c. Slowly lower the incline level in 0.5 increments until the full weight of the frame
is setting on the supports (the front wheels are not touching the floor). Verify the
supports are stable and secure carrying the full weight of the treadmill.
d. Continue lowering the incline to level to "0". Incline level "0" is the lift motor cal-
ibration reference incline level.
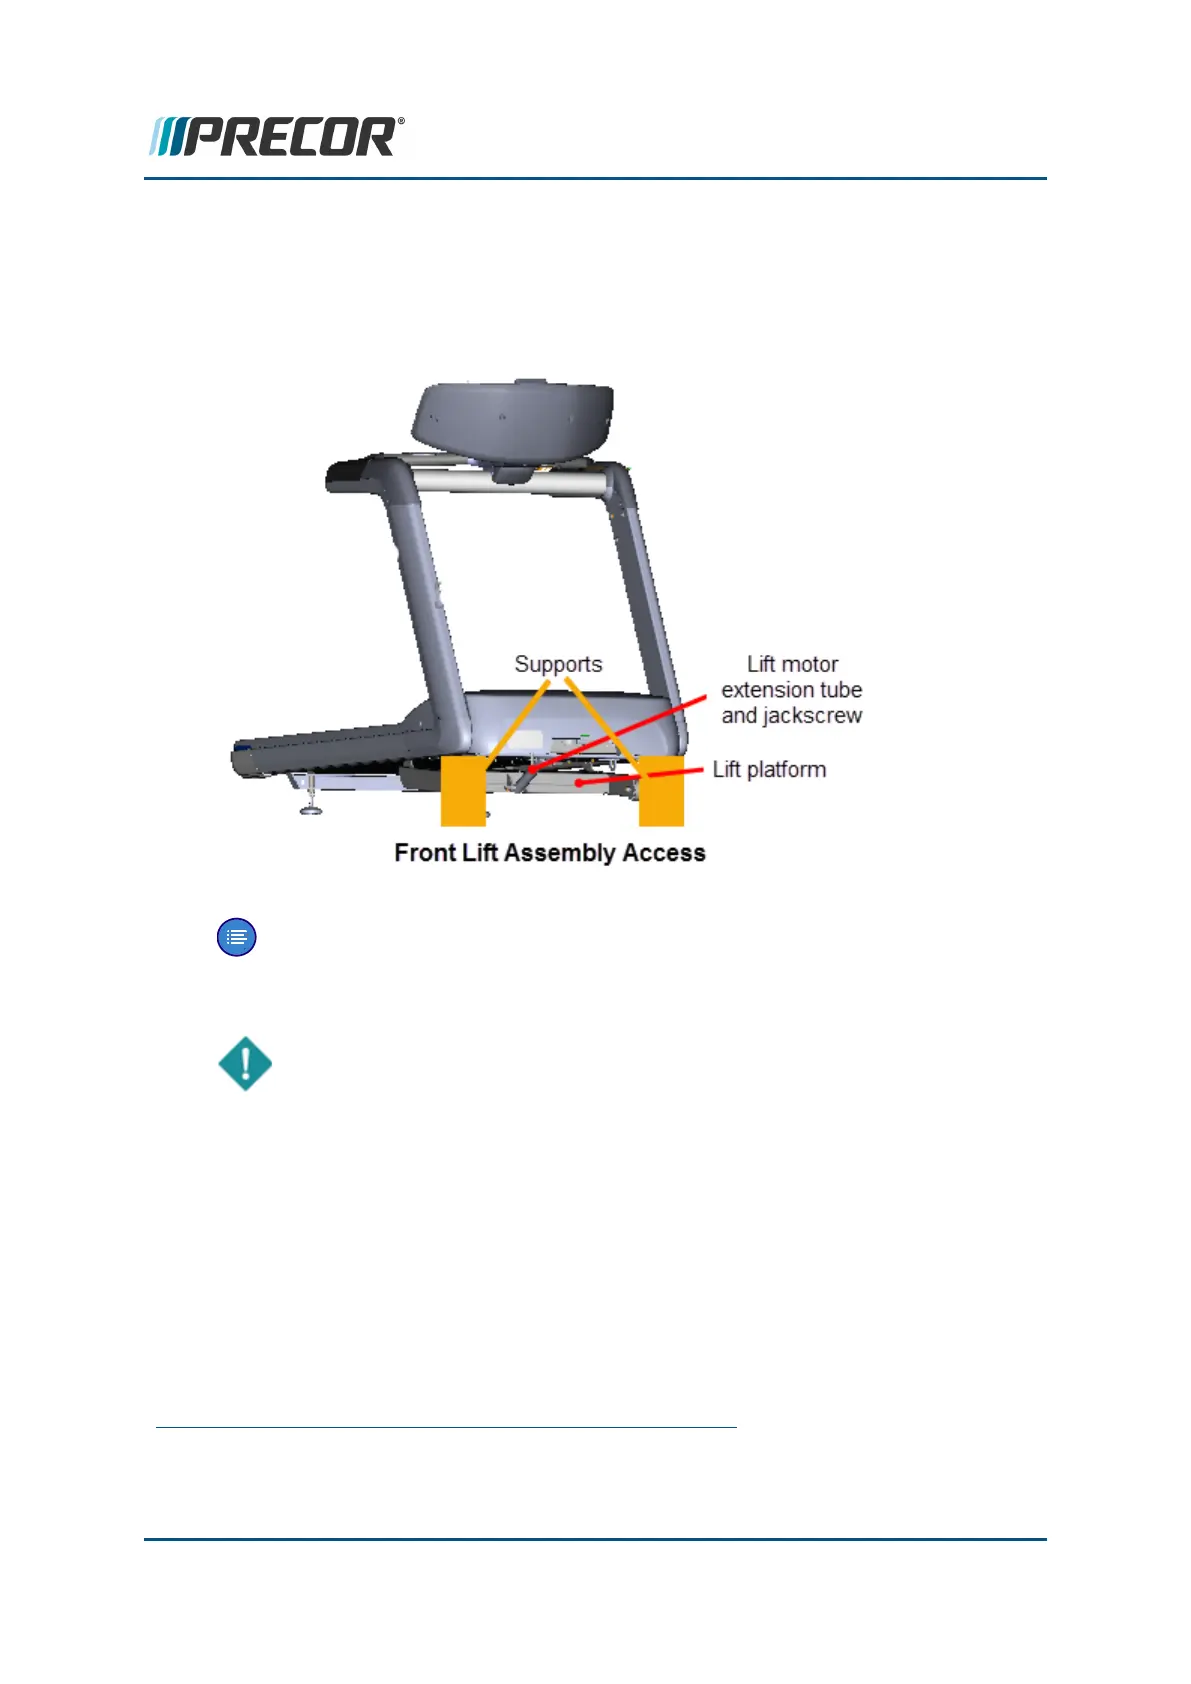
Note: You can also access the lift platform by laying the treadmill on its side,
see "Side access" on page 76 procedure.
5. Switch the power OFF and unplug
1
the power cord.
IMPORTANT: It's important to set the incline level to "0" (calibration ref level)
before switching the power OFF.
Remove the lift platform
6. Remove the lift motor extension tube from the lift platform:
a. Use painters tape to mark the current location of the extension tube nut on the
jackscrew prior to removal. This will be the "extension tube installation ref-
erence mark".
1
Disconnect a device power cord plug or cable connector from the power receptacle or out-
let.
Contact Precor Customer Support at support@precor.com or 800.786.8404 with
any questions.
Page 168
6 Replacement Procedures
Lift Platform Replacement