36 Assembling and Maintaining TRM 800-Series Treadmills
5. Position the hood so that its screw holes line up correctly
with the holes on the base of the treadmill.
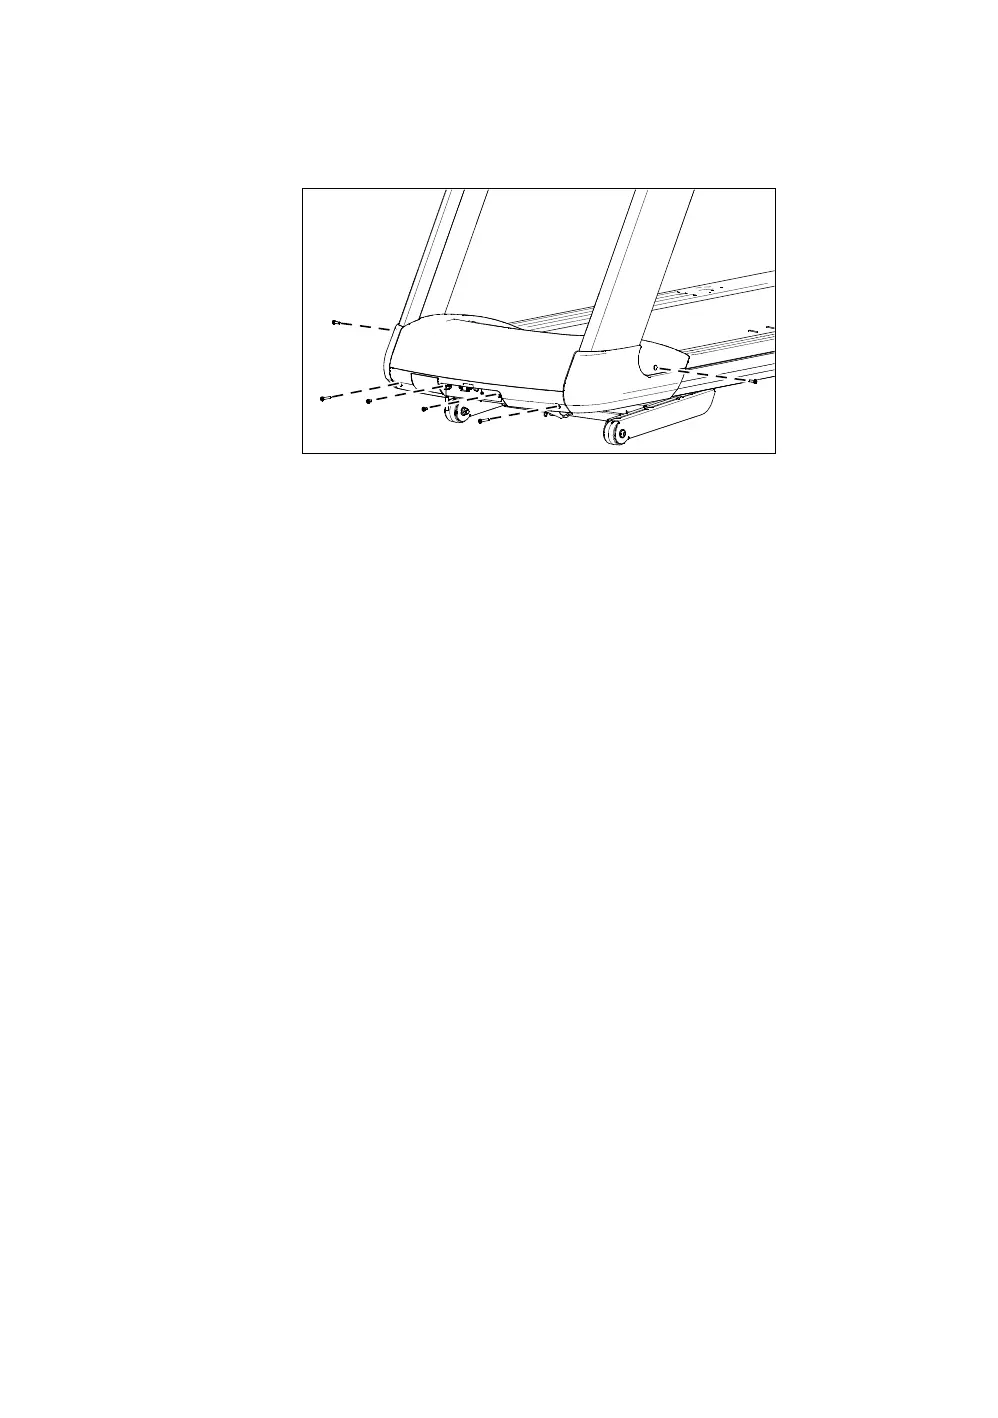
Figure 18: Hood installation and attachment
6. Insert one ¹₄-inch × ³₄-inch panhead self-tapping screw
into each of the two side holes. Partially tighten both
screws.
7. Insert one ¹₄-inch × 1¹₂-inch panhead self-tapping screw
into each of the two outer holes on the front of the hood.
Partially tighten both screws.
8. Insert one ¹₄-inch × ³₄-inch panhead self-tapping screw
into each of the two inner holes on the front of the hood.
Partially tighten both screws.
9. Tighten all six screws securely using a #3 Phillips
screwdriver, starting with the front screws.
Leveling the Unit
The treadmill deck must be absolutely level from side to side
to keep the belt in alignment and ensure proper operation. If
the load is not equally distributed across the treadmill deck,
users may feel excessive vibration or observe it at the
console. You must make sure the deck is level before allowing
anyone to use the treadmill.
Important: Observe the following precautions throughout this
procedure:
Adjust only one rear foot at a time.
Do not extend the adjustable feet more than ³₄ inch (2 cm).
Install the unit only on a stable, even surface. Adjusting the
rear feet cannot compensate for variations in the surface
under the unit.
 Loading...


