- 24 -
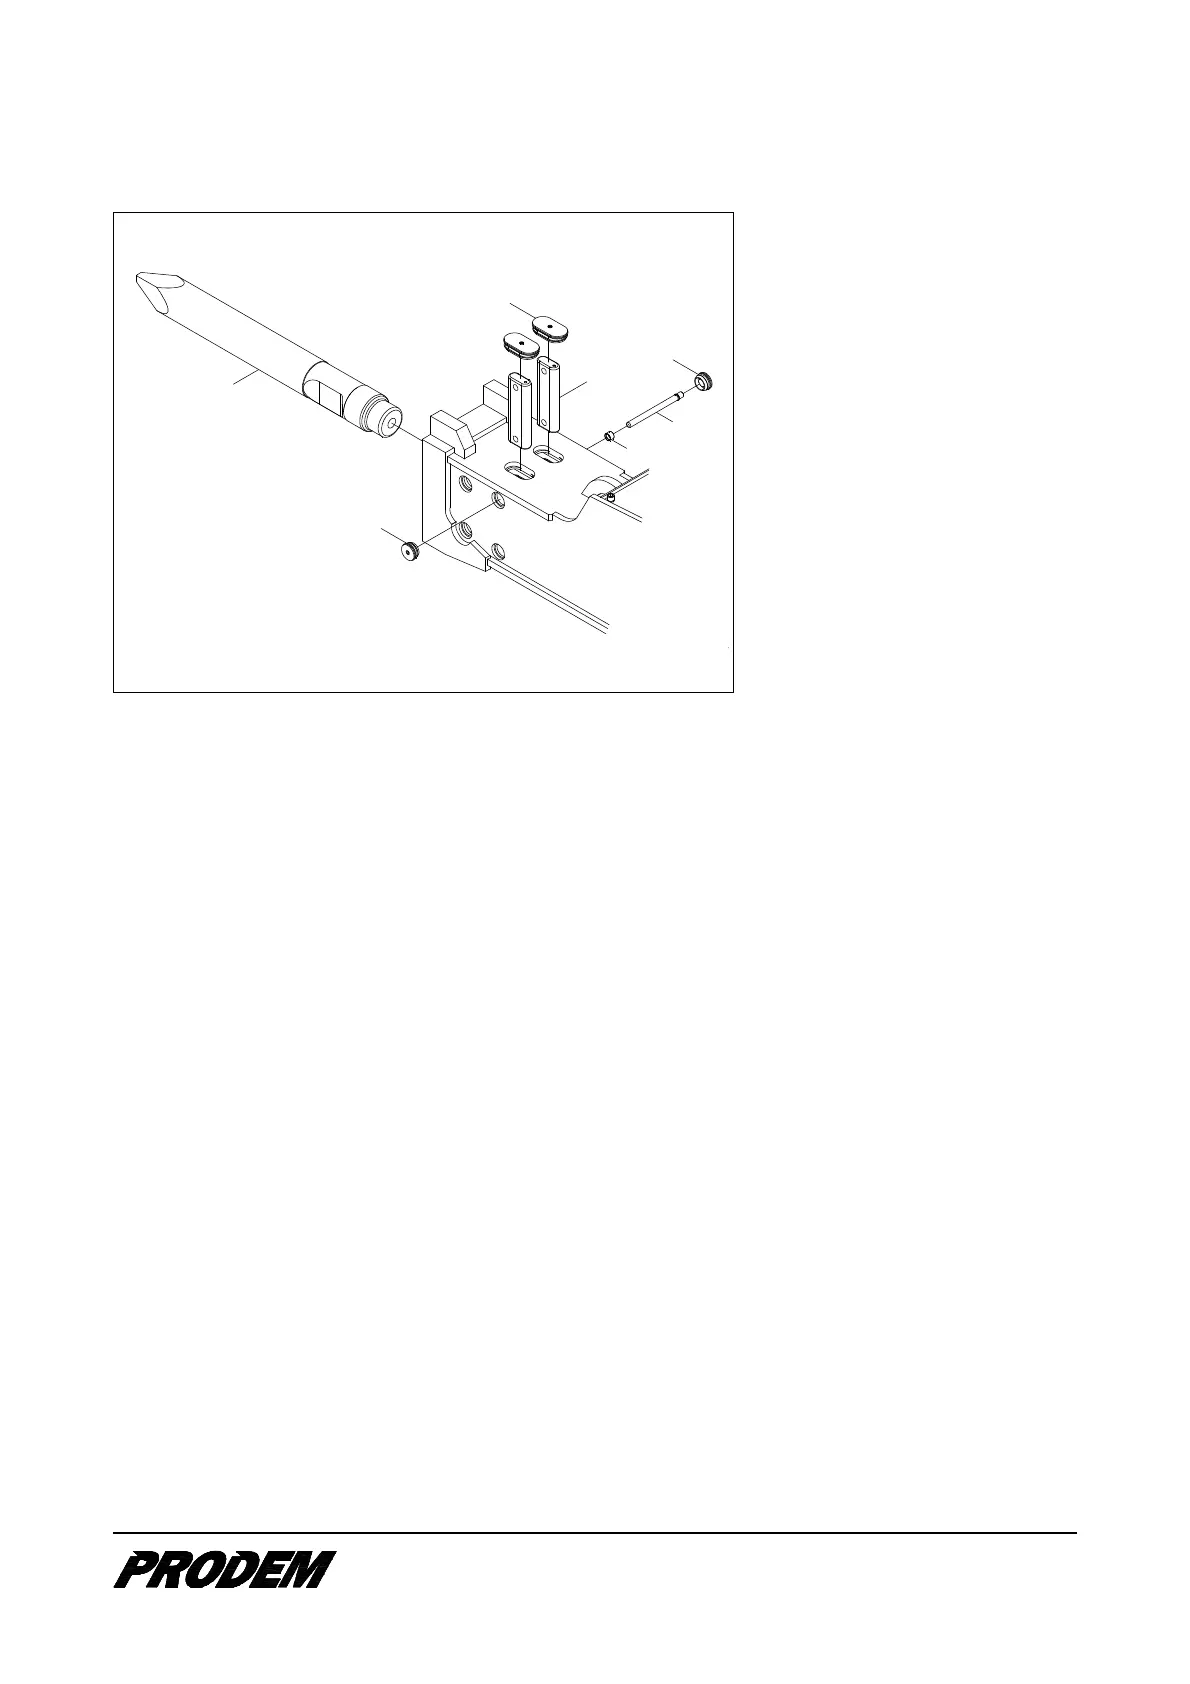
Silenced version bracket (BA version)
6
3
4
2
1
5
5
1. Stop pins
2. PU-sleeves
3. Plugs
4. Chisel pins
5. Plugs
6. Chisel
This figure shows only a case of the BA version. Detail configurations may vary on different bracket version
and hammer models.
For the entire bracket version, fit the chisel as follows:
1. Remove the plugs (3), (5) by using the screw bolt and remove the stop pins (1) by using a hand-hammer
and the special tool provided. Drive the stop pins out from the chamfered small diameter side to the large
diameter side.
2. If the PU-sleeve (2), which was inserted in the hole, is damaged, replace it with a genuine replacement.
3. Remove the chisel pins (4).
4. Check the inside of the front-head for wear or foreign bodies. In case of replacing the chisel after use, do
check and maintenance work according to Section “
7.6. Chisel, wear bushings and chisel
pins
”.
5. While lifting up the chisel, clean away any dirt adhering to the chisel shank in the inserted portion, then
sufficiently lubricate the chisel shank and the bushes in the hammer. For details of chisel lubricating and
applicable grease refer to Section “
7.4. Grease
”.
6. Insert the chisel (6) to the chisel bore of the front-head.
7. Align the recesses of the chisel shank to the chisel pin holes on the front-head by turning the chisel.
8. Then insert the chisel pins (4).
9. Drive the stop pin (1) into the front-head, small diameter side first, making sure that the stop pin is
inserted completely and insert the plugs (3), (5).
10. Moving the carrier and stand the hammer vertically on the chisel. Check that the chisel can move up and
down smoothly by applying contact pressure and releasing it.