- 21 -
IMPORTANT!
After mounting the hammer, extend and retract the carrier’s cylinder to its full extent in each
direction to ensure that carrier’s cylinder can move without any difficulty or damage.
If problems are encountered, consult your local PRODEM dealer.
5.4. Connecting the hydraulic lines of the hammer
Before connecting the hydraulic lines to the carrier, check following points
:
To avoid hammer damage, the hydraulic oil of the carrier must be kept clean. Check the contamination of
the oil, then, if necessary, change the oil or flush the oil through a external filtration system, and replace
the carrier oil filter according to the maintenance schedule of the carrier.
In case of using a newly installed hammer piping, remove the contamination in the hydraulic line through
bypass flushing (without connecting the hammer).
Check the pressure setting of the relief valve on the hammer hydraulic line, this pressure-relief setting
should be at least 30 ~ 40 bar higher than the measured maximum operating pressure of the hydraulic
hammer.
The sealing faces and connecting threads of the hoses or fittings must be undamaged and free of sand or
similar foreign particles.
If the hydraulic lines are in good preparation for operating the hammer, connect the hammer as follows:
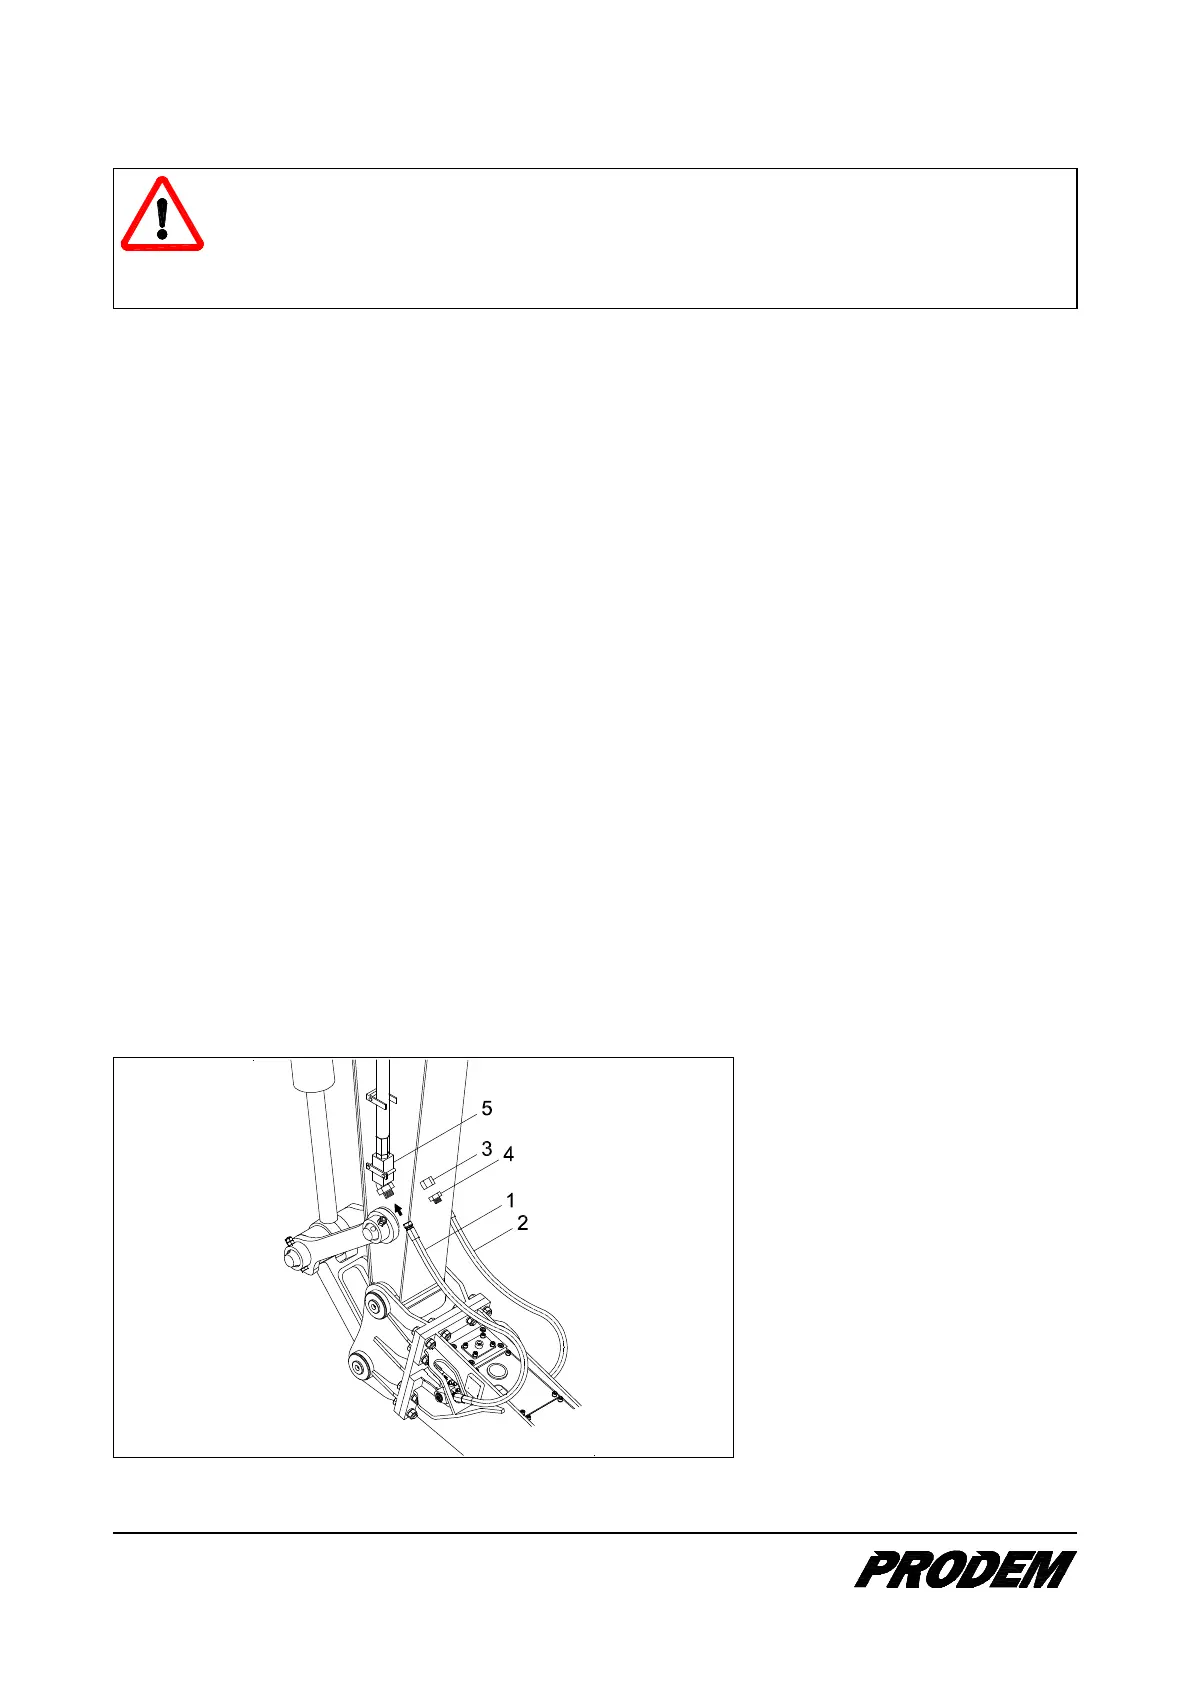
1. If the connection hoses are not installed on the hammer, remove the cover plate on the service window
and connect the “IN” & “OUT” hoses (1, 2) to the hammer.
2. Confirm both of the stop valves (5) are closed.
3. Remove the end caps (3) from the stop valves (5) and remove the hose plugs (4) from the hoses. Put
them in the toolbox for safekeeping.
4. Connect the “IN” & “OUT” hoses (1,2) to the stop valves on both sides of the carrier arm.
5. Open the stop valves (5).
1. High pressure hose (In)
2. Low pressure hose (Out)
3. End caps
4. Hose plugs
5. Stop valves