- 39 -
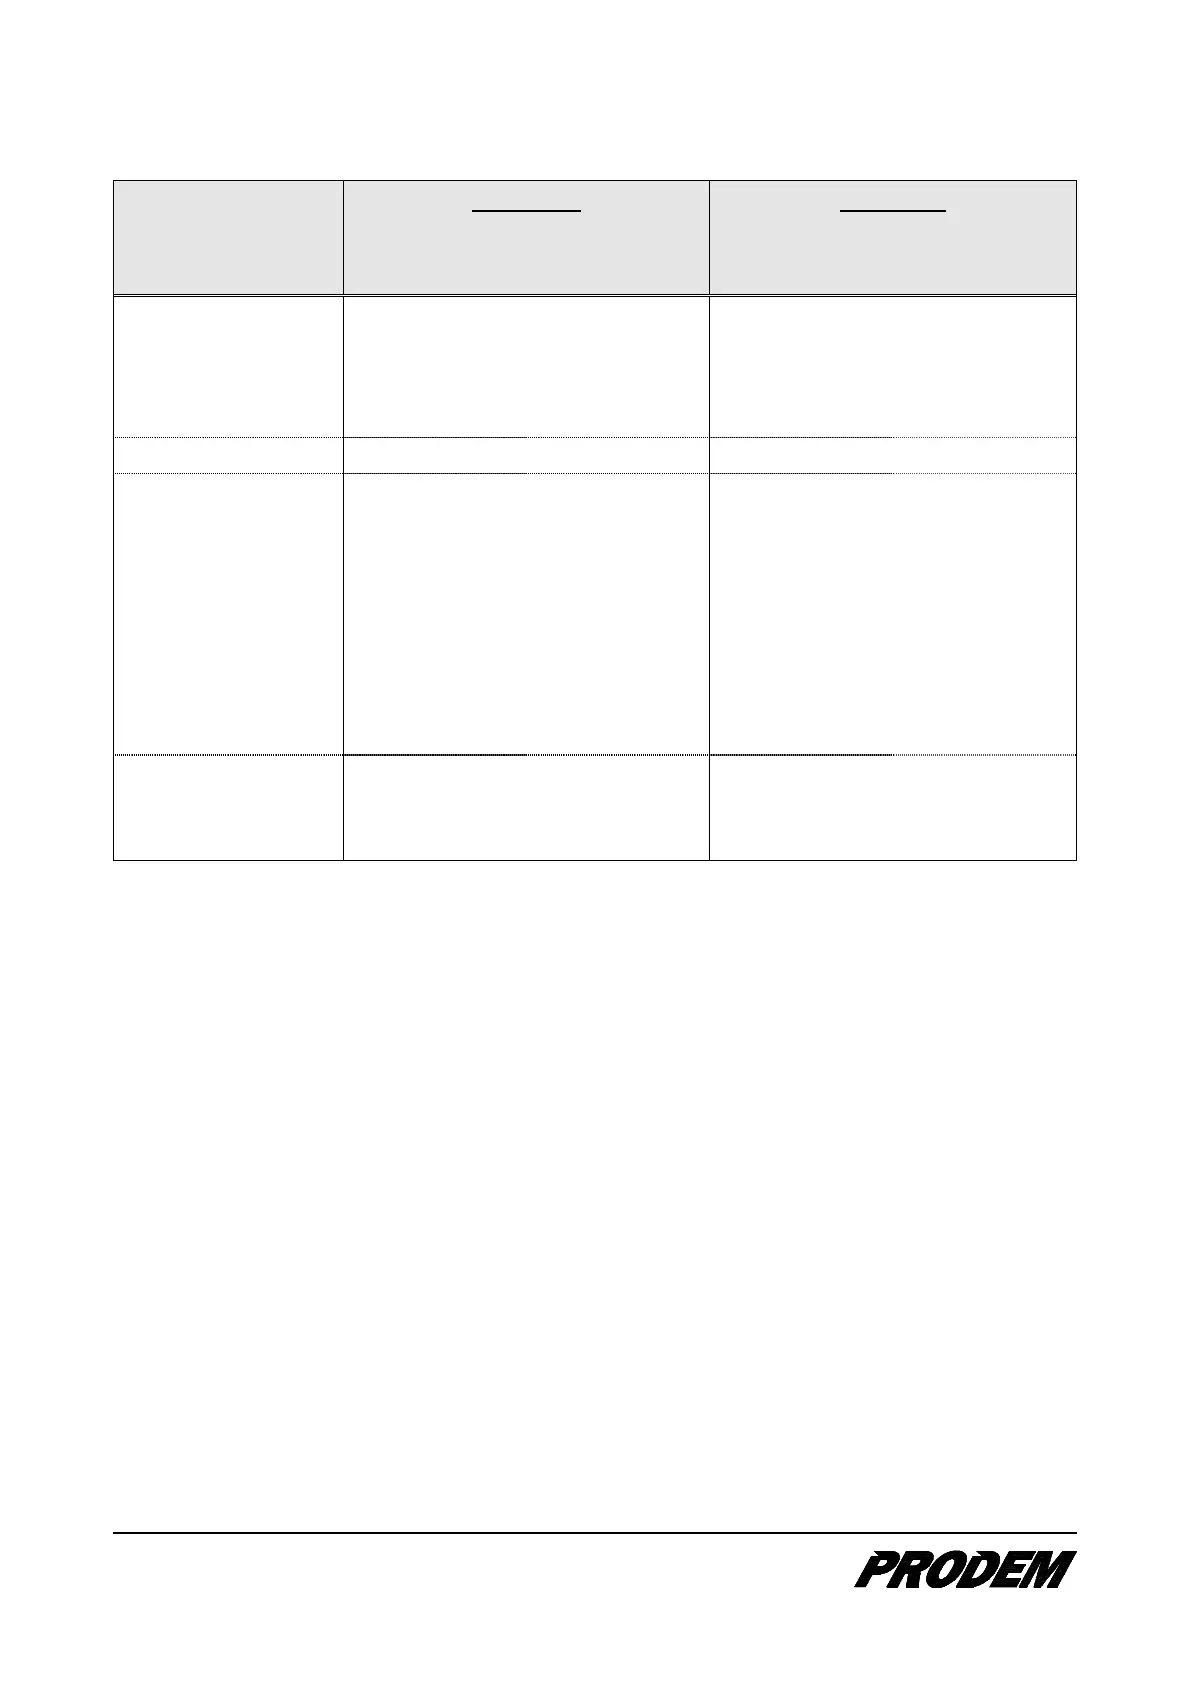
Back-head gas charging pressure:
Hammer model
CHARGING
at ambient temperature;
20°C (68°F)
CHECKING
at operating temperature;
60~70°C (140~158°F)
bar
(psi)
bar
(psi)
PRB008
PRB010
PRB020
PRB030
8 ~ 10
(116 ~ 145)
9.1 ~ 11.4
(132 ~ 165)
PRB040(H) 10 ~ 12
(145 ~ 174)
11.4 ~ 13.7
(132 ~ 187)
PRB050
PRB060
PRB100
PRB150
PRB170
PRB200
PRB250
PRB300
15 ~ 17
(218 ~ 247)
17.0 ~ 19.3
(247 ~ 280)
PRB400
PRB500
PRB700
16 ~ 18
(232 ~ 261)
18.2 ~ 20.5
(264 ~ 297)
Notes:
In general, as a basic rule, if the gas temperature increases 30°C (86°F) higher, then the gas
pressure increases of about 10% on the initial pressure.
7.5.2. Checking and charging the gas in the accumulator
1. Ensure the exhaust valve II (21) and the gas valve (10) are closed, and connect the cap nut (5) to the
nitrogen bottle.
2. Be sure the handle (9) is fully opened (loosened).
3. Remove the accumulator charging plug (14) and the O-ring (15) from the accumulator (19). Put them in
the toolbox for safekeeping.
4. Connect the Mini-mess coupling III (22) to the gas charging port (17).
5. Connect each end of the hose (7) to the Mini-mess couplings II (20) and III (22), respectively.
6. Open the accumulator charging valve (16), by turning it counter-clockwise a half turn.
7. Open the gas valve (10) to charge the accumulator, until the gauge pointer on the accumulator gauge
(11) indicates the specified gas pressure.If the accumulator is charged over the specified gas pressure,
open the exhaust valve II (21) slowly to reduce the gas pressure.
8. After the gas charging is completed, close the accumulator charging valve (16).
9. Close the gas valve (10), and carefully vent the hose (7) by opening the exhaust valve II (21).
10. Remove the Mini-mess coupling III (22) from the accumulator, and close the accumulator charging port
(17) with the plug (14) and O-ring (15).