Remove 12 screws.
Li o top of crate.
OB7 Robot Stand In Crate
Install column with 8 M8 screws.
Cut the tie downs.
M6
Threaded
Hole
Rear-view of stand. Note that the
2 threaded holes in the column go
towards the back of stand.
UNPACKING THE OB7 STAND
OB7 arrives in a single carton. If you’ve purchased a stand with your OB7 it will arrive in a small
wooden crate.
Before unpacking your OB7, you should prepare its mounting location.
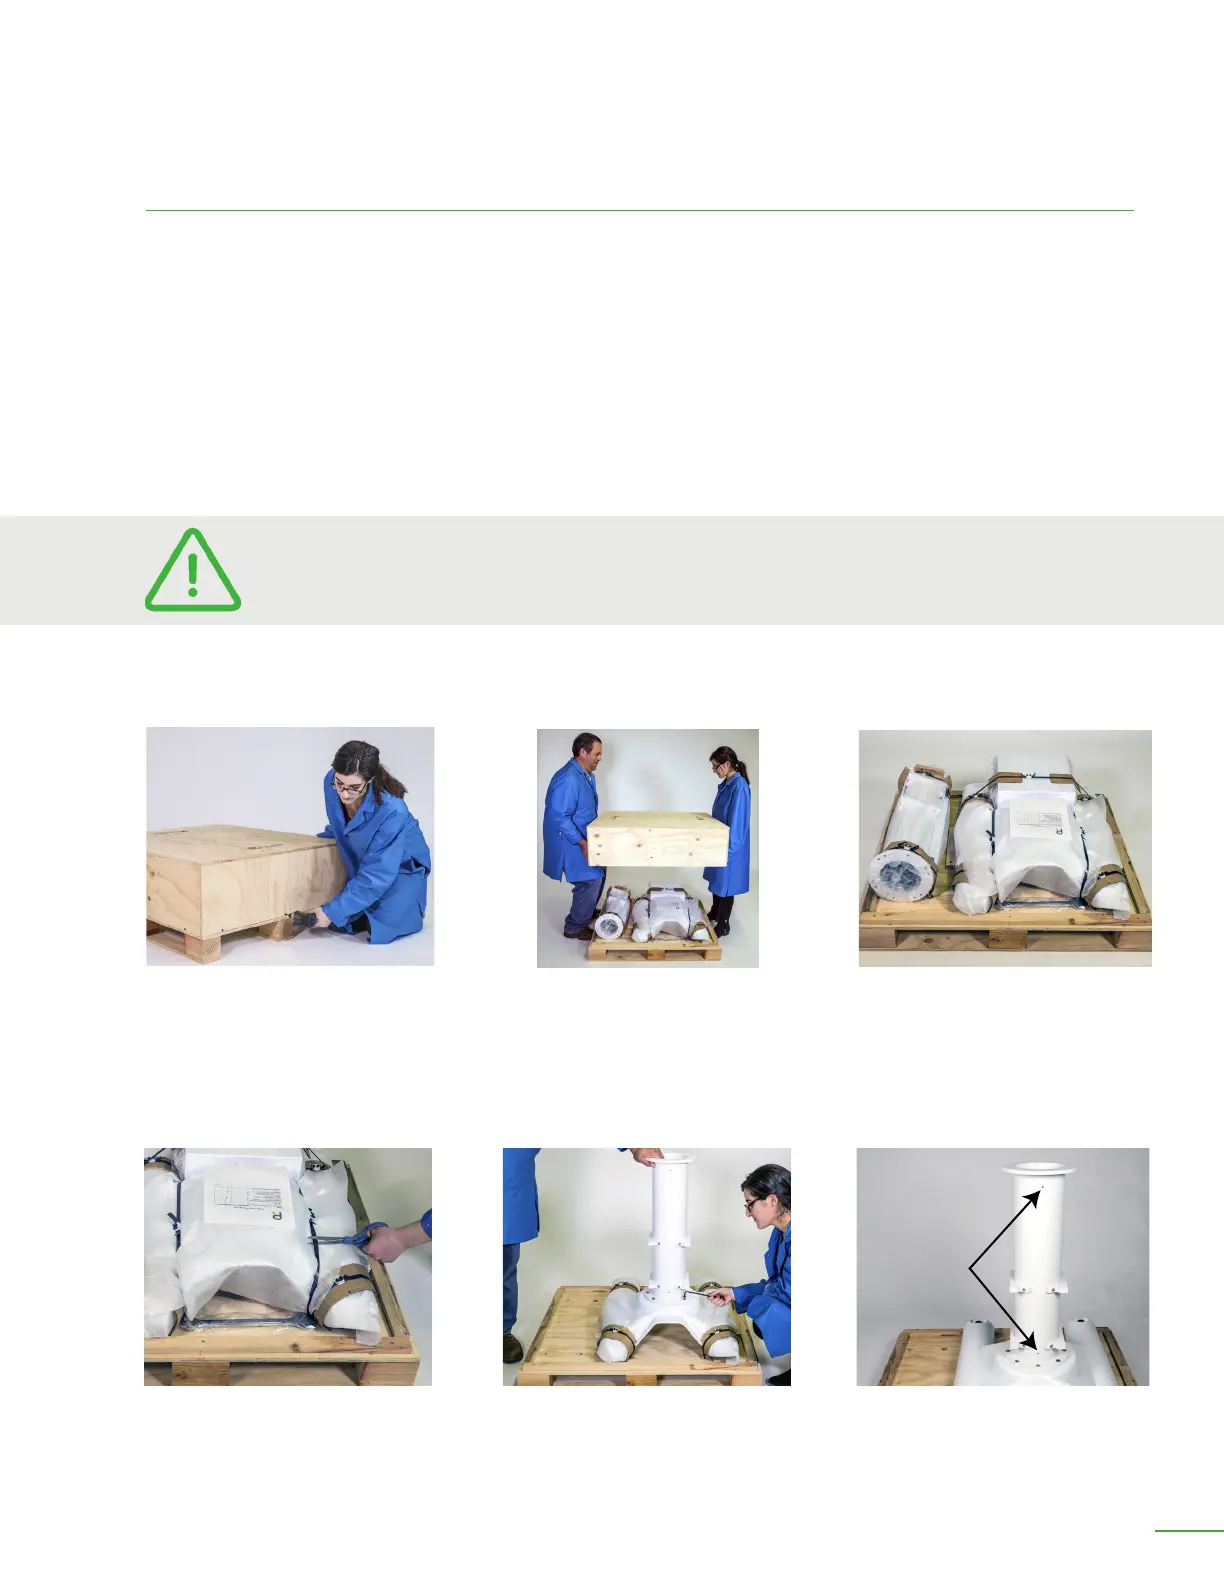
ASSEMBLING THE OB7 STAND
Step 1: Remove the 12 screws securing the top of the crate. Li o the top of the crate.
Step 2: Install the column. Cut the ties holding the column to the crate. Mount the column as shown
using the 8 M8 screws and the Allen wrench provided. Tighten the screws securely.
OB7 Collaborative Robot User Manual Version 0.6
Getting Started With OB7 / 15
GETTING STARTED WITH OB7
The components of your OB7 robot stand are heavy. This is intentional to keep the
robot stable as it moves and carries objects. Always use two people to move or li
heavy or awkward components.
 Loading...