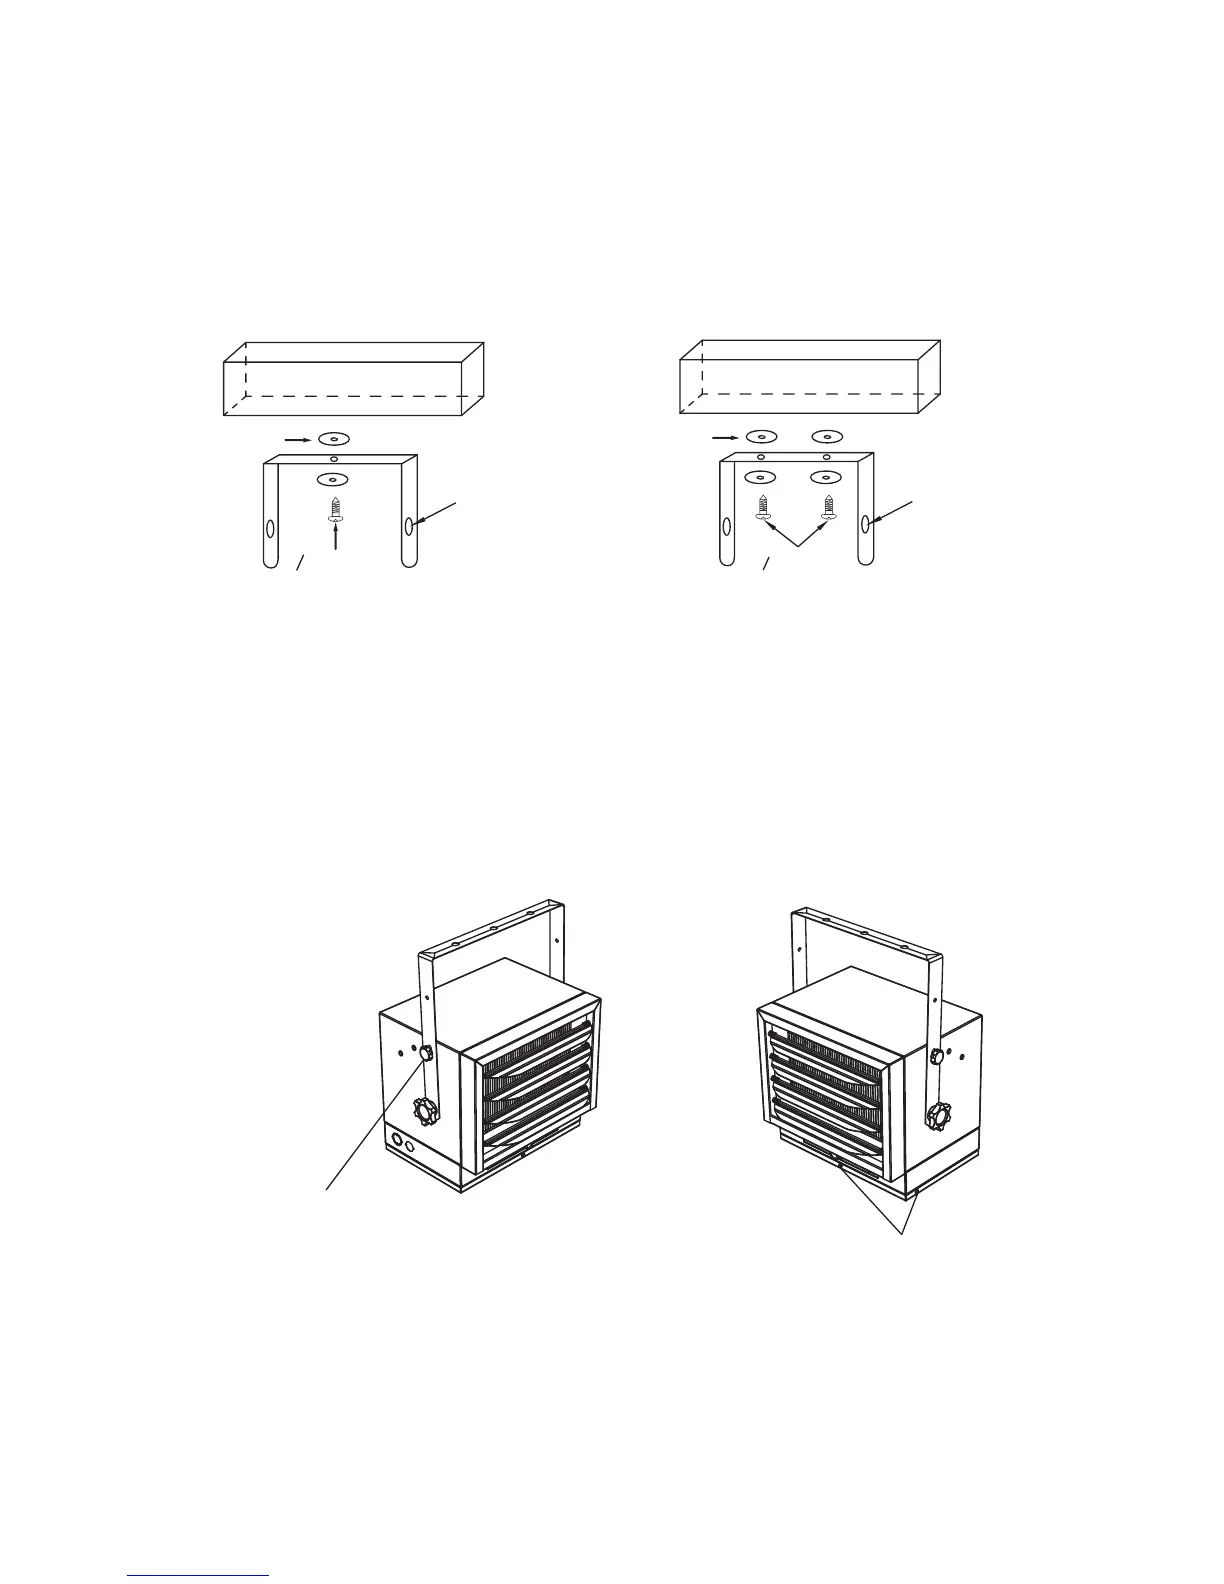
3. Place a washer on screws before inserting through the holes in the mounting bracket
and screw them securely into a ceiling joist.
NOTE: If you want to swivel the heater either to the right or left adding a washer to both
sides of the bracket is recommended. A longer lag bolt may be required to properly secure
the unit. See Figure 4a.
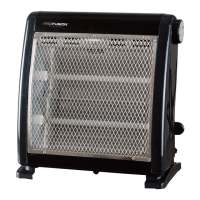
HANGING THE HEATER
1) Attach the heating unit to the mounting bracket.
2) Lift the heater up and into the mounting bracket.
3) Align the bracket screws with the keyhole slots in the mounting bracket.
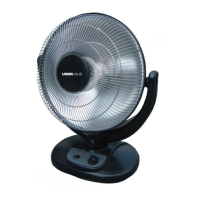
4) If the heater is to be tilted it must be positioned in the keyhole slots - see figure 5.
5) Tighten the bracket screws with a wrench so the unit is securely suspended at
horizontal or vertical level.
Figure 5
ADJUSTING AIR FLOW DIRECTION
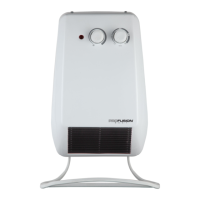
1. To turn the unit when it has been installed with a single lag bolt (as shown in figure 4a),
simply turn the entire heater as needed. The unit cannot be turned horizontally if it has
been installed with 2 lag bolts.
6
USE BOTTOM KEYHOLE
SLOTS IF HEATER IS TO
BE TILTED DOWN
REMOVE SCREW TO DOOR
WASHER
BRACKET
LAG BOLT
DIAGONAL
3
8
’’
Figure 4b-Double-Screw Mounting
WASHER
BRACKET
LAG BOLT
DIAGONAL
3
8
’’
Figure 4a-single-Screw Mounting