1.
2.
3.
4.
5.
6.
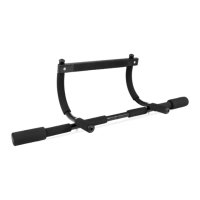
Slide Bar 3 into Bar 2. Repeat to attach the second Bar 3 to Bar 2. The ends of
the assembled Bar 2/3 should curve away from the center of the Prosource Fit
Multi-Grip Pull-Up Bar assembly.
Use Screw E to attach the assembled Bar 2/3 to each end of Bar 1. Place
Spring Washer D and Locking Nut C on each Screw E and tighten.
Use Screw F to attach the rst Bar 4 to the rst Bar 3. Place Spring Washer D
and Nut C on each Screw F and tighten. Repeat to attach the second Bar 4 to
the second Bar 3 at the other end.
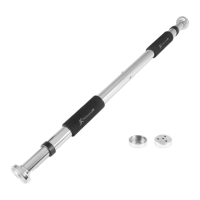
Bar 5 consists of 2 seperate parts # Bar 5.1 and # Bar 5.2. Connect both Part
5's by rotating clockwise to form one complete bar, Bar 5. The screw holes of
Bar 5.1 and Bar 5.2 MUST BE located at the same level.
Use Screw F to attach Bar 5 to the ProsourceFit Multi-Grip Pull-Up Bar assembly.
Place Spring Washer D and Nut C on each Screw F and tighten.
If needed, slip on additional Foam Doorframe Protectors J to Bar 5 to protect
frame/walls.
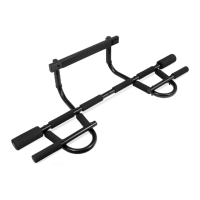
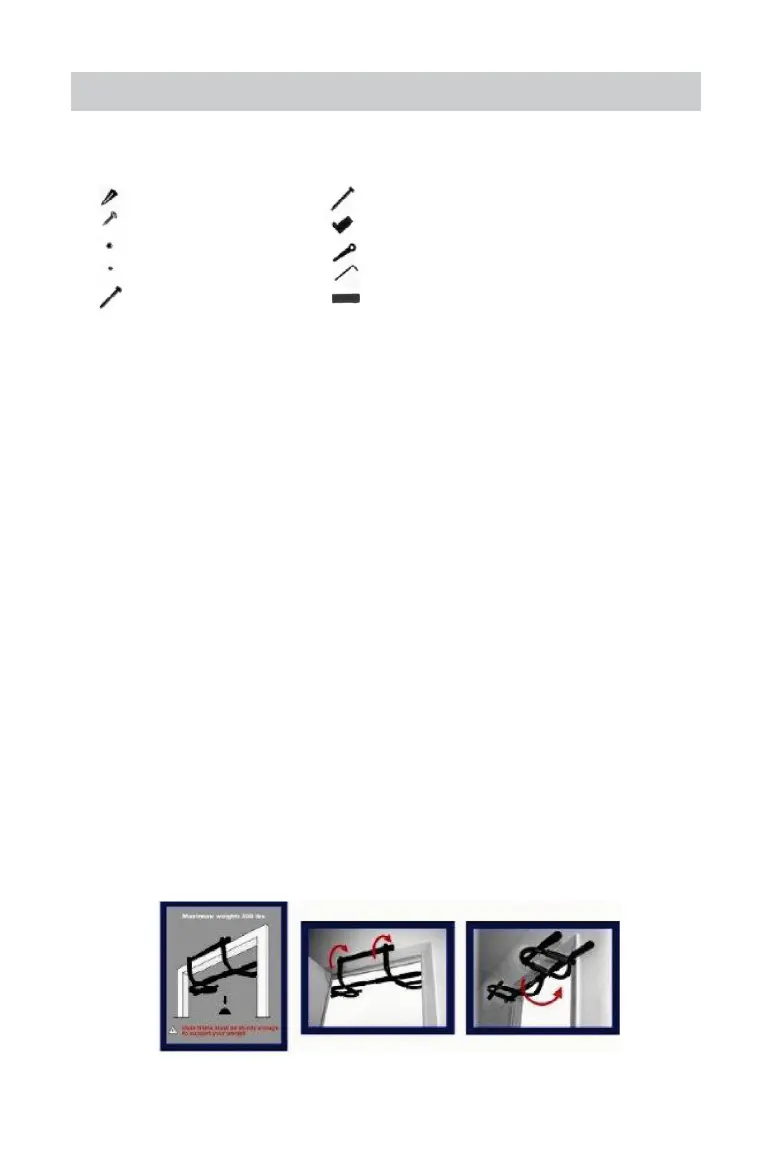
Hook the ProsourceFit Multi-Grip Pull-Up Bar assembly onto doorframe on back of
doorway, as shown. The doorframe and leverage keep the ProsourceFit Multi-Grip
Pull-Up Bar in position.
ASSEMBLY INSTRUCTIONS
A Wall Anchor (8)
B Wall Screw (8)
C Locking Nut (10)
D Spring Washer (10)
E Screw (2)
F Screw (8)
G Door " J " (2)
H Hex Open Wrench (1)
I Allen Key (1)
J Foam Doorframe Protectors (optional)
Assembly Inventory