Do you have a question about the Protimeter Surveymaster and is the answer not in the manual?
Caution note for WME pins: sharp and require careful handling with the cap when not in use.
Accuracy specifications are valid for one year after calibration; recalibration is required thereafter.
Operate for intended purpose within parameters; readings aid professional judgment, not definitive.
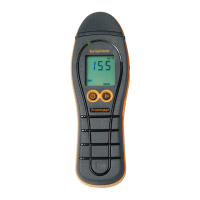
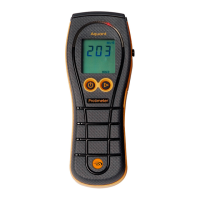
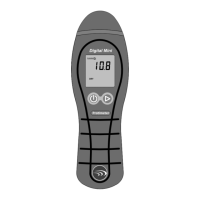
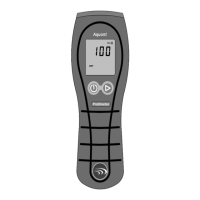
Remove needle cap and press the ON/OFF button to switch the unit on.
Check display for %WME (Measure) or REL (Search) and switch modes with the button.
Push pins firmly onto surface, read value, and note color-coded LED scale.
Distinguishes % moisture content for wood vs. %WME for other materials.
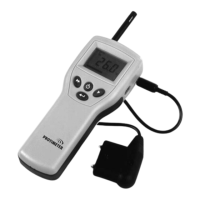
Connect probes to socket and push pins onto surface for measurements.
Use Deep Wall Probes for depth readings in walls/floors via drilled clearance holes.
Employ Hammer Electrode for measurements deep into hard and softwoods.
%mc for wood, %WME for other materials; %WME relates to wood moisture equilibrium.
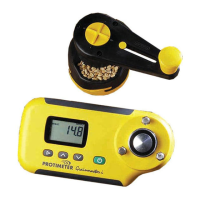
Use Calcheck device; a correctly calibrated unit reads 18.2 ±1.0.
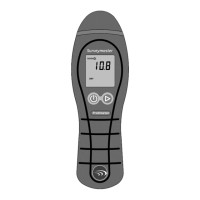
Moisture detector for up to 19mm depth; ideal for rapid surveys.
Surface moisture has minimal effect; conductors can cause high readings.
Ensure full contact with flat surface; avoid sliding to prevent wear.
Measure until stable, then press button for 2s to store reading for comparison.
Press the ON/OFF button; LCD displays segments and sweeps LED bar graph.
Use the mode button to toggle between WME (Pin) and REL (Search) modes.
Numeric value and color LED indicate DRY, AT RISK, or WET conditions in WME mode.
Numeric value and color LED indicate DRY, AT RISK, or WET conditions in REL mode.
Take reference measurement, press and hold mode button for 2 seconds.
Press the mode button again to return to normal measurement mode.
Press and hold mode button, then press ON/OFF button until version number is shown.
Use mode button to turn ON/OFF the display of DRY, AT RISK, WET status.
Use mode button to turn ON/OFF the audible buzzer for tones and indications.
Use mode button to turn ON/OFF the display backlight.
Set auto-off duration (1-6 mins) or disable with '0'; use mode button to set.
A symbol on screen indicates low battery requiring prompt replacement.
Press ON/OFF button during measurement to display "HOLD" and freeze the reading.
Remove screw and slide lid downwards to open the battery compartment.
Carefully remove old battery and insert new one, ensuring correct polarity.
Specifies operating temperature (0-50°C) and non-condensing humidity (0-90% RH).
Covers pin probe range (7.9-99% MC/WME) and non-invasive depth (up to 3/4").
Includes power, size, weight, needle depth, buzzer, and compliance (CE, RoHS, ETL).
| Display | Digital LCD |
|---|---|
| Power Supply | 9V Battery |
| Operating Temperature Range | 0°C to 50°C (32°F to 122°F) |
| Measurement Principle | Electrical Resistance, Radio Frequency |
| Non-Invasive Measurement Depth | Up to 19mm (3/4 inch) |
| Dimensions | 190 mm x 70 mm x 49 mm (7.5 in x 2.8 in x 1.9 in) |
| Accuracy (Moisture) | ±1% WME (Wood Moisture Equivalent) |