PRO-VISION® Video Systems
37 provisionusa.com
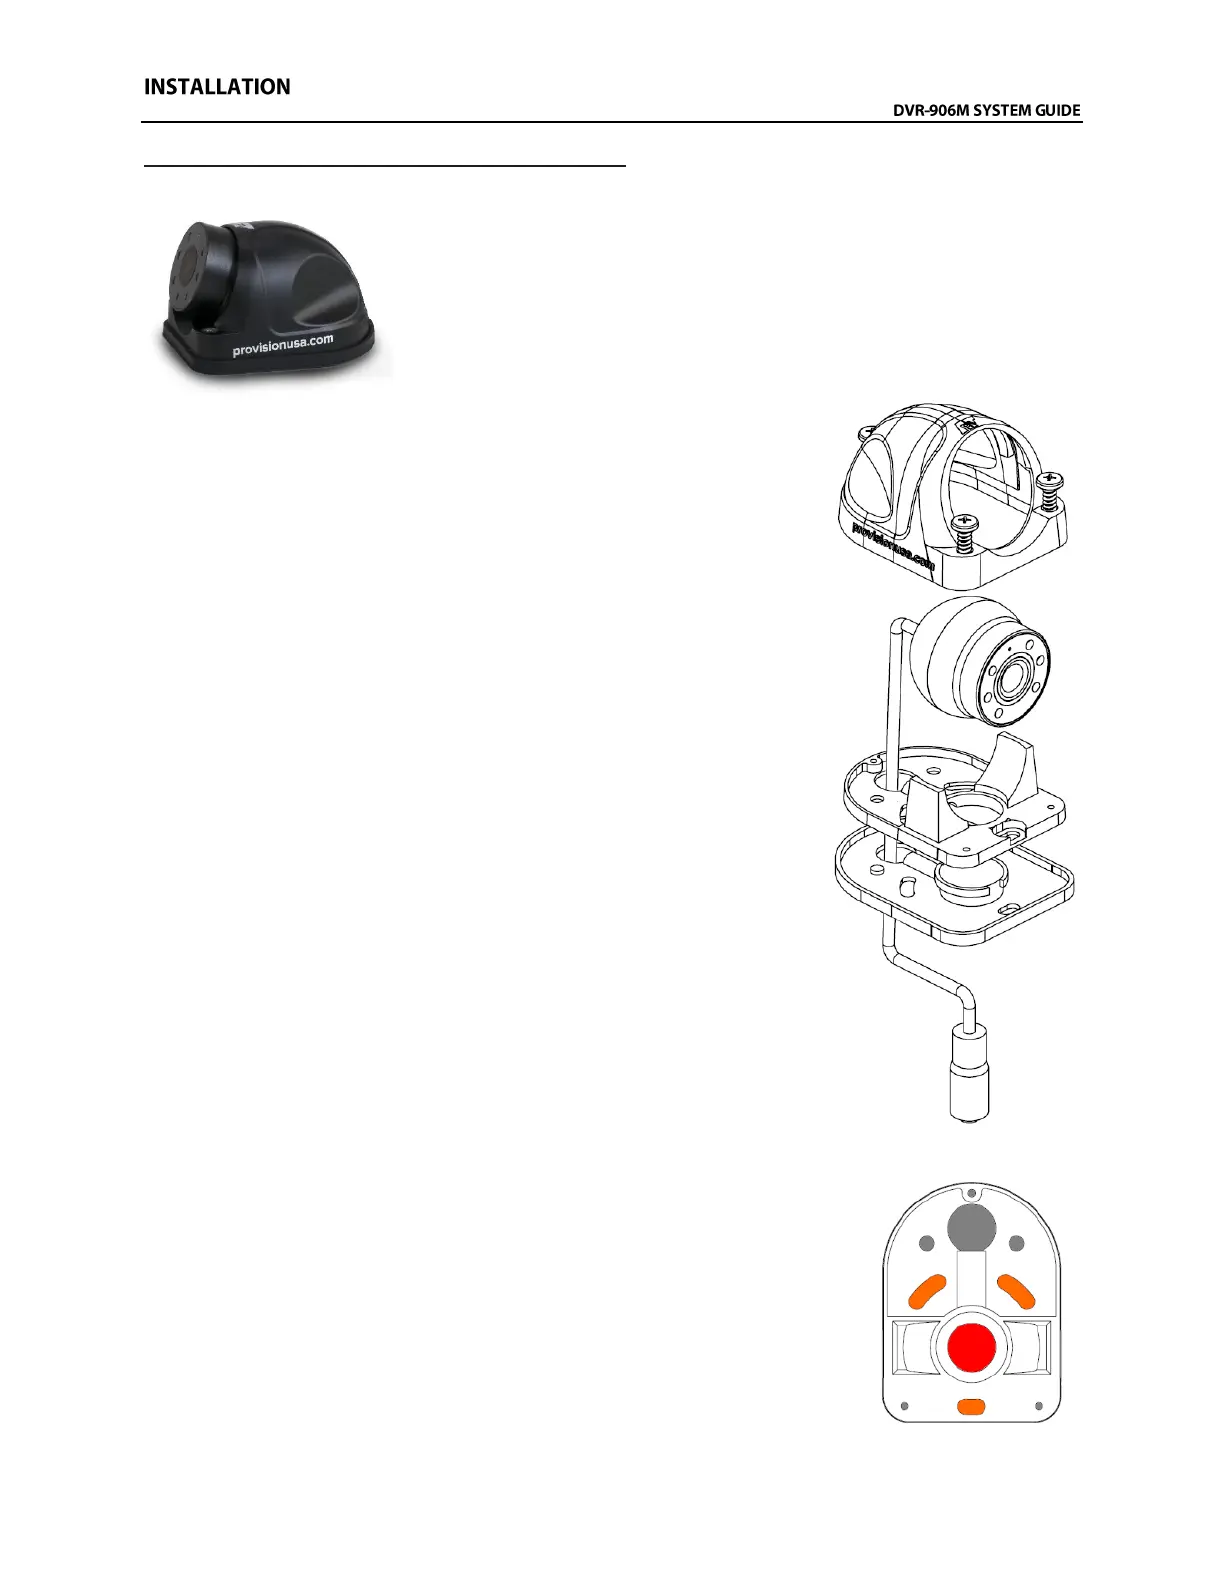
Digital HD Wide-Angle Exterior Camera Installation
The Wide-Angle Exterior Camera (Kit P/N: DVR-820, Camera P/N: PC-
1820) is designed to provide coverage around the outside of the vehicle.
The camera is waterproof rated IP-67 and has a wide-angle lens that can
capture a wide area around the outside of the vehicle. The camera is
designed to be mounted directly to a vehicle exterior body panel. The
camera has six (6) infrared (IR) LED’s that provide illumination during low
light/dark conditions. The camera also has a waterproof microphone built
into the camera housing.
Mounting Locations:
The camera provides a 175° field-of-view allow nearly complete coverage
of whatever side of the vehicle it has been mounted and aimed to cover.
For coverage of the side of a vehicle, the camera is typically mounted
directly to the roof or side of vehicle body near the roof facing outward
perpendicular to the direction of vehicle travel at a slight downward angle.
The camera should be mounted as close to the outside edge of the
roofline as possible to prevent blind spots directly next to the vehicle.
Always check the mounting structure under the camera to ensure that
proper access to route the cable is possible.
Installation:
11. Remove the three (3) Allen head cover mounting screws from the
camera and then remove the camera ball and cable.
12. With just the camera base and gasket, hold in desired mounting
location and mark the three (3) camera base mounting screw
locations (shown in ORANGE color below right).
13. It is recommended to power on the DVR unit, temporarily connect
the camera to it, set the camera in the mounting base (with gasket
attached), and observe that the view in the desired mounting
location is satisfactory before permanently attaching the camera
and routing the cable(s).
14. Remove the mounting gasket from the base and hold the base
aligned over the previous screw marks. Now mark the center of
the large hole underneath the dome base portion previously
covered by the gasket (shown in RED color in the diagram to the
right). This hole will be drilled to 5/8” to route the cable out of the
camera. DO NOT DRILL any holes until you are certain of and have
verified the cameras mounting location.
IMPORTANT: Do not drill out any of the holes shown in GRAY color in the
image to the left. They are not used for mounting or routing the
cable through the vehicle body.