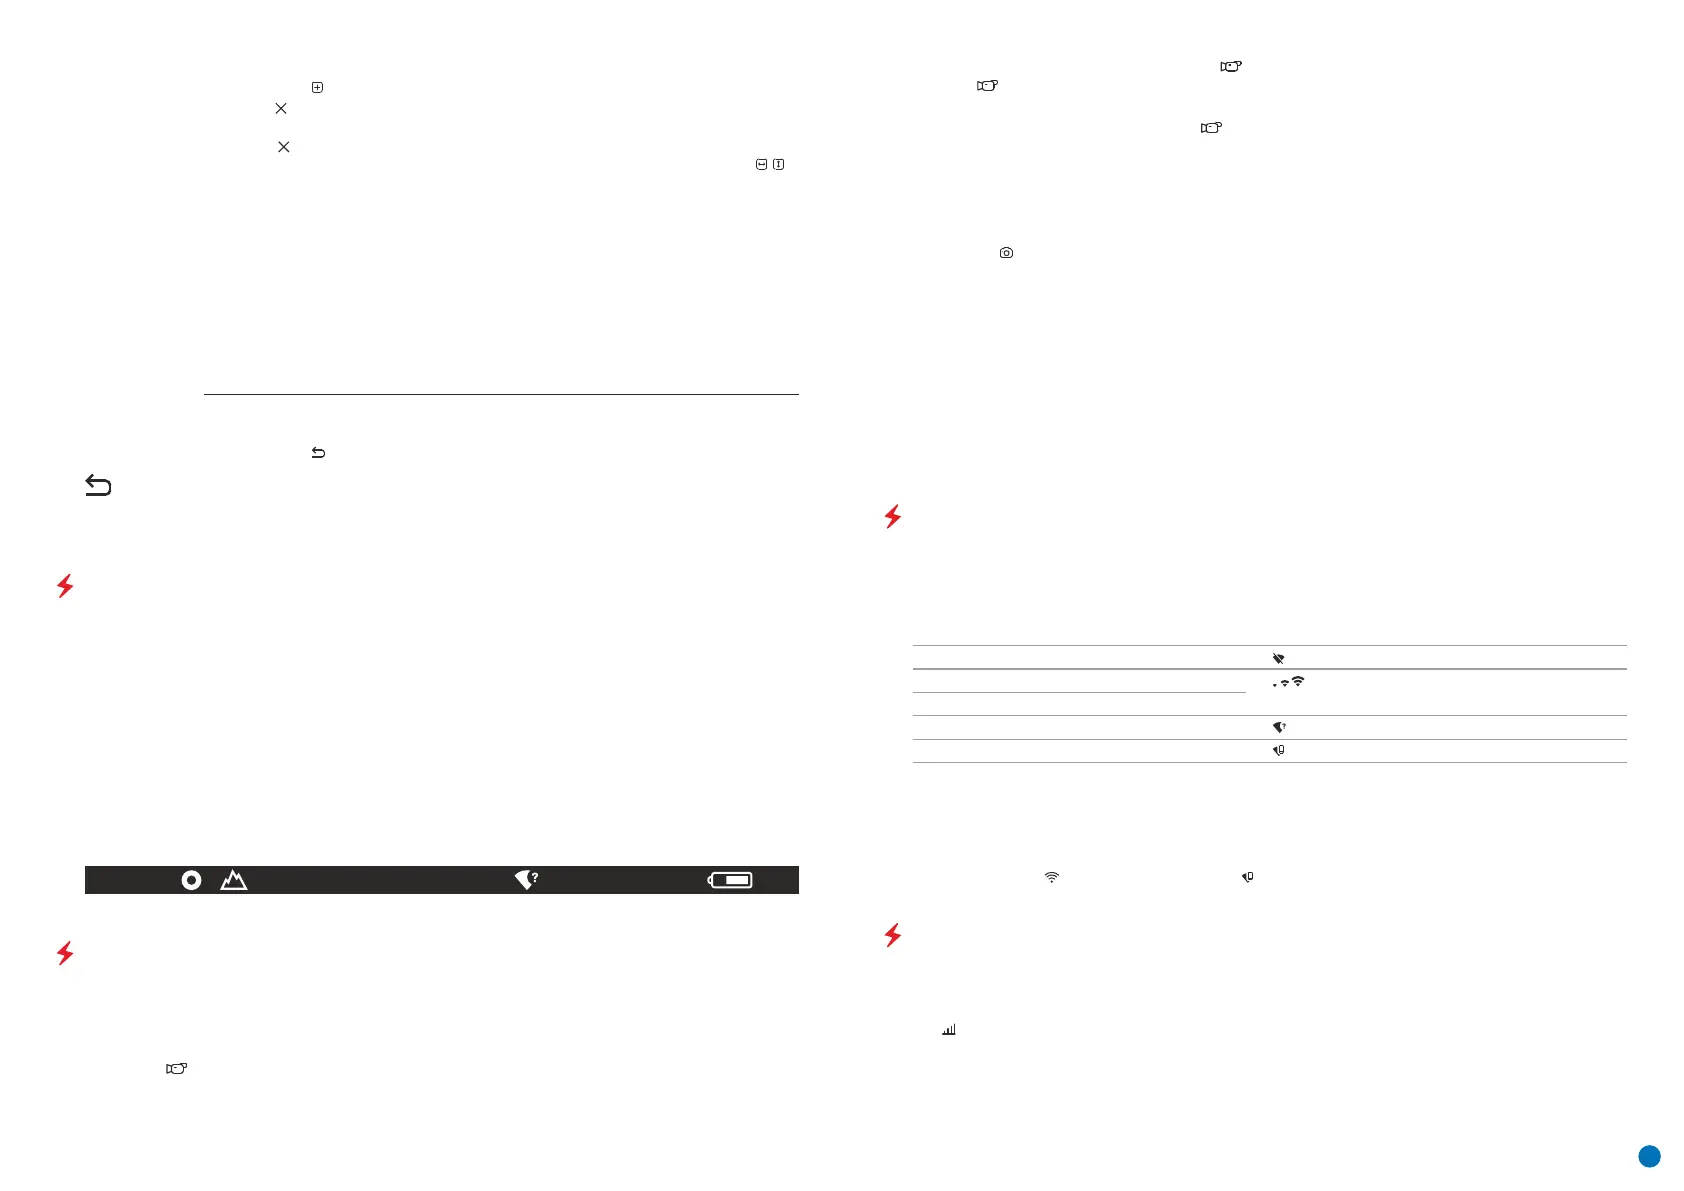
The status bar is located at the bottom of the display and displays information relating to the operational status
of the device, including:
џ Current full magnification
џ Calibration mode (when in automatic calibration mode with 3 seconds remaining until automatic calibration, a
countdown timer will appear in place of the calibration icon).
џ Wi-Fi connection
џ Observation mode
џ Colour palette (displayed only when the Hot Black palette is installed)
џ USB connection (if the device is connected)
џ Current time
џ External power supply indicator (when the device is powered from an external supply)
Note: when calibration is in progress, the display image freezes for the duration of the calibration
џ Battery discharge level (when the device is powered by the rechargeable battery)
SA
11.0x 08:13PM
STATUS BAR
VIDEO RECORDING AND PHOTOGRAPHING AN OBSERVED IMAGE
џ The device is in VIDEO mode as soon as it is turned on.
VIDEO mode . Video recording of an image
The built-in recording device operates in two modes:
AXION thermal imagers are equipped with a function for video recording and photographing an observed image
onto the built-in memory card. It is recommended that the date and time be set before using the video recording
and photographing function (see the corresponding menu items).
Wi-Fi FUNCTION
The device is equipped with wireless communication with external devices (computer, smartphone) via Wi-Fi.
џ Turn on the wireless connection module in the menu. Wireless operation is displayed in the status bar in the
following way:
џ The device is recognised by an external device under the label ‘AXION_XXXX’, where XXXX are the four last digits
of the serial number.
Wi-Fi disconnected
Wi-Fi connection process in progress
џ After entering the password on an external device (for more detailed information of setting passwords, see the
subsection entitled ‘Wi-Fi setting’ in the section ‘Main Menu Functions’ of the Instructions) and establishing a
connection, the icon in the status bar changes to .
Connection status Status bar indication
Wi-Fi turned on, no connection to the device
Wi-Fi turned on, the device is connected
Wi-Fi enabled by the user
STADIAMETRIC RANGEFINDER
Thermal imagers are fitted with a stadiametric rangefinder that enables the distance to an object to be defined
where its size is known.
џ The stadiametric rangefinder function is accessed by a short press of the Menu button (3) and selecting the
icon .
џ Bars will appear on the display to determine the distance, icons of three objects and digits of the estimated
distance of these three objects.
џ Open the submenu by pressing the Menu button (3).
џ Select the icon with a short press of the Menu button (3).
џ A marker will appear on the left side of the display.
џ A magnifying glass will appear on the right side of the display – an enlarged image with a
fixed cross – that is required to facilitate a search for the defective pixel and to align the
marker with it. There are horizontal and vertical directional arrows to move the marker
with the coordinates along the X and Y axes.
џ Use the UP (4)/DOWN (2) buttons to move the marker to align its centre with the defective pixel.
џ A short press of the Menu button (3) switches the marker direction from the horizontal to the
vertical and vice versa.
џ Delete the defective pixel with a short press of the On/Calibration ON button (5).
џ Where a pixel has been successfully deleted, the word ‘OK’ will appear briefly on the screen.
џ Open the submenu by pressing the Menu button (3).
џ Select the icon and press the Menu button (3).
џ To exit the ‘Delete defective pixels’ function, press and hold down the Menu button (3).
Return all defective pixels previously disabled by the user to their original state:
џ Then, by moving the marker across the display, you can delete the next defective tile.
џ Select 'YES' if you want to return to the factory pixel map and 'NO' if you do not.
џ Confirm your selection with a short press of the Menu button (3).
џ Using the UP (4) and DOWN (2) buttons, align the defective pixel with the fixed cross in the
frame – the pixel should disappear.
Attention! One or two pixels on the imager display in the form of black, bright white or
coloured (blue or red) dots may appear. These are not a defect.
Return to
factory
'pixel map'
џ Stop the video recording by pressing and holding down the Down/REC button (2).
џ Take a photograph with a short press of the Down/REC button (2). The image freezes for 0.5 seconds and the
image file is saved to the build-in memory card.
џ Once video recording has begun, the icon will disappear, with a REC icon appearing in its place and the
record timer showing in MM:SS (minutes:seconds) format.
џ Video files are stored in the built-in memory card after video recording has been turned off.
џ To toggle between Video and Photo modes press and hold down the Down/REC button (2).
Notes: You can enter and work on the menu during video recording. Recorded videos and photographs are saved
to the device’s built-in memory card in the format: img_xxx.jpg (for photos); video_xxx.mp4 (for video). xxx -
three-digit common file counter (for photos and video). The counter used in the naming of multimedia files is
NOT reset.
Attention: The maximum duration of a video recording file is seven minutes. After this time, the video will be
recorded onto a new file. The number of files is limited by the capacity of the device’s built-in memory. Regularly
monitor the amount of free memory in the built-in memory card, transferring footage and photographs to other
media to free up space on the memory card.
џ Start video recording with a short press of the Down/REC button (2).
џ Pause the video recording and resume recording with a short press of the Down/REC button (2).
PHOTO mode . Photographing an image
џ Switch to PHOTO mode with a long press of the Down/REC button (2).
џ An icon is displayed in the upper left corner with the remaining recording time (in hh:mm format), for
example, 5:12.
6
 Loading...