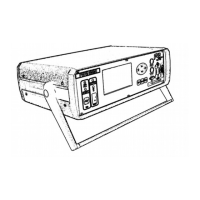
5Operation of the PVPM 10
5.4Power Supply
The PVPM contains an accumulator which let it become independent from mains grid power supply. The
accumulator can be charged by the external power supply and an integrated charge unit. After connecting the
external power supply to the left side of the PVPM case the accumulator is loaded automatically. The loading
state is displayed by a LED at the front panel of the device.
5.5Connecting a PC
The PVPM can operate independent from an external PC. For an extended evaluation of the measured data or
just for controlling the PVPM from a PC you can connect the PC to the PVPM with the delivered cable (USB A –
Mini B). Attach this cable to a free USB port of your PC and to the “PC” connector of the PVPM.
Caution: before you can control the PVPM from a PC with PVPM.disp it is necessary to select the menu option
“transfer” on the PVPM. Otherwise the PVPM will not listen to the serial port and the PC can not access the
device.
5.6Connecting the Solar Generator
Important: during an I-V-curve measurement the solar generator under test must be disconnected from all
other devices like batteries, inverters or loads. During the measurement the PVPM will short circuit the solar
generator for some seconds and it might be damaged by still connected batteries or load capacities of the
inverter!
Connect the PVPM properly to the solar generator using the cables delivered with the PVPM. The plus pole is
marked RED, the minus pole is marked BLACK!
Assure that all connectors of the power measuring cables are pushed in completely (until stop) into
the sockets.
For older, not yet serviced PVPMs: When connected with wrong polarity the solar generator is in short circuit
through the safety diodes integrated in PVPM (than no measurement of current is possible). This condition must
not be kept for more than one minute, else the measuring amplifier may overheat. Newer or serviced PVPMs
have an inverse-polarity protection diode that prevents this problem.
It is important, that all 4 plugs of the 4-wire-measurement are connected properly by the delivered 4-wire-cable
or (if you don’t want a 4-wire-measurement) the two red plugs should be connected and the two black plugs as
well. Use standard short circuit plugs (19mm) or laboratory cables for this purpose. Without this connection a
measurement is not possible!
Caution: keep a sufficient distance to power leading parts of the cables between solar generator and
measuring device. These cables may lead high tension what may affect your health even without direct
contact!
5.7Connecting the Combination Sensor
For a measurement you must connect a Pt100/Pt1000 temperature sensor and a Phox irradiance sensor
(delivered as a combined device) to the relevant plug(s) of the PVPM. For just the measurement of serial
resistance Rs or I-V-curve these sensors are obsolete. The plugs are build in a way with prevents you from
connecting a sensor to a wrong plug.
The combined Phox/Pt1000 sensor should be mounted near the modules to be measured. It must have exactly
the same orientation (elevation and azimuth) regarding the sun as the modules have. Most time the easiest way
is the direct assembly to the module frame. Please take care that the sensor will drop no shadow to the module!
The sensor needs several minutes to adapt to the environment conditions: the reference cell firstly should reach
the temperature of the module, before you can start to measure I-V-curves with the PVPM (see chap.5.10).
For this reason the sensor should not be set up far away from the modules (e.g. modules on the roof, sensor in
the yard). Since the solar cells do not react only to the direct irradiation, but also to light reflected in the
environment, the sensor can possibly notice different light intensity in the same orientation of sensor and
modules and so falsify the results of the measurement.
In the simplest case the sensor is fastened with a clamp to the modules under test. Pay attention that the
sensor does not shadow the modules under test! The sensor should have some time in order to adapt to the
Operation manual for PVPM devices PV-Engineering GmbH