5Operation of the PVPM 11
site conditions. At PVPM devices that have no second temperature measuring input the sensor must
approximately reach the temperature of the module under test (the temperatures are readable on the display of
the running PVPM). For security reasons we recommend to check the backsurface temperature of the module
under test additionally manually e.g. with an infrared thermometer. Now a measurement with the PVPM can be
carried out (s. also chapter 8).
5.8Switching-on
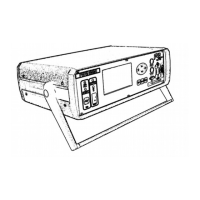
Switch the power of PVPM on by pushing the trigger switch “Power” at the front panel for approx. 1 second
(push it again to power the device off again). The indicator light “On” will show you the presence of power from
the accumulator or an external power supply. The PVPM will now pass some self tests and will be ready after
about 10-15 seconds of operation. The device is ready when the main menu appears on the LCD-screen.
Lamps on front panel:: see chapter 17.1
The PVPM reports several system conditions, functions and errors by speaker signals. A list of signals you will
find in the appendix.
When the device signales readiness, you can start a new measurement.
Only devices with Li-Ion battery:
● The device will power off automatically, if the battery voltage becomes too low. Recharge the battery before
you use the device again. Caution: charging is only allowed in the temperature range between 0°C and
40°C. If the battery temperature is outside this range, charging will not proceed.
● If the battery voltage becomes lower and the device estimates an operation time left of less than 30
minutes, the LED „State of charge“ will blink red.
● The battery then should be charged within short time or the device should be powered externally.
5.9Keys
5.9.1 Test
The “Test” key is used to visualize the state of charge of the accumulator with the front panel LEDs when the
device is not operating. You should do this regular to avoid damage of the accumulator through inevitable self
discharge. Charge the PVPM completely at least once a month even if you don’t use the device.
5.9.2 ESC
The “ESC” key will bring you up to the next higher menu level.
5.9.3 HOME
The “HOME” key will bring you up to the main menu.
5.9.4 ENTER
With the “ENTER” key you select an option or confirm.
5.9.5 Arrow keys
You can move the mark in menus and other lists using the arrow keys.
5.10 Measurement
Please pay attention to the safety hints in chapters 4+5 and factors affecting measurement accuracy in chapter
6.
The measurement can be started from the PVPM or from a connected PC (see chapter 10). The measurement
should not be started before the solar generator and the necessary sensors are connected properly. The I-V-
curve measurement will take up to 2 seconds, than the calculated results will be displayed immediately on the
PVPMs display (or on the PC).
Operation manual for PVPM devices PV-Engineering GmbH