10Operation of the Software PVPM.disp 26
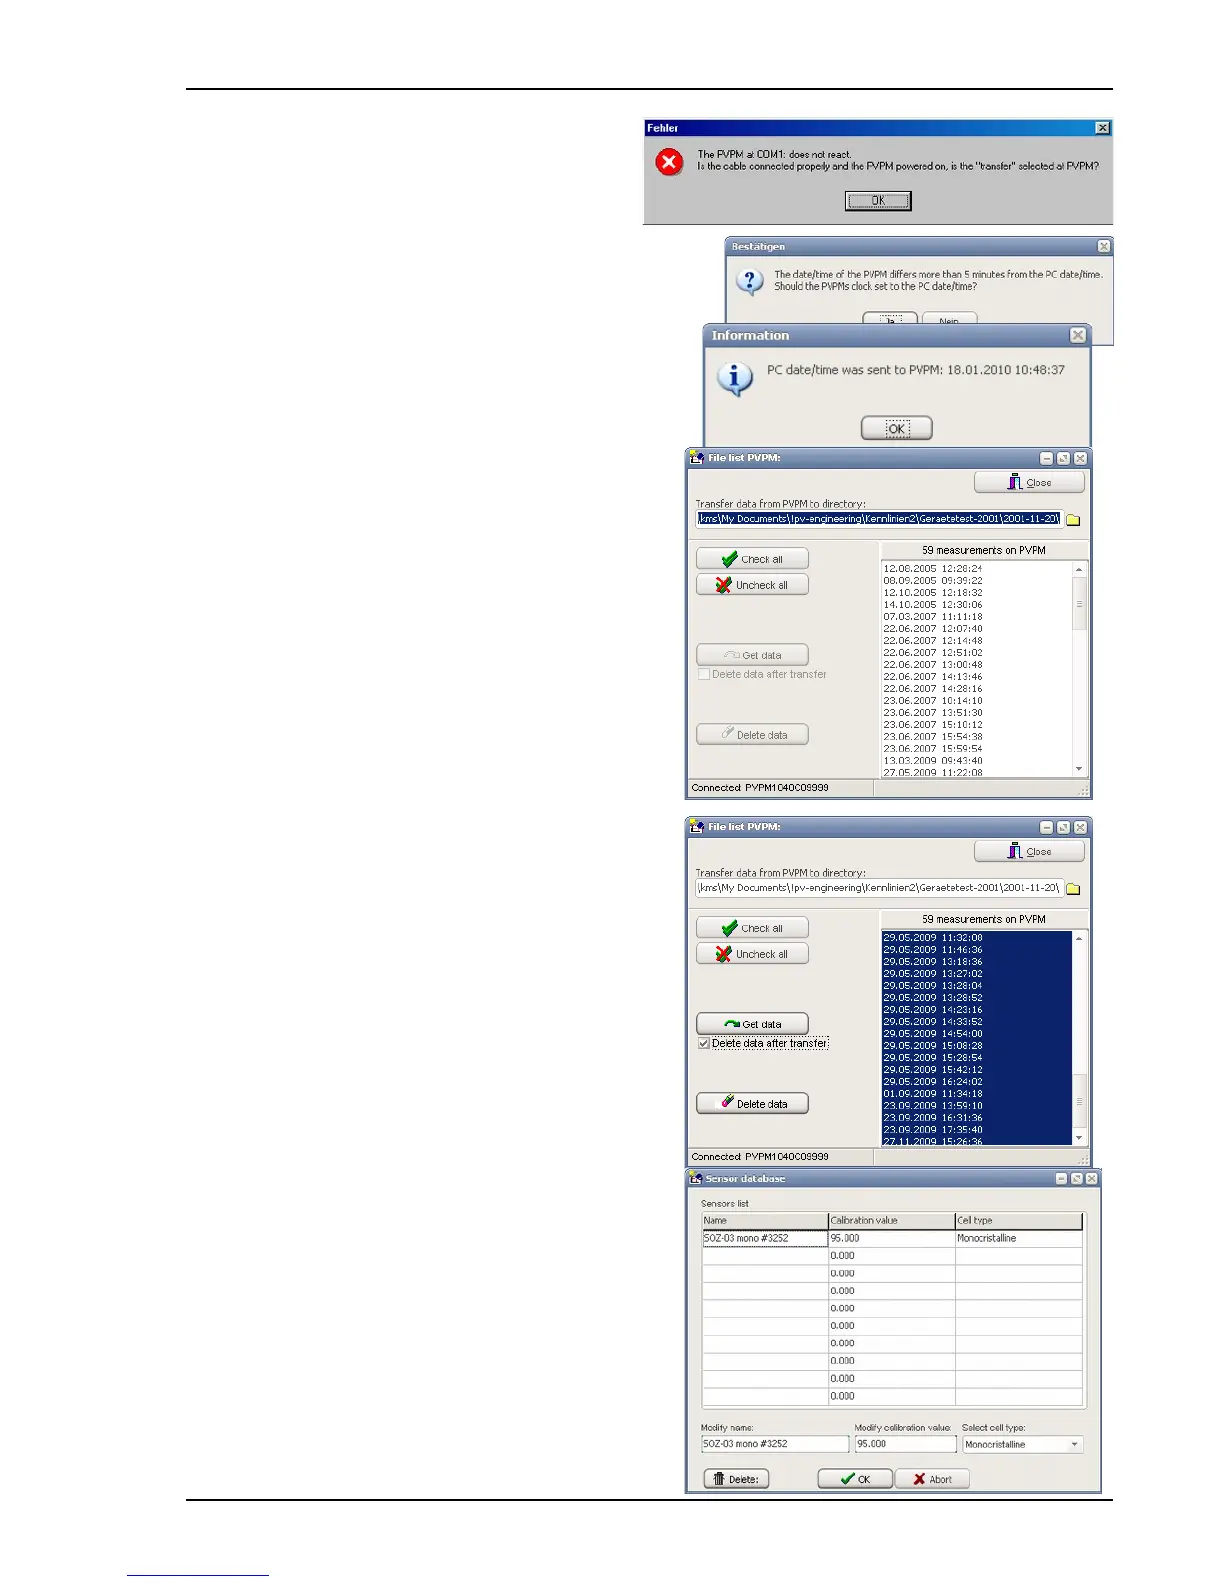
If this message appears (see right), the cable to the
PVPM is not mounted properly or the function
“Transfer” on the PVPM is not activated.
10.3.2 Manage Files on the PVPM
At first the time settings of PC and PVPM will be compared – if
the time differs more than 5 minutes the application will ask
whether to correct the PVPM time with the PCs time setting. Now
the measurement data stored on PVPM will be displayed in a
list (the PVPM must be connected and online for this
function). Now you can select data sets from the list (even
more than one) and either transfer it to the PC for further
processing (Button “Get data”) or just delete it from the PVPM
(Button “Delete data”). You can set the destination directory
with a directory dialogue that appears if you click on the
directory symbol right of the displayed directory.
Caution: Carrying out the “delete” function can not be
withdrawn!!
When you select data transfer the data sets will be
transferred one after the other and the files are stored to
disk automatically using a file name that contains the date
and time of the measurement.
If the checkbox “Delete data after transfer” is checked a
dialog will appear after the transfer and ask, whether the
transferred data should be deleted now from the PVPMs
memory. Only if you are really shure that the data on the
PVPM will not be used any more you can answer “Yes” here
– the marked datasets will be deleted from the PVPMs
memory.
10.3.3 Synchronize PVPM to PC date/time
With this function the internal real time clock of the PVPM is
set to the PCs date/time.
10.3.4 Modify PVPM sensor database
You can connect different irradiance sensors to the PVPM.
Every sensor has its own calibration value, the PVPM needs
to know this value for correct operation. To make the
selection of a sensor simple during measurement you can
define a table with up to ten different sensors, its names
and calibration values, which will be stored in the PVPMs
permanent memory. So later on you just have to select the
appropriate sensor at the PVPM. The name you give the
sensor is more or less free selectable, but it should be short
and informative. It will be displayed later on on PVPMs
display and informs you about the actually selected sensor.
You can select the sensor at the PVPM via the menu
“Service” and “Select sensor”.
If you want to modify the sensors database the PVPM must
be connected and ready for data transfer. When you start
this function the database is loaded from PVPM and will be
stored back to PVPM when you close this form.
Operation manual for PVPM devices PV-Engineering GmbH