Enforcer: Installation Manual
Page: 5
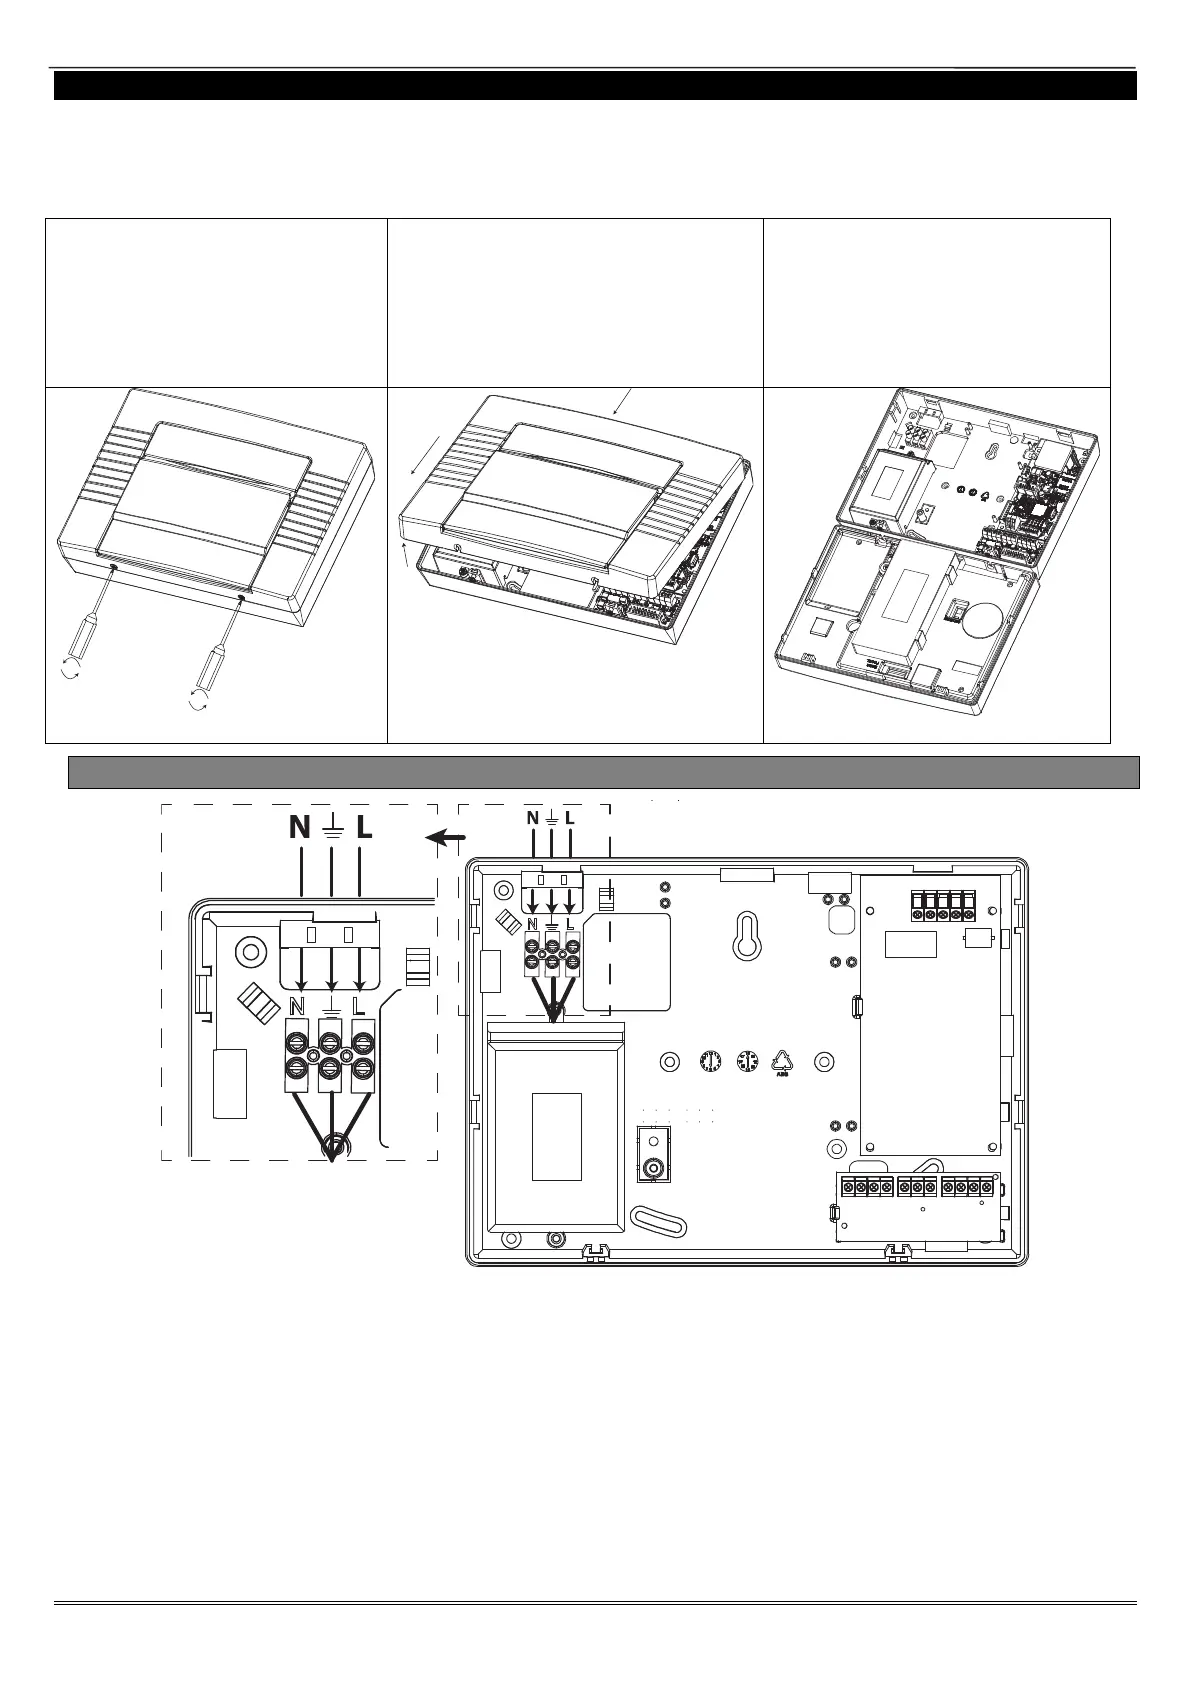
3. Installation Guide
NOTE 1: It is recommended that the Engineer menu is accessed prior to opening a powered Enforcer.
NOTE 2: If any new peripheral is installed (i.e. Modem, I/O board, Expander) it is recommended that the
Enforcer is powered down (mains and battery).
1. Slightly unscrew the two screws
located at the bottom.
NOTE: Do not fully unscrew at
these can be used as a 'hanger' to
the rear casing as shown in Step
3.
2. Unhinge the Enforcer from the top
and pull down to disconnect.
NOTE: Take extra care when
removing the front of the Enforcer as
modems, I/O boards etc may be
connected to the front.
3. Hang the front of the Enforcer
on the opening screws at the
bottom if required. Shown below.
3.1 Mains and Earth Wiring
It is important that the electrical earth connection is connected when connecting the 240V mains
supply to the Enforcer.
NOTE 1: Do not locate the mains cables next to internal cabling.
NOTE 2: Ensure that the Enforcer is not mounted on any metal surfaces.
NOTE 3: That the mains cables should not be internally 'looped' as shown. This may interfere with
the wireless antenna's. Where possible it is recommended that all mains cables should be installed
through the area nearest the mains terminals as shown above.
NOTE 4: If cable management is an issue, a spacer is available: ENF/SPACER-WE
 Loading...