6
1.5 Optional Accessories
• 25 ml sample vial (Part # MA-25)
• 10 ml sample vial (Part # MA-24)
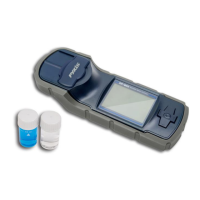
1.6 Sample Vial Compartment
The sample vial compartment is shown in Figure 1, along with a 10-ml sample vial. When the sample vial
is inserted into the sample vial compartment, the triangular mark on the sample vial should be aligned
approximately with the 6 o’clock position of the sample vial compartment or any position consistently.
The 16 mm tube adapter is needed for colorimetric methods using the 16 mm sample tube. The instruction
to us the adapter is provided in section 6.
The sample vial compartment can take in a 25 ml sample vial. The light shield cover is not required to be
closed if the 25 ml sample via is used.
The sample vial compartment should be kept clean. A small amount foreign material could significantly
affect turbidity measurement results. Use a soft cloth or lint free paper tissue to clean sample vial
compartment periodically. Remove debris, scale, and deposit promptly.
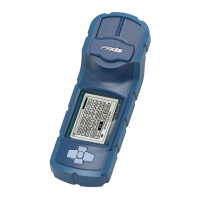
1.7 Light Shield Cover
The light shield cover is shown in Figure 2. The light shield cover can be conveniently slid between the
open and closed positions. The light shield cover is held firmly at the rest positions by permanent magnets.
The light shield cover should be in the closed position during storage, transportation, and measurements,
especially during the turbidity. When turned on, the SP-800 carries out self-diagnosis including checking
the performance of a variety of optical devices. The light shield door shall be at the closed position to shield
interference from ambient light during self-diagnosis.
Care should be taken to avoid water or debris being trapped in the track of the light shield door.