29
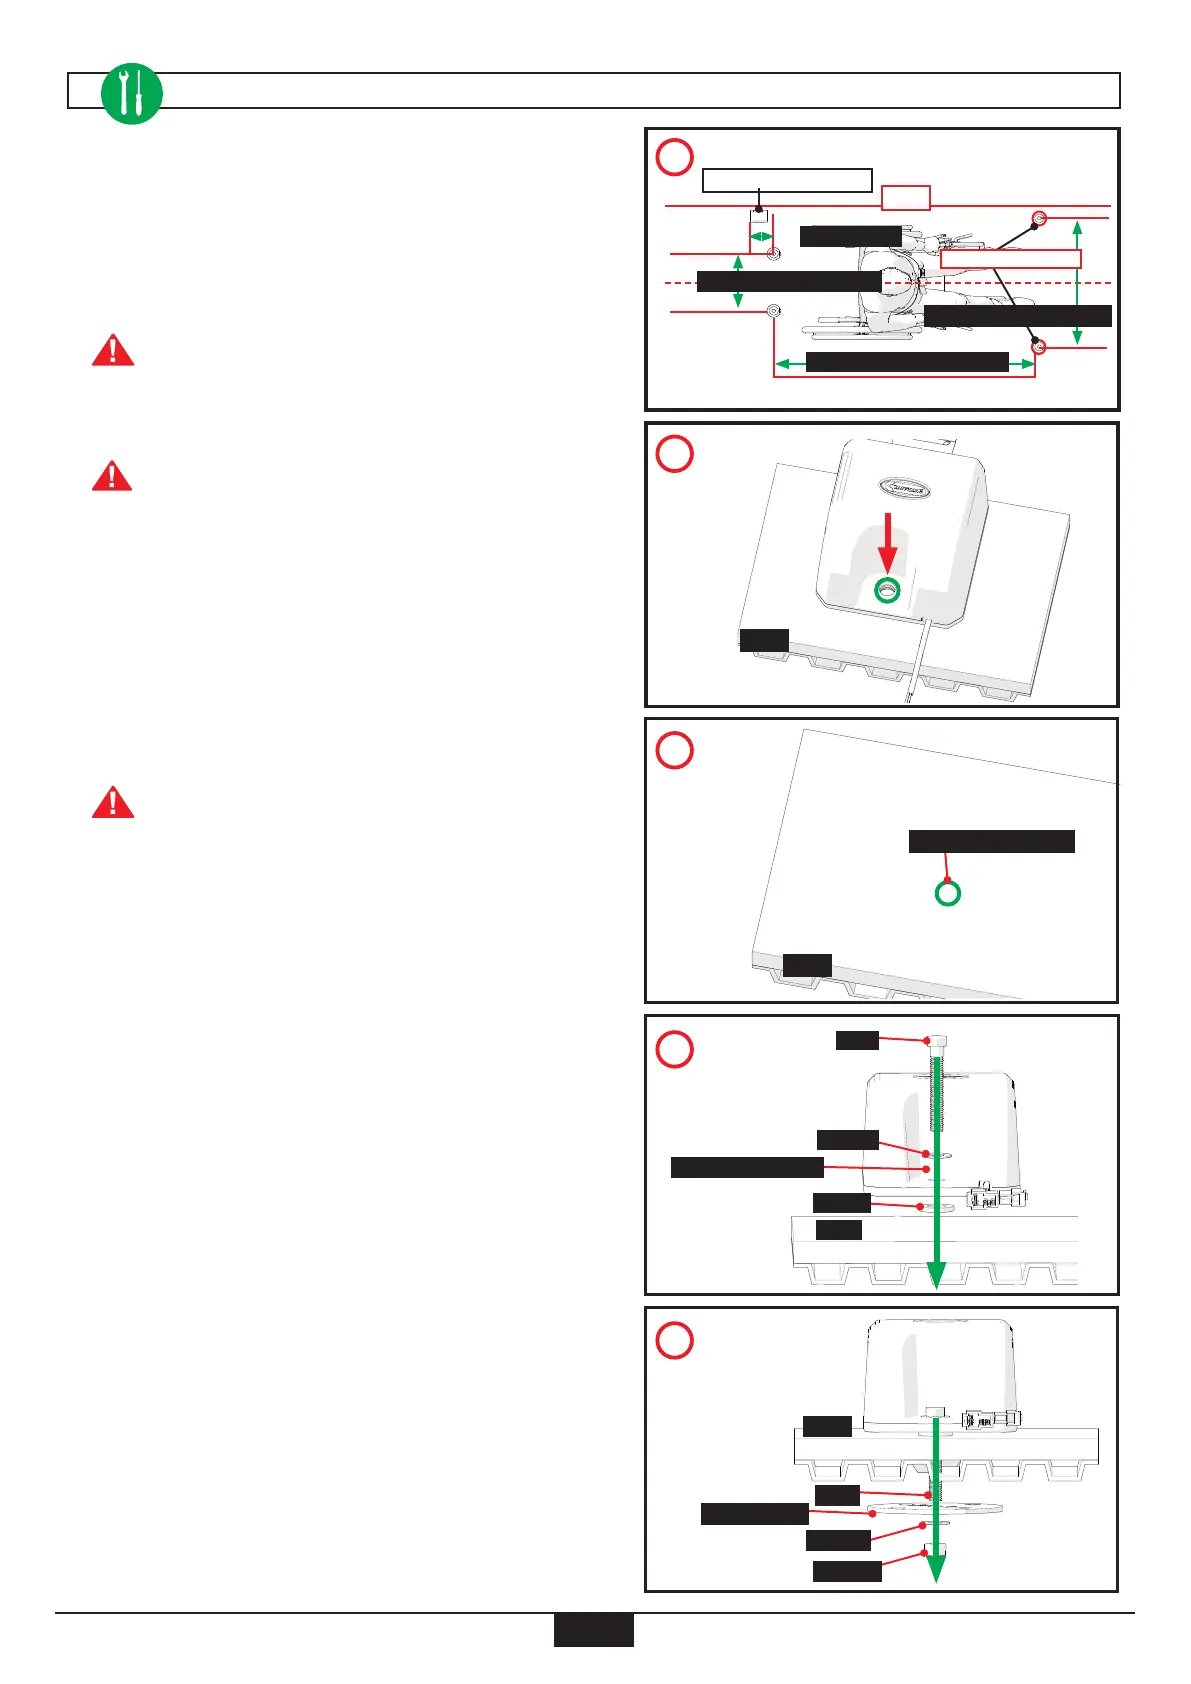
1. Choose and mark location for installing the Electrical
Retractors (front position only) (PP).
Retractors MUST be xed to vehicle’s oor.
Retractor should be mounted at on a horizontal
surface
Recommended distances for Electrical Retractors
(II).
2. Use Electrical Retractor as a template to mark centre hole for
drilling (QQ).
Before installation, inspect the underside of the
vehicle oor, note utilities, frames, cross
members, fuel tanks and other possible
obstructions -- any questions contact the vehicle
OEM.
3. Remove Electrical Retractor, drill a 3/8” (10mm) hole through
the oor (RR) and clean out debris.
4. Put 3/8” (10mm) Bolt through Washer, Electrical Retractor,
Spacer and oor (TT).
5. From underneath vehicle oor, put Bolt through Backing
Plate, Washer and Locknut (MM).
ELECTRICAL RETRACTORS INSTALLATION
Wall
2” (51mm) Min
13” (330mm) - 15” (380mm)
Shoulder Belt Retractor
Electrical Retractors
27” (685mm) - 34” (865mm)
Floor
Floor
8
Drill 3/8” (10mm) Hole
RR
QQ
8
Bolt
8
Floor
8
Electrical Retractor
8
Washer
8
Spacer
SS
8
Floor
8
Bolt
8
Backing Plate
8
Washer
8
Locknut
TT
PP
48” (1220mm) - 54” (1520mm)

 Loading...

