5. Troubleshooting
This chapter describes basic troubleshooting information.
Forcing Qnder Pro or myQNAPcloud to locate the NAS
If Qnder Pro or myQNAPcloud is unable to locate the NAS during QTS installation, the drives or data may
be faulty.
1. Power o the NAS.
2. Remove all drives.
3. Power on the NAS.
4. Locate the NAS using Qnder Pro or myQNAPcloud.
5. Reinsert the drives.
6. Continue with the QTS installation.
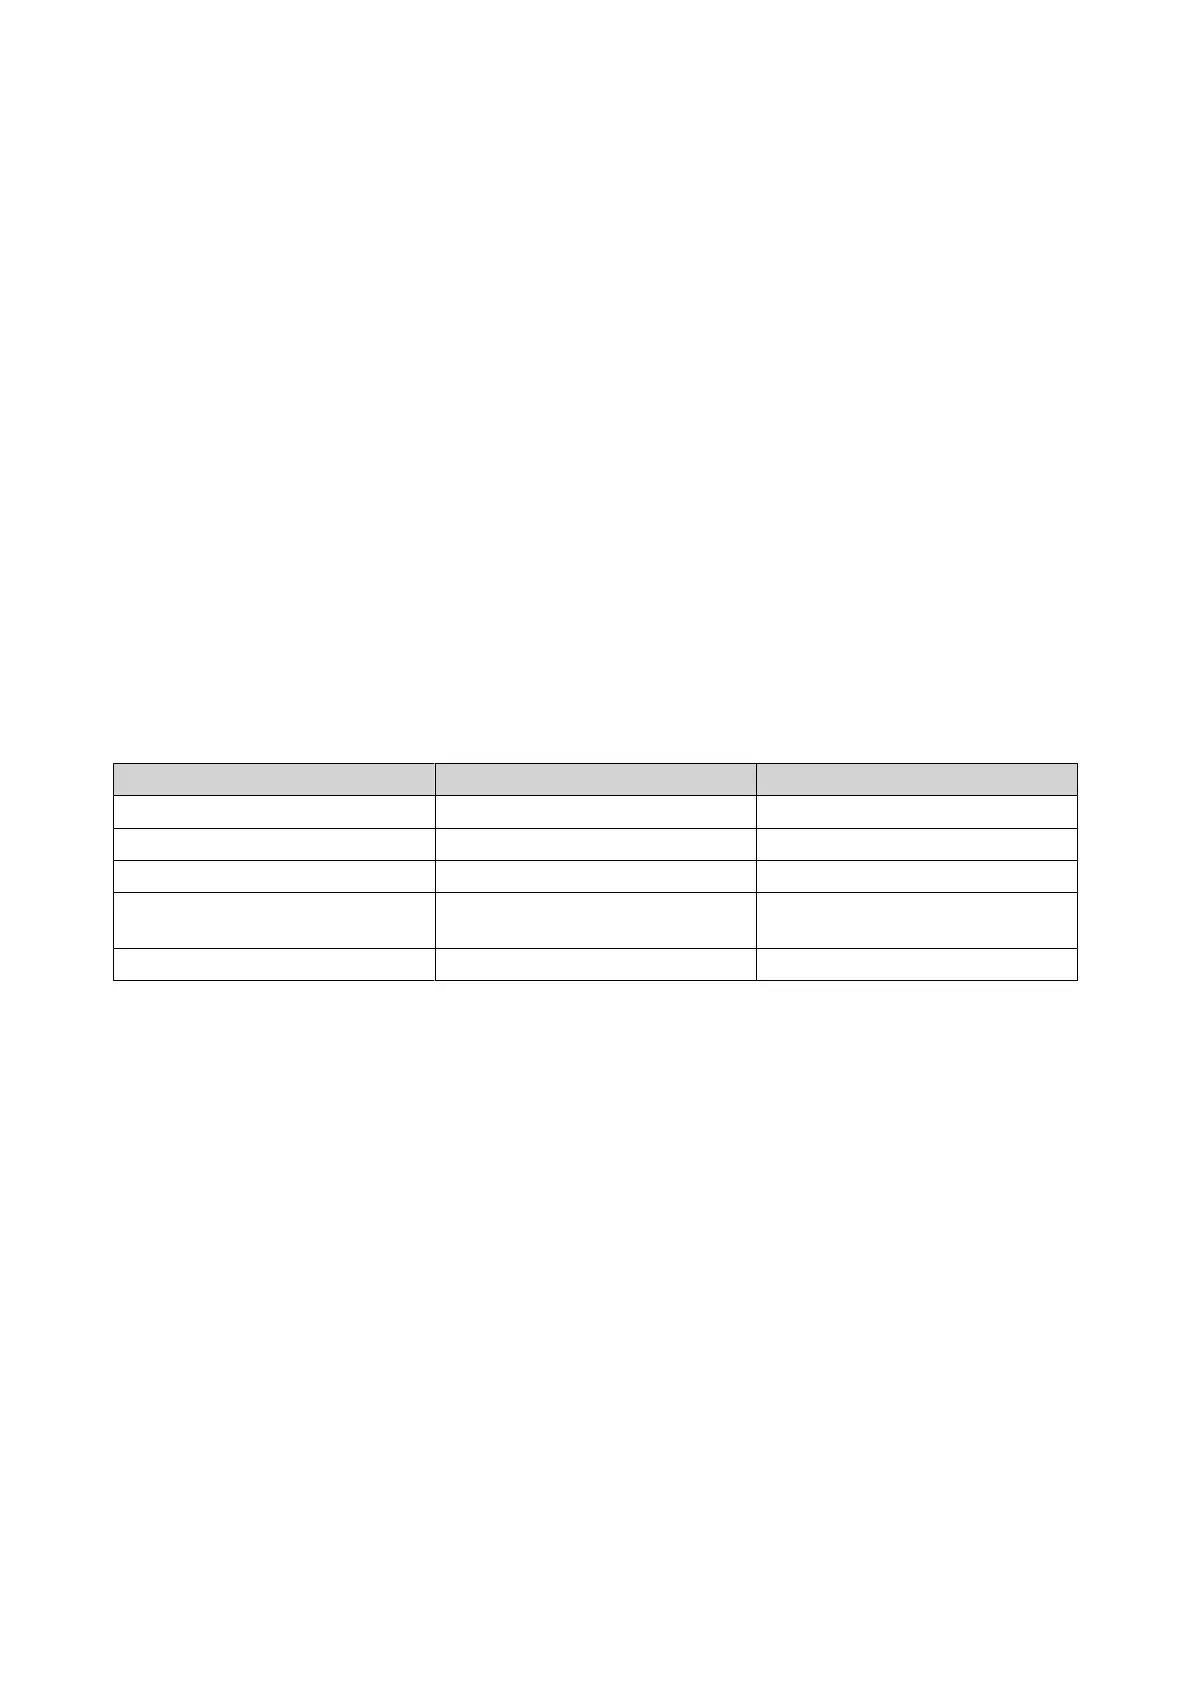
Hot-swapping failed drives
The NAS supports hot-swapping of drives in the following situations:
RAID Type Number of Disks Situation
RAID 1 2 One member drive fails.
RAID 5 ≥ 3 One member drive fails.
RAID 6 ≥ 4 One or two member drives fail.
RAID 10 ≥ 4 (Must be an even number) One or two member drives in two
dierent pairs fail.
RAID 50 ≥ 6 One disk per subgroup fails.
1. Log on to QTS.
2. Go to Main Menu > Storage & Snapshots > Storage > Disks/VJBOD .
3. Locate the failed drive.
4. Prepare a new hard drive with a capacity that is the same as or larger than the failed hard drive.
5. Remove the failed drive from the device.
6. Wait for 20 seconds or until the device beeps twice.
7. Remove the failed drive from the drive tray.
8. Insert the new drive into the drive tray.
9. Install the new drive.
The NAS beeps twice.
10. Go to Main Menu > Storage & Snapshots > Storage > Storage/Snapshots .
11. Locate the volume that contains the new drive and then verify that the status is Rebuilding.
TS-AI642 User Guide
Troubleshooting 48
 Loading...