Initial Configuration 33
DXi6701/DXi6702
a Select the eth0 row in the table.
b If necessary, click Add IP to enable entry in the IP Address box.
c Enter the following network information as provided by your network
administrator (all fields are required):
Caution: Make sure you enter the correct IP address information and that
you write this information down. If you enter the incorrect IP
address information and reboot, you will not be able to access the
system.
• IP Address - The IP address of the DXi6701/DXi6702.
• Netmask - The network mask of the DXi6701/DXi6702.
• Gateway - The gateway of the DXi6701/DXi6702. (This is usually not the
same as the default gateway.)
d Select the Any check box to allow all traffic types (management, replication, and
data) on the interface.
e Click Update to save the changes you made to the IP Address table.
8 Do not make any changes under IP Address Configuration > Routing Details
unless directed by your network administrator.
Note: If the DXi needs to communicate with another subnet that is not reachable
using the default gateway, a route must be added under the Routing
Details section. (For more information about interface routing, see the
“Network” section in the
Quantum DXi6000 User’s Guide
, 6-67199).
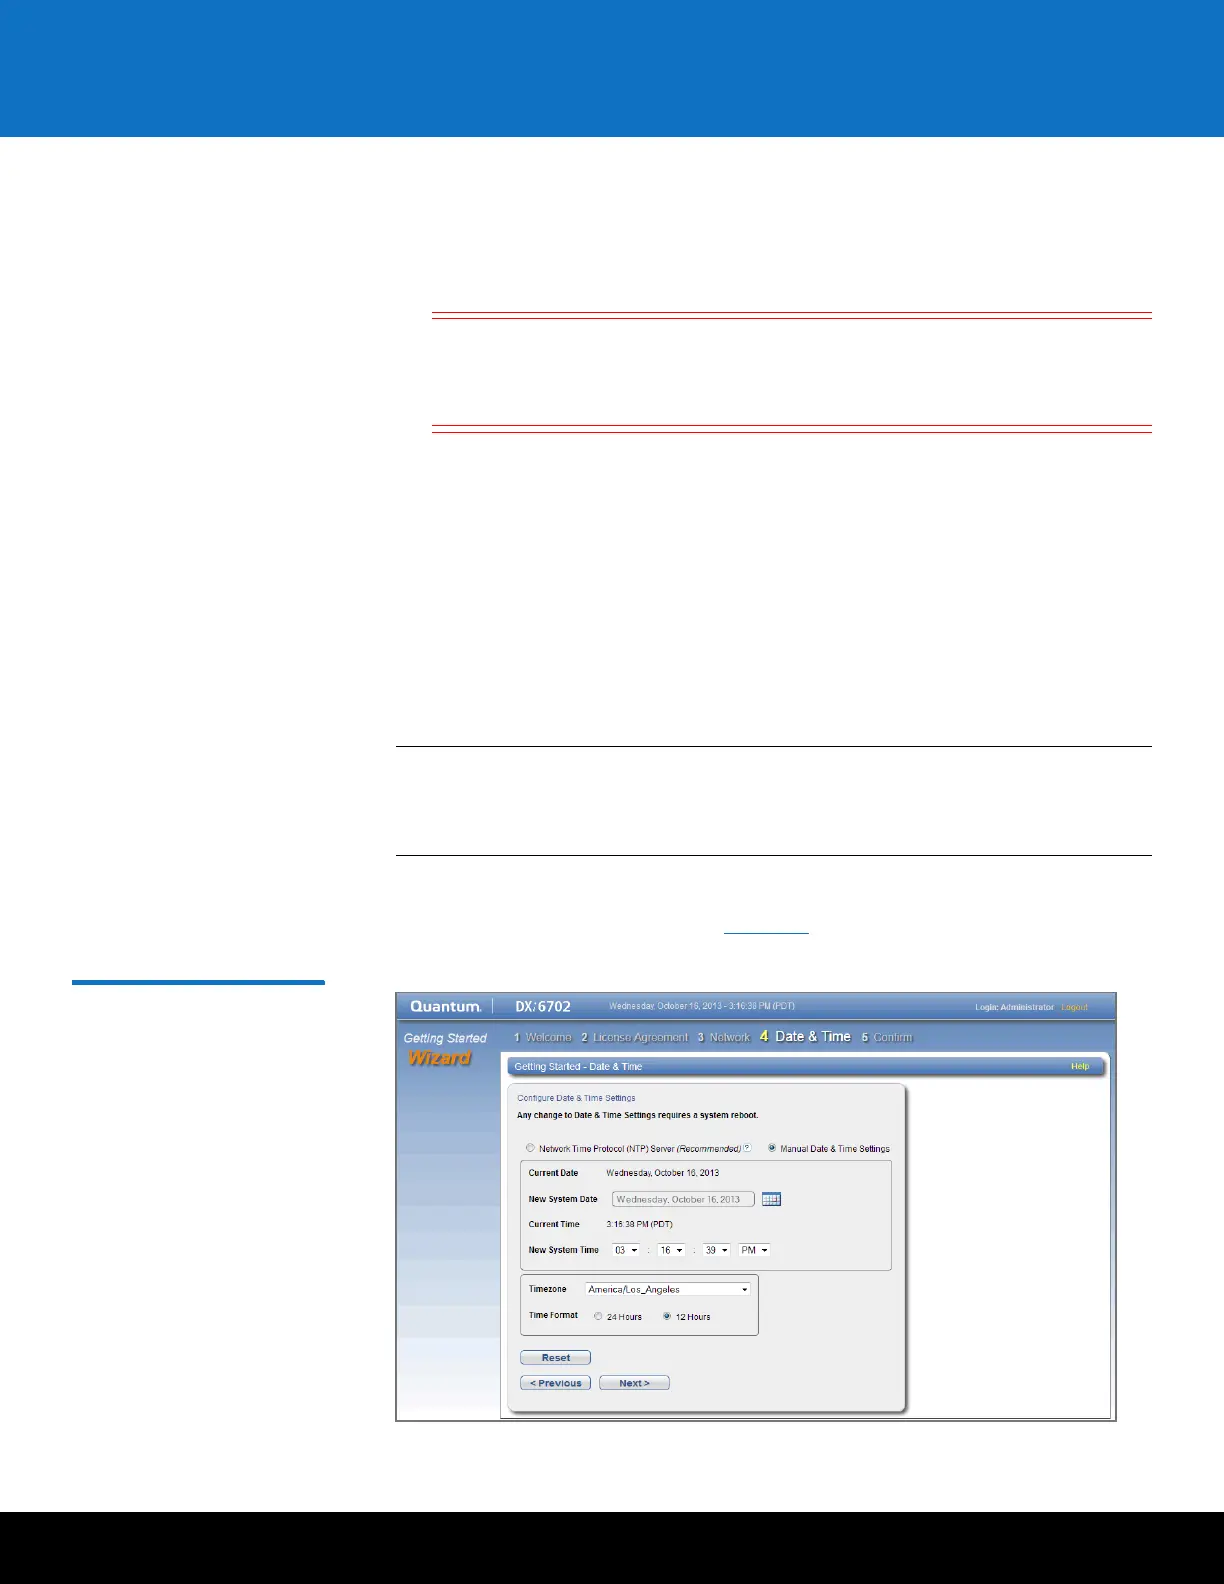
9 Click Next to continue.
The Date & Time page displays (see Figure 22).
Figure 22 Getting Started
Wizard: Date & Time