Secure Sensor to Mounting Plate 129
M5 x 12 mm
Screws
Wall Fixing Screws
(not supplied)
Mounting
Plate
Rada Mounting Plate 129 (optional)
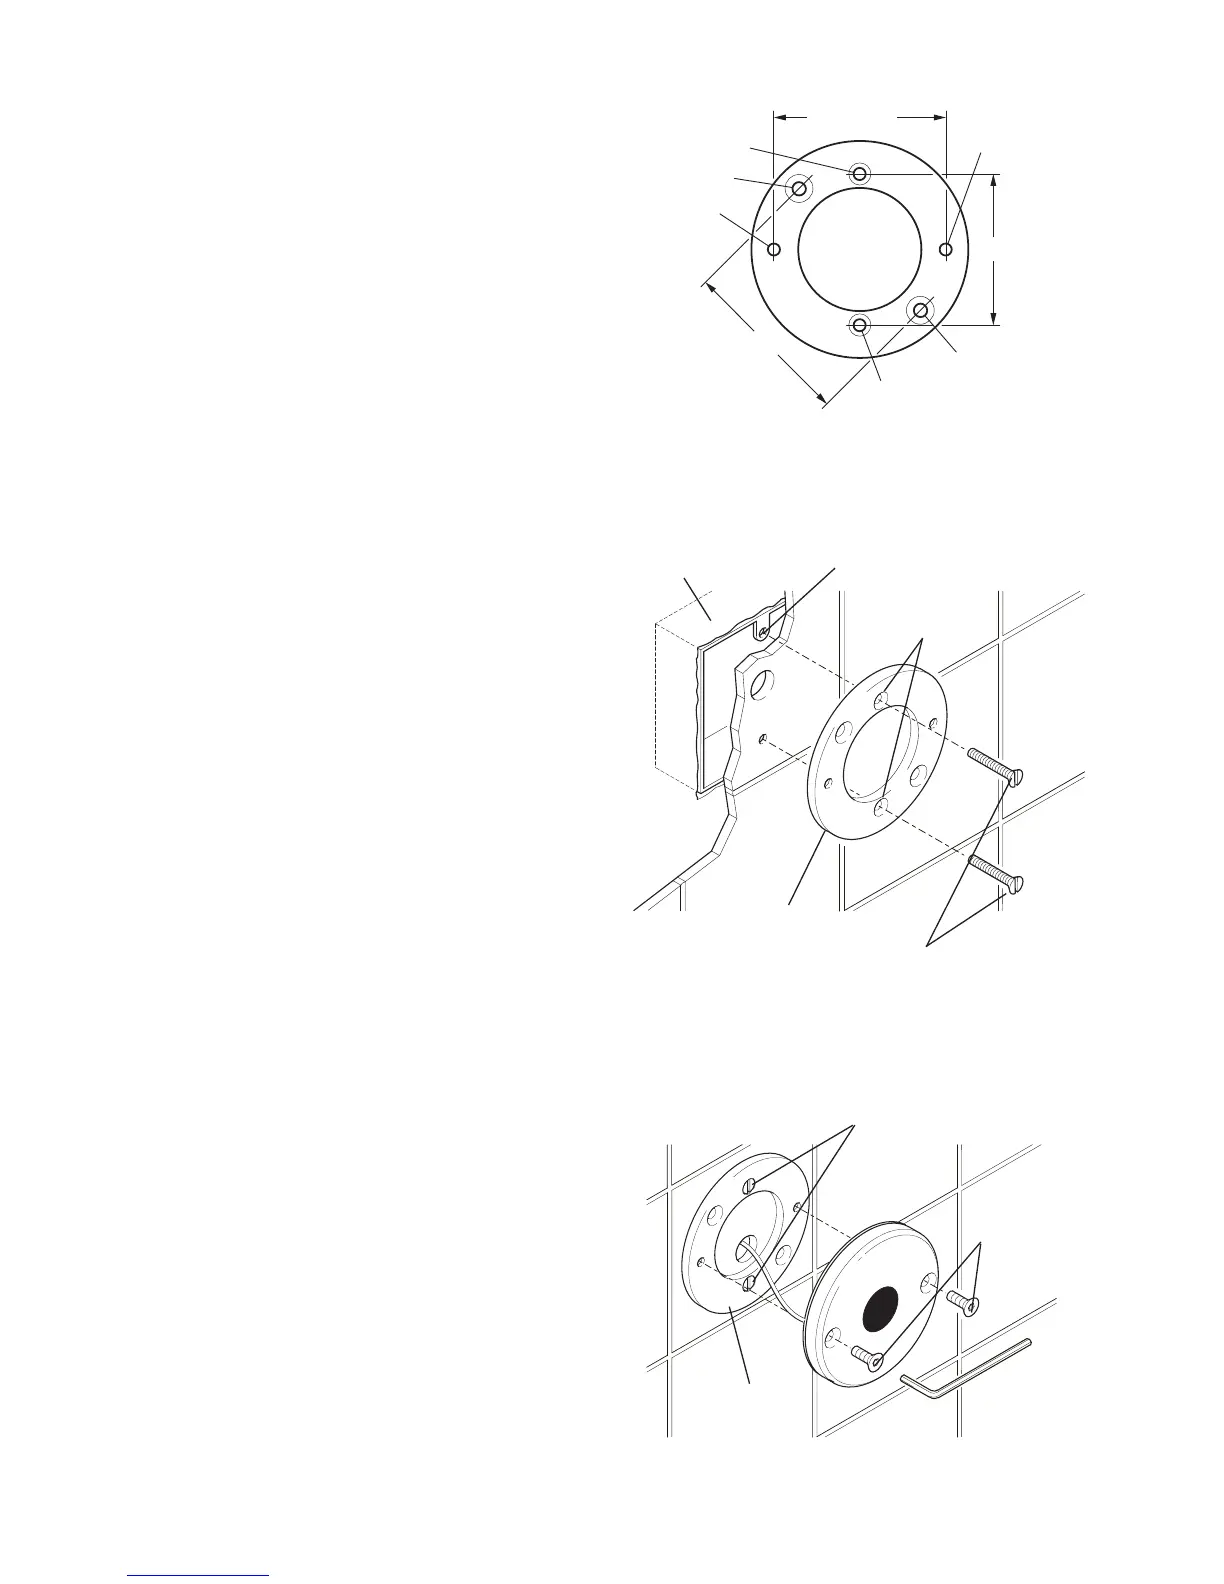
1. Select which set of xing holes you
intend to use (Refer to illustration
'Fixing Holes').
Use the 6 mm holes for wall/panel
xing screws. Use plugs to suit the
wall composition
Use the 4 mm holes to x the Mounting
Plate directly to an electrical junction
box.
The M5 threaded holes are for
receiving the screws to secure the
sensor to the mounting plate.
Important! When fitting a sensor
to an electrical junction box, make
sure that the 4 mm xing holes are
in the vertical position (Refer to
illustration 'Junction Box Installation').
When preparing the finished wall
surface (e.g. tiling), allow sufcient
clearance to facilitate alignment of
the xing screws into the xing holes
of the junction box. Leave space for
the cable to be inserted through the
centre of the mounting plate.
2. With the mounting plate secure, offer
up the Rada 129 Sensor, making
sure that the cable from the sensor
runs through the centre hole (Refer
to illustration 'Secure Sensor to
Mounting Plate 129').
Fixing Holes
Junction Box Installation
Electrical
Junction Box
(not supplied)
Mounting Plate Fixing
Screws (not supplied)
Mounting
Plate
Cover Fixing Holes
68 mm
60 mm
68 mm
M5
M5
Ø 4 mm
Ø 6 mm
Ø 4 mm
Ø 6 mm
Ø 4 mm
 Loading...