2.2 Rada Pulse129 Sensor
1. Refer to section: 'Install the Sensors, 2.1 Rada Pulse 120 and 122 Sensors'
and follow instructions 1 and 2.
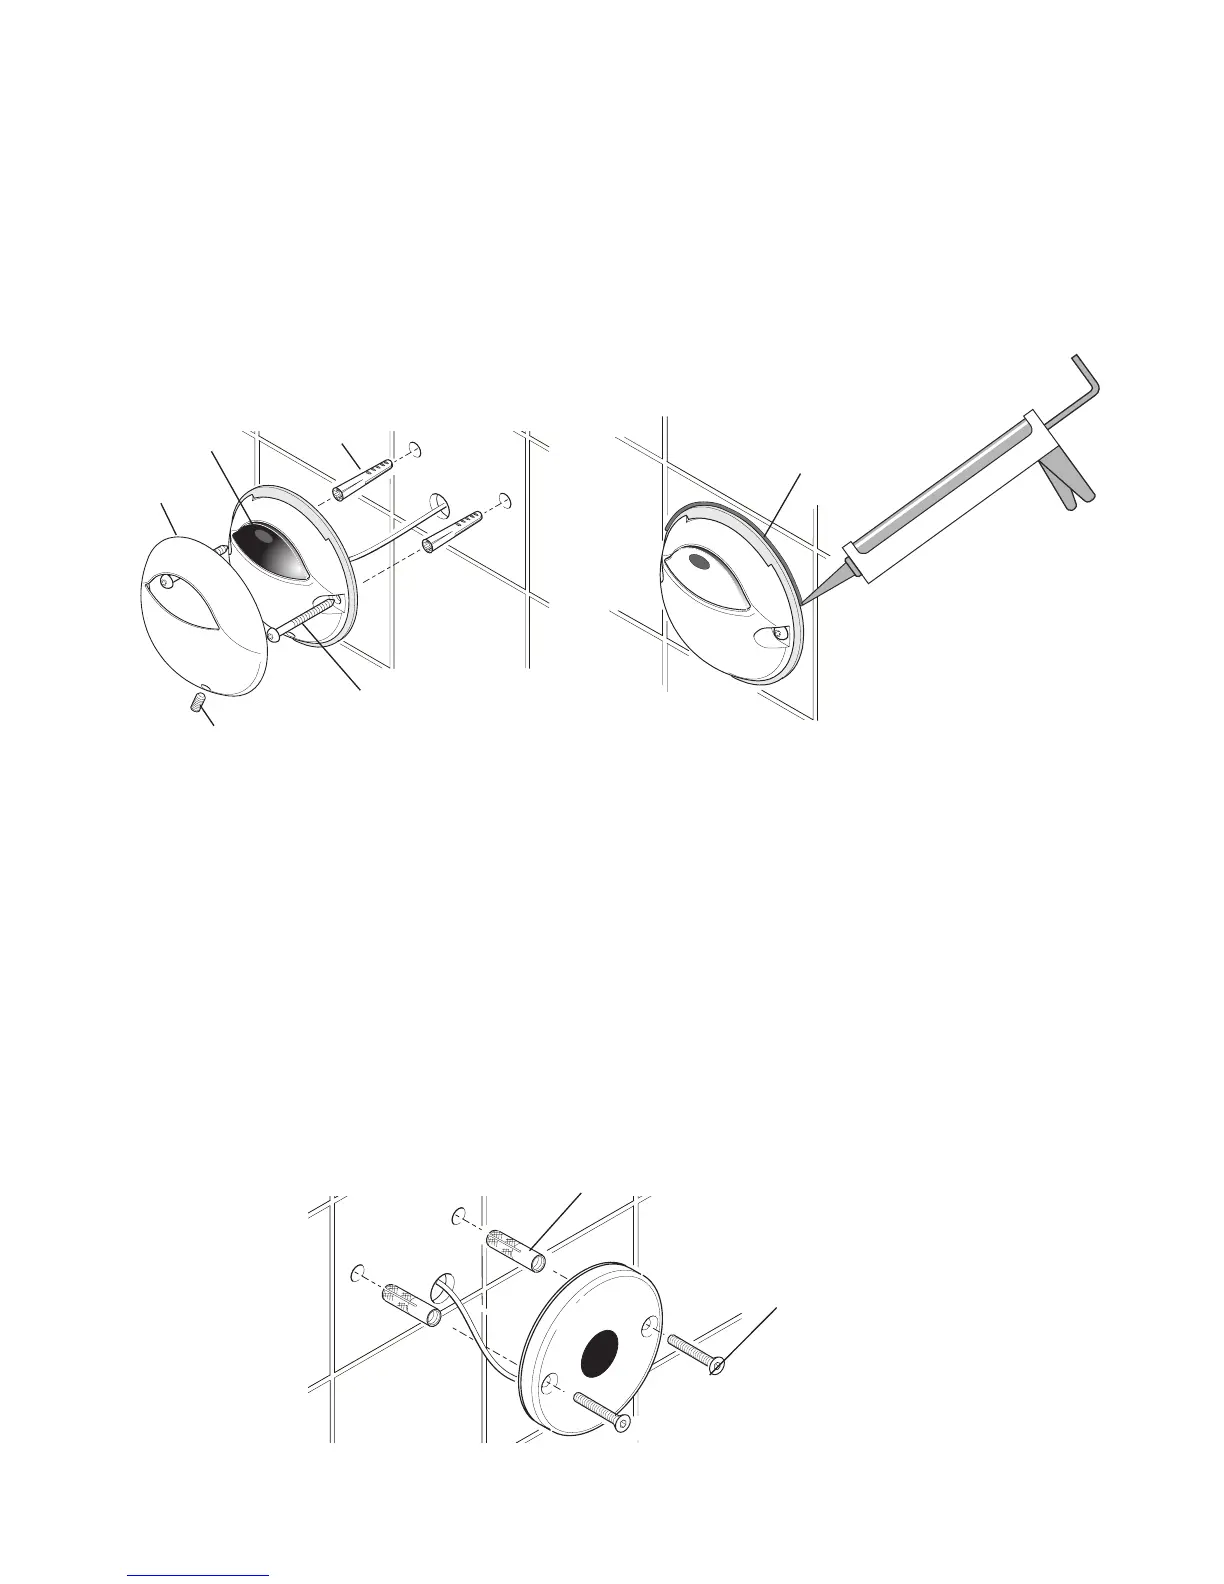
2. Make sure that the foam seal on the rear face is in place then secure the sensor
to the wall with the securing screws (supplied).
3. Make the connection between the 2 core cable and the Rada Pulse control box
using the plug-in connector (supplied).
Installation of 129 Sensor
Fixing Screws
Wall Plug
Installation of 120/122 Sensors
Grub Screw
Cover
Fixing Screw
Wall Plug
Sensor
3. Secure the sensor to the wall with the supplied xing screws.
To prevent water ingress into the building fabric place a thin bead of silicone
sealant around the top edge of the sensor (refer to illustration).
4. Make the connection between the 2 core cable and the Rada Pulse control box
using the plug-in connector (supplied).
5. Fit the cover. Make sure that it locates correctly over the top lip of the sensor.
6. Fit the grub screw to secure the cover in position.
Silicone Sealant
 Loading...