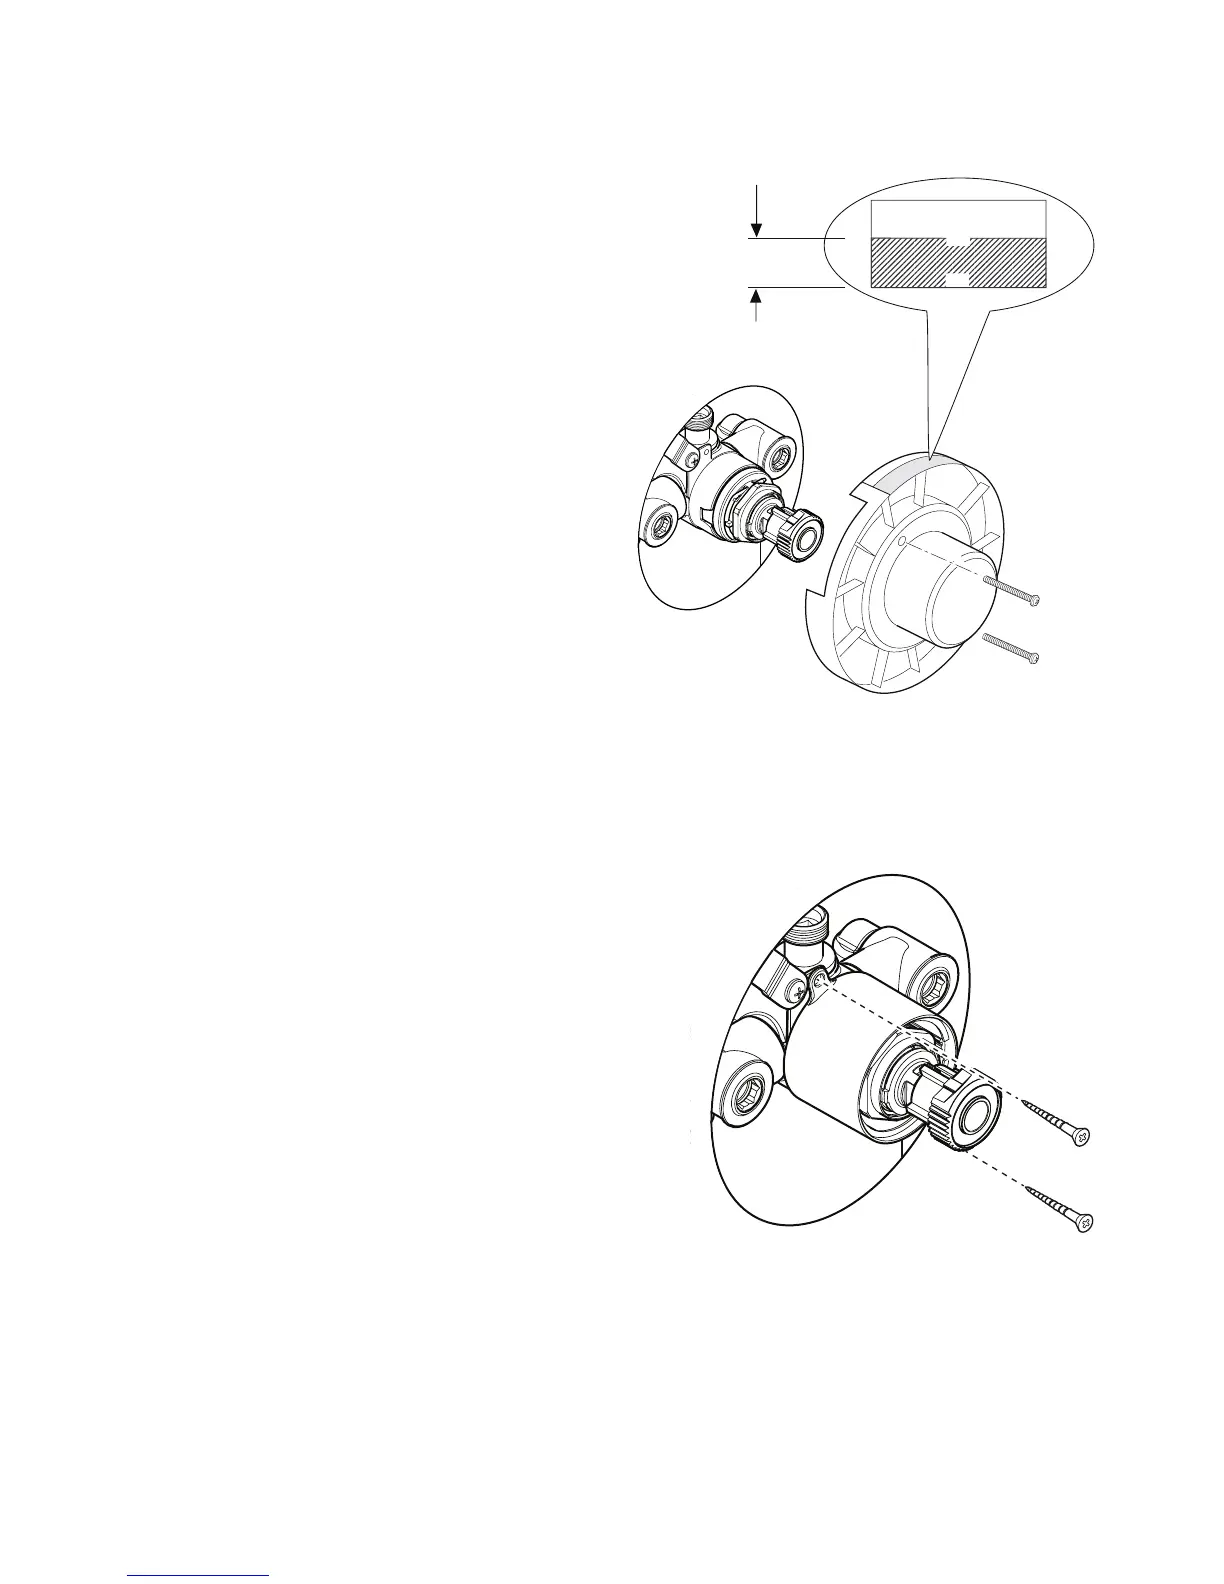
20
1145094-W2-D
Minimum nished
wall surface
Maximum nished
wall surface
Finished Wall
F9802
Min
Max
14. Attach the building-in shroud to the
mixer using the two shroud screws
removed earlier.
15. Using the ‘Finished Wall Indicator’
on the building-in shroud as a guide,
nish the wall, e.g. tiles.
Caution! Make sure that the nished
wall is within the maximum and
minimum limits and to an even depth
(no greater than 2 mm variation) or
the control components will not t
correctly.
16. Remove the two shroud screws and
discard the building-in shroud.
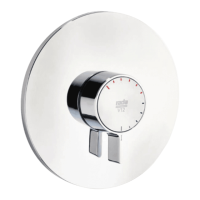
17. Refit the chrome trim and secure
in position with the two screws
(supplied).
18. Fit the Shower Fittings, refer to your
Shower Fittings Product Manual for
Instructions.
19. Fit the concealing plate and control
assembly, refer to section: ‘Control
Assembly’.