True to the Music
Radial Engineering Ltd. SW8-USB™ Owner’s Manual
12
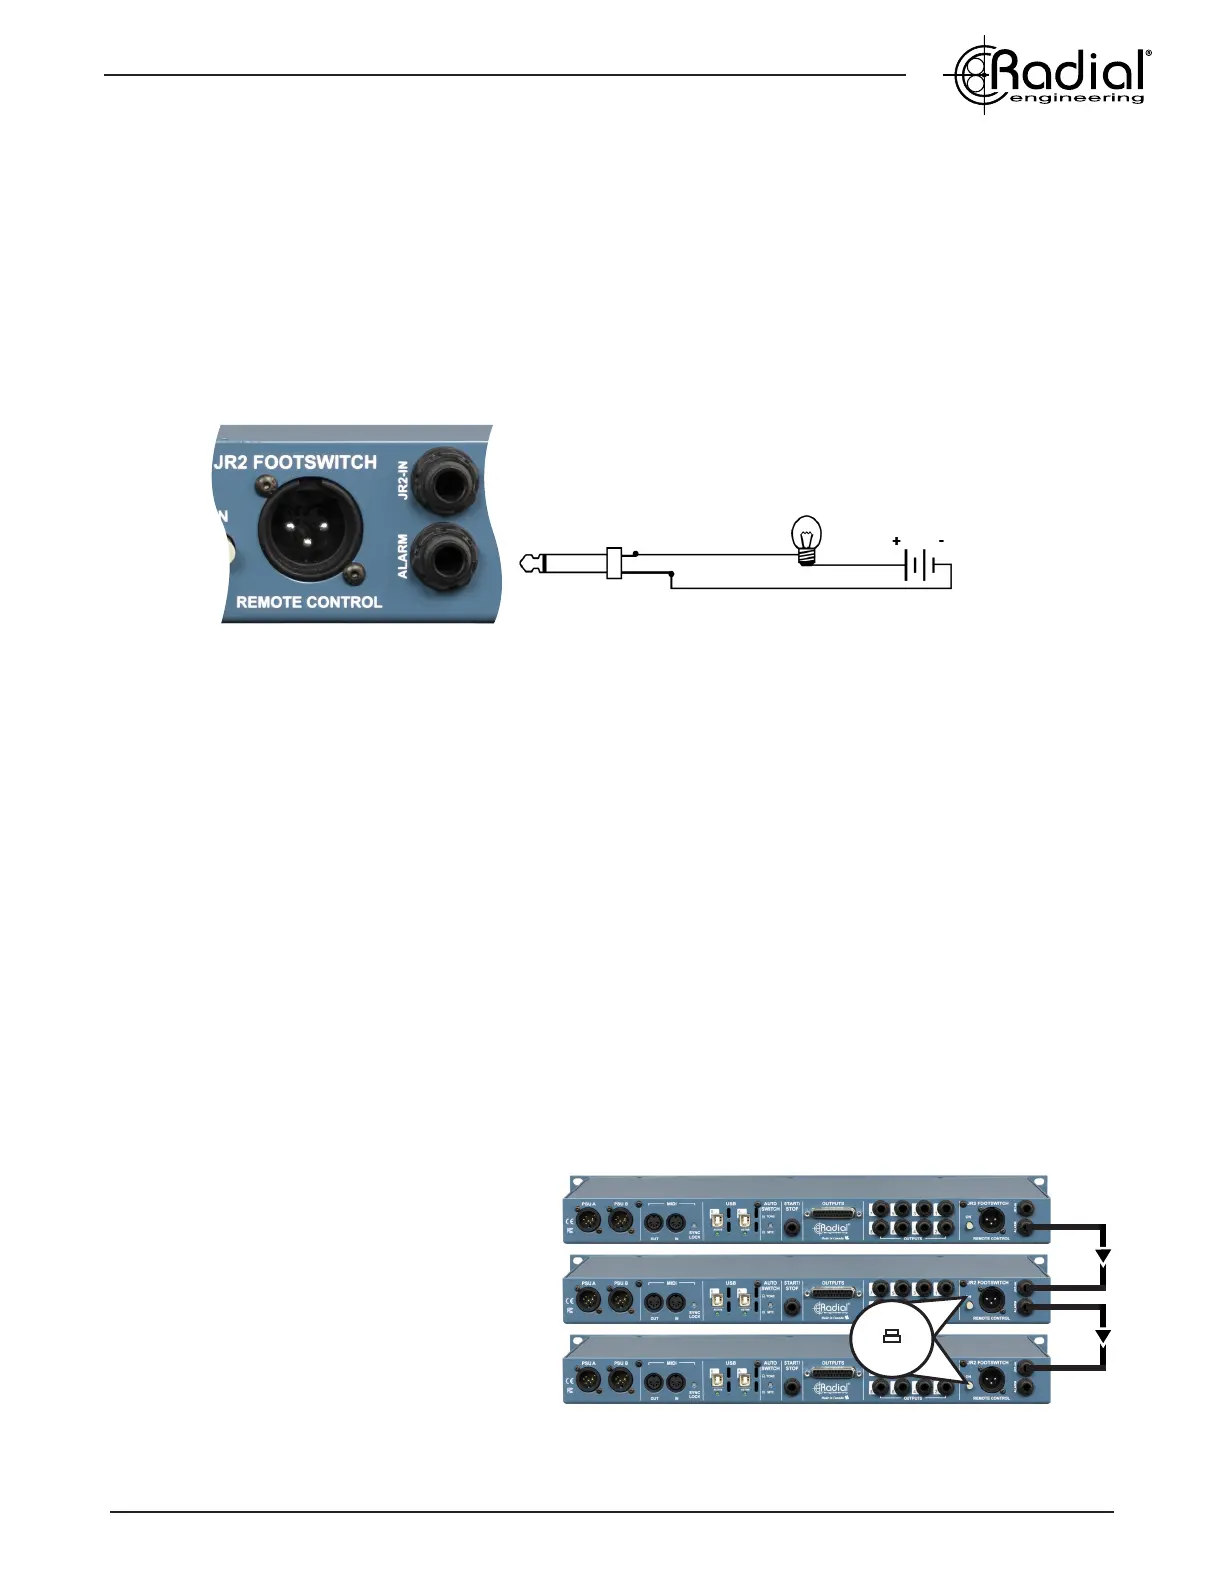
Linking multiple SW8-USB units using 1/4” TRS cables
On
USING THE ALARM OUTPUT
When in Auto-Switch mode, the SW8-USB can seamlessly switch over to the backup (B) computer. This can occur
without a noticeable gap in audio playback, so unless you were looking at the front panel of the SW8-USB you
wouldn’t know that the switch had occurred and you were running on your backup system.
For this reason, the SW8-USB is equipped with an ALARM output that can be connected to an external circuit to
trigger a beacon or an audible alarm that can be easier to identify during a performance. This output features a
special 24 Volt relay that can be connected to an external circuit and power supply as shown below, with a standard
1/4” TS jack connected to the ALARM output.
Normally, the relay is in an ‘open’ state preventing current from owing through the external circuit and activating the
beacon. However, when the SW8-USB detects a dropout at the auto-switch input and switches over to the backup
(B) computer the relay closes, allowing current to ow through the external alarm, while simultaneously illuminating
the ALARM LED on the front panel. Once good signal is again fed to the Auto-Switch input and the RESET button
is pressed, the SW8-USB switches back to the primary (A) inputs and the external alarm turns off.
Using the ALARM output to trigger an external device
DC Power Supply
5-12 Volts
External Beacon
SYNCHONIZING MULTIPLE SW8-USB UNITS
Up to three SW8-USB units can be linked together to provide as many as 24 channels of simultaneous playback
tracks for larger productions, while retaining the powerful switching capabilities of the SW8-USB. You can connect
each SW8-USB directly to each computer with USB cables, or you can use two hubs (one for the primary computer,
one for the backup) to free up available ports on your computers. If using a hub to connect multiple SW8-USBs,
ensure it is equipped with the Thunderbolt
TM
protocol - this is required to provide a high enough transfer speed for
connection to multiple SW8-USB units simultaneously.
To begin, connect your rst SW8-USB to the primary computer and open the Audio Devices window in Audio MIDI
Setup. Press the ‘+’ button in the lower left corner of the window and select ‘Create Aggregate Device’ - a new
aggregate device will appear on the left side that you can rename by double-clicking on it. With this new aggregate
device selected, check on the ‘Use’ box to select the connected SW8-USB. Connect the next two SW8-USB units
to your computer in turn, checking the box next to the name ‘Radial SW8-USB’ each time to add them to the
aggregate. In your Digital Audio Workstation, select your aggregate device as the enabled output device.
To ensure all three SW8-USB units switch
simultaneously, treat the rst SW8-USB as the
master unit and use its ALARM output to control
the remaining units in the chain. Connect a 1/4”
TRS cable from the ALARM output on the rst
SW8-USB to the JR-2 IN on the second unit, and
repeat this process for the third SW8-USB.
Ensure that the JR-2 ON switches are engaged
on the second and third SW8-USB, and that front
panel AUTO ON and STANDBY functions are
disengaged on these units.