Radiolink Electronic Ltd
www.radiolink.com
Mission Planner Setup
Battery measurement is primarily set up in the Mission Planner ‘s INITIAL SETUP -- Optional Hardware --
Battery Monitor screen.
Enter the properties your module can measure, the type of module, the type of flight controller, and the
battery capacity:
Monitor: Voltage and Current or Battery Volts
Sensor: Supported power module, or “Other”
APM ver: Flight controller (e.g. Pixhawk )
Battery Capacity: Battery capacity in mAh
The bottom section of the the Battery Monitor screen allows you to calibrate the voltage/current
measurement in order to verify that the measured voltage of the battery is correct. You can also set the
Sensor selection list to Other and use the calibration process to configure an “unknown” power module.
To calibrate the voltage reading:
1. Check the voltage of your LiPo battery with a hand-held volt meter or a power analyzer
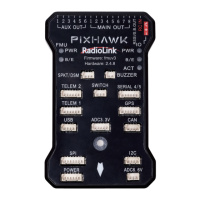
2. Connect your PIXHAWK to your computer and plug in the LiPo battery
3. Check the voltage through the Mission Planner ‘s INITIAL SETUP | Optional Hardware | Battery Monitor
screen or on the Flight Data screen’s HUD or Status tab.
 Loading...