Radiolink Electronic Ltd
www.radiolink.com
5.4 ESC Calibration
ESC calibration will vary based on what brand of ESC you are using, so always refer to the documentation for
the brand of ESC you are using for specific information (such as tones). “All at once” calibration works well for
most ESCs, so it is good idea to attempt it first and if that fails try the “Manual ESC-by-ESC” method.
If using BLHeli and/or DShot ESC’s, please refer to DShot and BLHeli ESC Support for setup.
Some ESCs like the DJI Opto ESCs do not require and do not support calibration, so skip this page
completely
Some brands of ESC do not allow calibration and will not arm unless you adjust your radio’s throttle end-
points so that the minimum throttle is around 1000 PWM and maximum is around 2000. Note that if you
change the end-points on your TX you must re-do the Radio Calibration. Alternatively with Copter-3.4 (and
higher) you may manually set the MOT_PWM_MIN to 1000 and MOT_PWM_MAX to 2000.
If using OneShot ESCs set the MOT_PWM_TYPE to 1 (for regular OneShot) or 2 (for OneShot125). Note only
supported in Copter-3.4 (and higher).
Begin this procedure only after you have completed the radio control calibration and Connect ESCs and
motors part of the Assembly Instructions. Next follow these steps:
Before calibrating ESCs, please ensure that your copter has NO PROPS on it and that the PIXHAWK is NOT
CONNECTED to your computer via USB and the LiPo battery is disconnected.
ESC calibration steps:
1. Turn on your transmitter and put the throttle stick at maximum.
2. Connect the Lipo battery. The autopilot’s red, blue and yellow LEDs will light up in a cyclical pattern. This
means the it’s ready to go into ESC calibration mode the next time you plug it in.
3. With the transmitter throttle stick still high, disconnect and reconnect the battery.
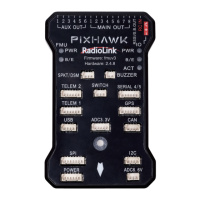
4. For PX4 or Pixhawk, press and hold the safety button until it displays solid red.
5. The autopilot is now in ESC calibration mode. (On an APM you may notice the red and blue LEDs blinking
alternatively on and off like a police car).
6. Wait for your ESCs to emit the musical tone, the regular number of beeps indicating your battery’s cell
count (i.e. 3 for 3S, 4 for 4S) and then an additional two beeps to indicate that the maximum throttle has been
captured.
7. Pull the transmitter’s throttle stick down to its minimum position.
8. The ESCs should then emit a long tone indicating that the minimum throttle has been captured and the
calibration is complete.
9. If the long tone indicating successful calibration was heard, the ESCs are “live” now and if you raise the
throttle a bit they should spin. Test that the motors spin by raising the throttle a bit and then lowering it again.
10. Set the throttle to minimum and disconnect the battery to exit ESC-calibration mode.
6. AutoTune
AutoTune attempts to automatically tune the Stabilize P, Rate P and D, and maximum rotational accelerations
to provide the highest response without significant overshoot. Copter needs to be “basically” flyable in AltHold
mode before attempting to use AutoTune as the feature needs to be able to “twitch” the copter in the roll and
pitch axis.
Position Hold during AutoTune is available in Copter 3.5 (and higher).

 Loading...