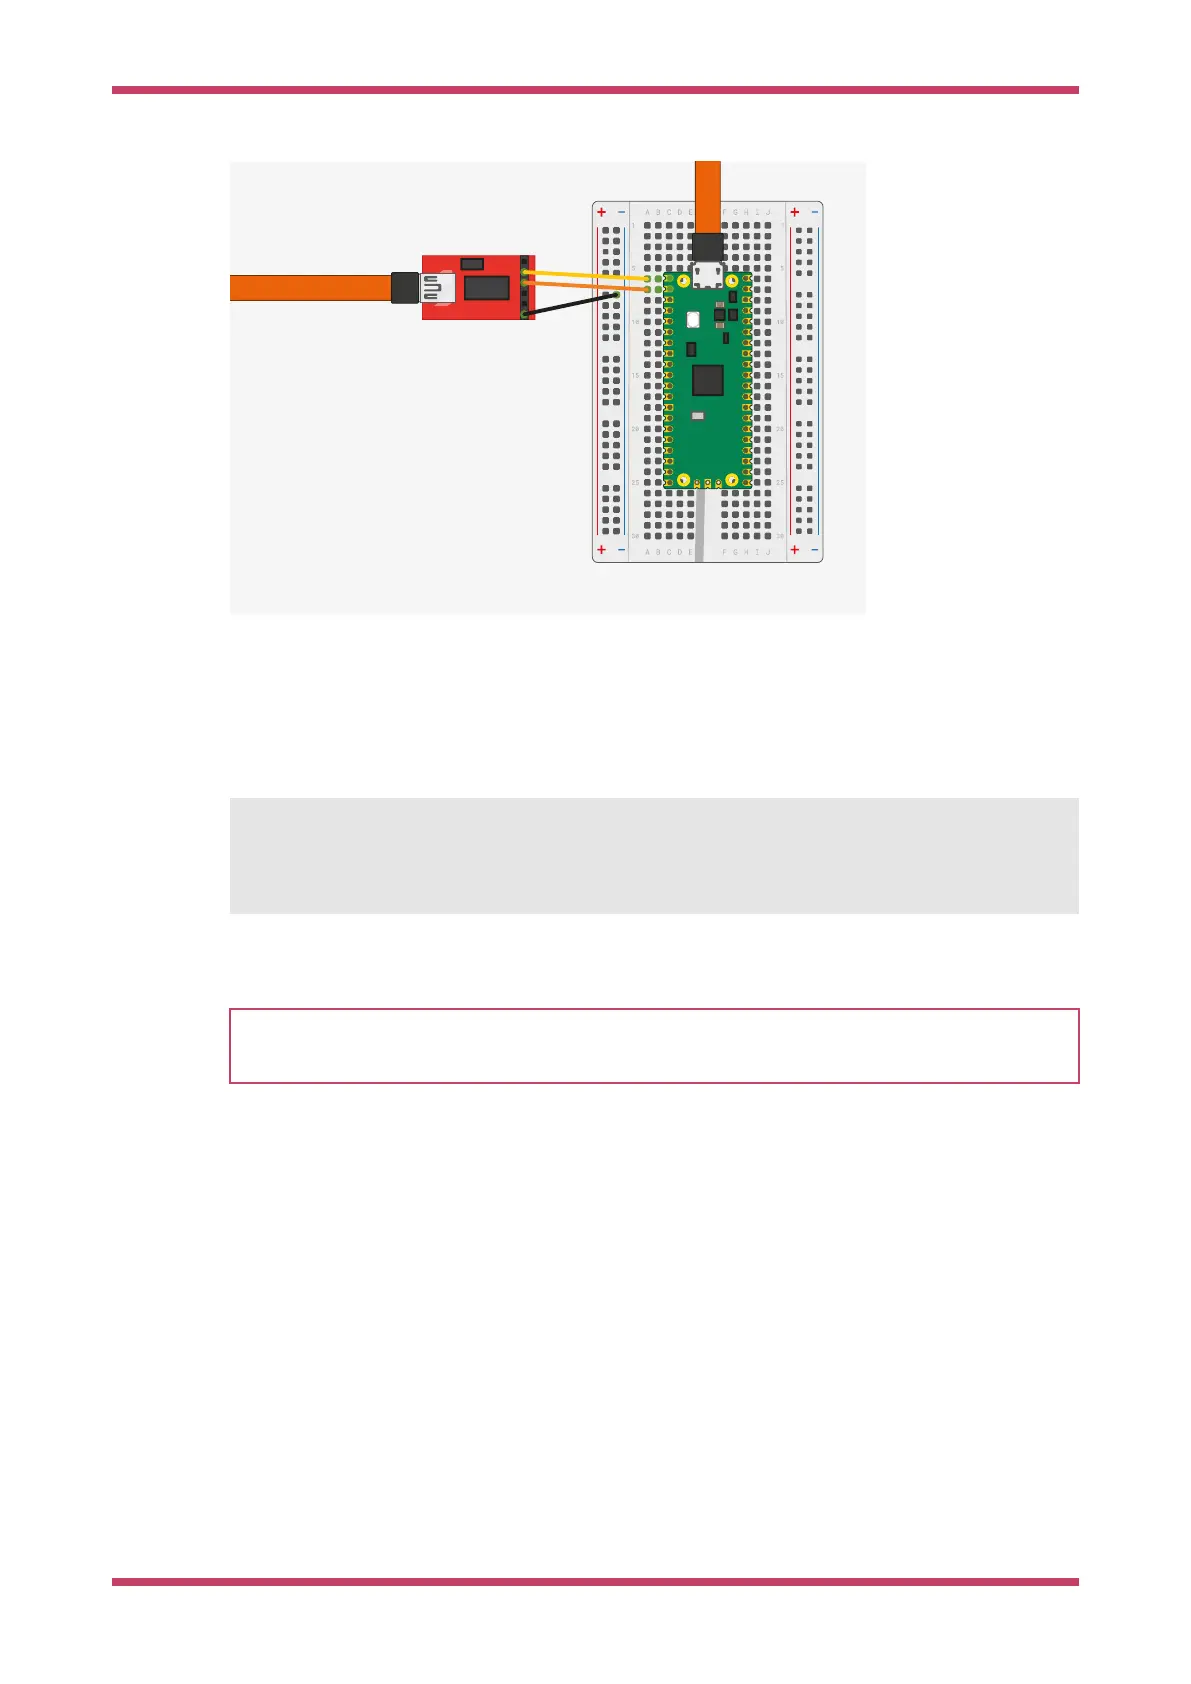
EasyManua.ls Logo

Raspberry Pi RP2040 User Manual

Raspberry Pi RP2040
77 pages
To Next Page IconTo Next Page
To Previous Page IconTo Previous Page
Page #46 background imageLoading...
Page #46 background image
Figure 21. Sparkfun
FTDI Basic adaptor
connected to the
Raspberry Pi Pico
So long as you’re using a recent version of Windows 10, the appropriate drivers should already be loaded. Otherwise see
the manufacturers' website for
FTDI Chip Drivers.
Then if you don’t already have it, download and install
PuTTY. Run it, and select "Serial", enter 115,200 as the baud rate
in the "Speed" box, and the serial port that your UART converter is using. If you don’t know this you can find out using
the
chgport command,
C:> chgport
COM4 = \Device\ProlificSerial10
COM5 = \Device\VCP0
this will give you a list of active serial ports. Here the USB to UART Serial converter is on
COM5.
NOTE
If you have multiple serial devices and can’t figure out which one is your UART to USB serial converter, try unplugging
your cable, and running
chgport again to see which COM port disappears.
After entering the speed and port, hit the "Open" button and you should see the UART output from the Raspberry Pi Pico
in your Terminal window.
Getting started with Raspberry Pi Pico
9.2. Building on MS Windows 45

Table of Contents

Question and Answer IconNeed help?

Do you have a question about the Raspberry Pi RP2040 and is the answer not in the manual?

Raspberry Pi RP2040 Specifications

General IconGeneral
ProcessorDual-core Arm Cortex-M0+
Clock Speed133 MHz
SRAM264 KB
GPIO30
USBUSB 1.1 Host/Device
PWM16 channels
UART2
SPI2
I2C2
Temperature Range-20°C to +85°C
Operating Voltage1.8V to 3.3V
FlashExternal QSPI flash
I/O InterfacesSPI, I2C, UART, PWM
ADC4 × 12-bit ADC channels

Summary

Chapter 1. Quick Pico Setup

Quick Pico Setup

Steps to quickly set up your development environment for Raspberry Pi Pico, including script execution.

Chapter 2. The SDK

Get the SDK and examples

Instructions for downloading and cloning the Raspberry Pi Pico SDK and example repositories.

Install the Toolchain

Steps to install necessary tools like CMake and the GNU Embedded Toolchain for Arm.

Chapter 3. Blinking an LED in C

Build, Load, and Run 'Blink'

Steps to build, load, and run the 'Blink' example program on the Raspberry Pi Pico.

Chapter 4. Saying 'Hello World' in C

Serial Input and Output

Explains how serial input/output works on the Pico via UART or USB CDC.

Build and Run 'Hello World'

Steps to build, flash, and run the 'Hello World' example.

Chapter 5. Flash Programming with SWD

Install OpenOCD

Instructions for installing OpenOCD, a debug translator for SWD.

SWD Port Wiring and Loading

Details on wiring the SWD port and loading programs via OpenOCD.

Chapter 6. Debugging with SWD

Debug Build and GDB Installation

Creating a debug build and installing GNU Debugger (GDB) for interactive debugging.

Chapter 7. Using Visual Studio Code

Chapter 8. Creating Your Own Project

Appendix A: Using Picoprobe

Related product manuals