Adaptor cable
Compatible
transducer
Compatible
display / unit
A80331 —
CPT-DV /
CPT-DVS (3
keyway ) to Legacy
Dragony 6 /
Dragony 7 (1
keyway) adaptor
cable
• Updated
CPT-60
• Updated
CPT-70
• Updated
CPT-80
• CPT-DVS
• CPT-DV
• Legacy
Dragony 6
• Legacy
Dragony 7
A80332 —
Legacy (1
keyway) CPT-60 /
CPT-70/ CPT-80
transducer to
update Dragony
6 and Dragony
7 (3 keyway )
adaptor cable
• Legacy CPT-60
• Legacy CPT-70
• Legacy CPT-80
• Updated
Dragony-6
• Updated
Dragony-7
Legacy and updated products
Dragony 6, Dragony 7 displays and CPT-60
/ CPT-70 / CPT-80 transducer designs have
been modied to include the improved 3 keyway
connectors.
The table below identies the effective manufacturing
date for the improved keyway connectors.
Product
3 keyway
introduction date
3 keyway
introduction
serial number
Dragony 6
(E70085)
January 2015 E700850150001
Dragony 7
(E70231)
November 2014 E702311140712
CPT-60 (A80195)
December 2014 A801951240023
CPT-70 (A80278)
January 2015 A802780150001
CPT-80 (A80279)
January 2015 A802790150001
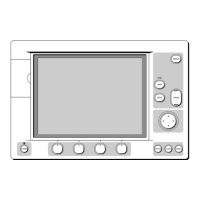
5.3 Cable connection
The display has a combined power and transducer
cable that is attached to the transducer.
1. Display rear panel connection.
2. Transducer with cable attached.
3. Drain wire (The drain wire is the wire with a
sheath).
4. Black wire (12 V dc negative).
5. Red wire (12 V dc positive).
Power distribution
Raymarine recommends that all power connections
are made via a distribution panel.
• All equipment must be powered from a breaker or
switch, with appropriate circuit protection.
• All equipment should be wired to individual
breakers if possible.
Connecting the cable to the display
1. Ensure the locking collar is in the unlocked
position.
Cables and connections 35
 Loading...