29
.Ifrequired,applyadditionalmarine-gradesealantaroundthebaseofthetransducerstemand
anti-rotationbolt.
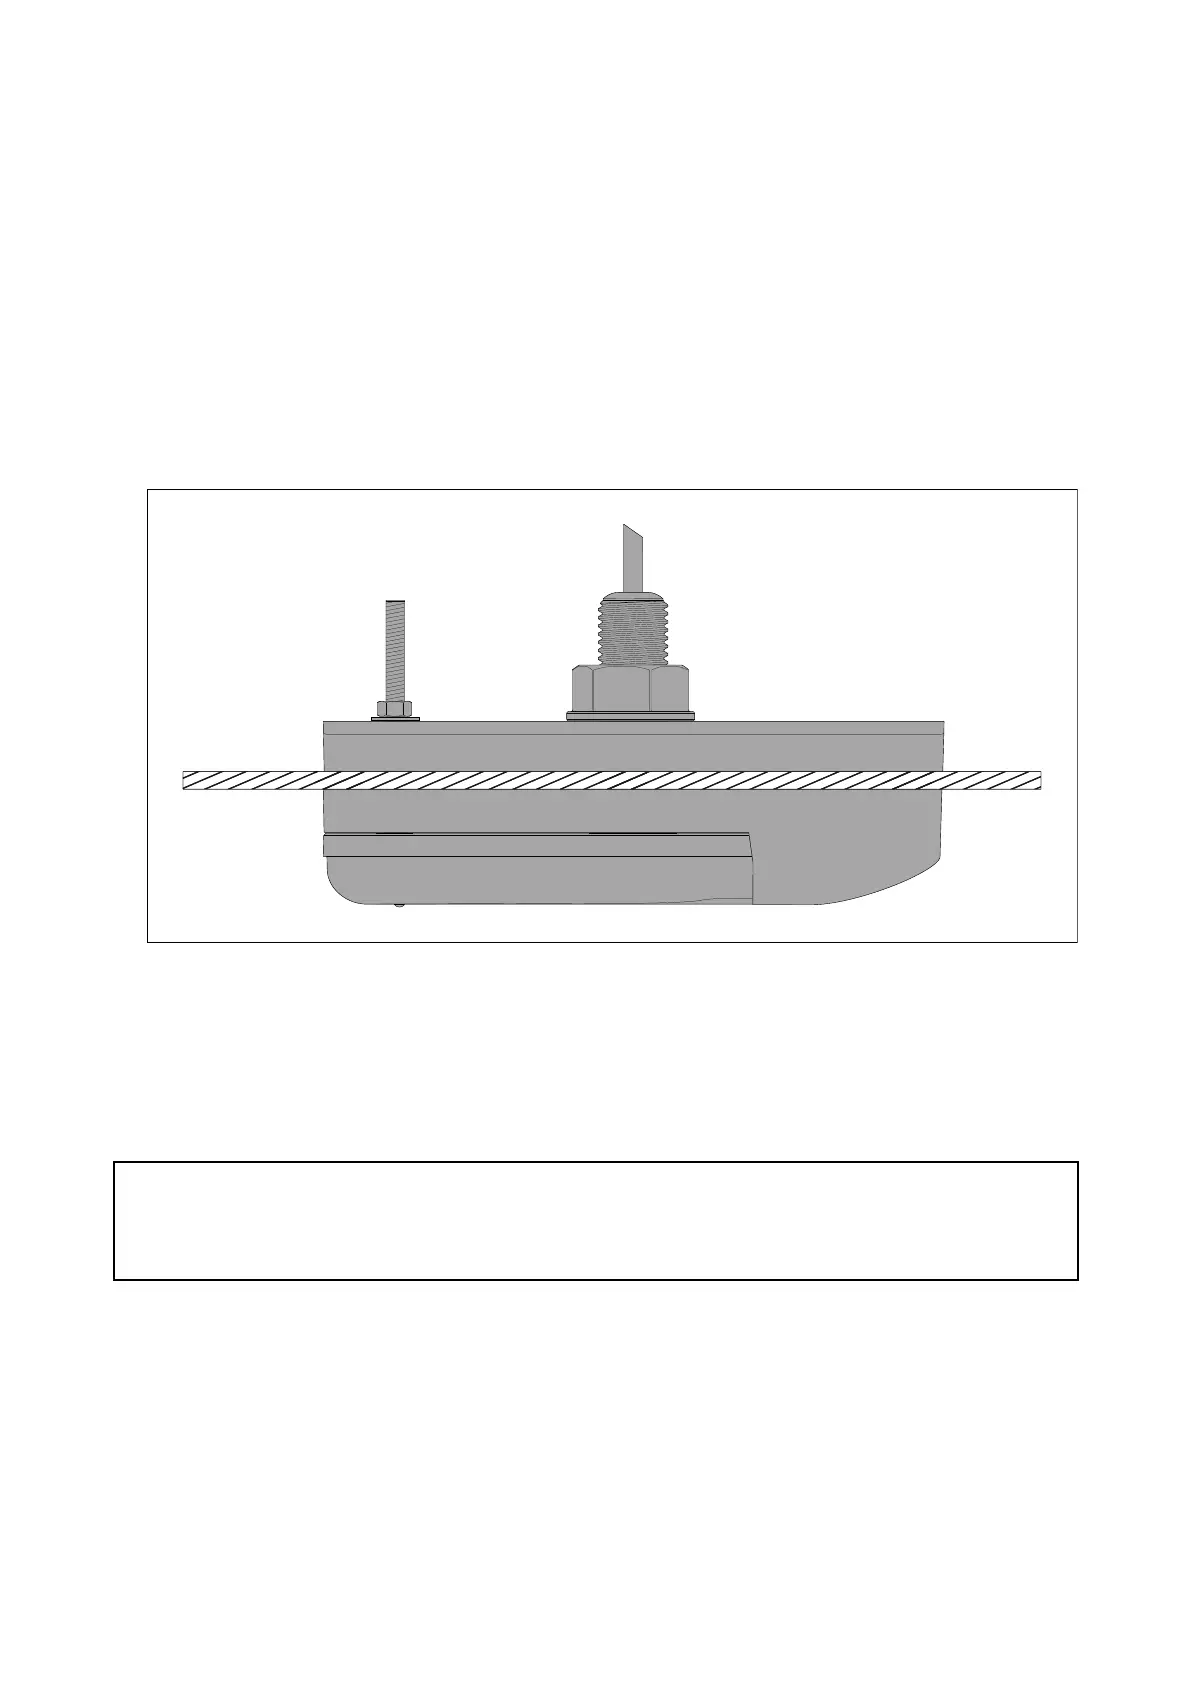
30.Guidethetransducercablethroughthehullnut
31.Applyacontinuous,thickbeadofmarine-gradesealanttothebottomoftheplastichullnut.
32.Ensuringthatthefairingblockpiecesandtransducerdonotmove,securethetransducer
assemblybytighteningthehullnutbyhand.
33.Slidethewasherovertheanti-rotationbolt.
34.Screwtheanti-rotationnutontotheboltandtighten,usinga13mm(1/2in)wrench(spanner).
35.Addafurtherquarterturnusinga44mm(13/4in)wrench(spanner).
Inordertopreventleaksandtransducermovementwhenhitbyobjectsorwaves,ensurethat
thenutisadequatelytightened.Y oushouldseethesealantprotrudingfromtheedgesofthe
appliedsurfaces.
36.R emoveanyexcessmarine-gradesealant.
37 .Ensurethatthemarine-gradesealanthasfullycured
Refertothesealantmanufacturer’sinstructionsforcuringtimes.
38.Unlesslocalenvironmentalregulationsprohibit,applyawaterbasedanti-foulingpainttothe
bottomfaceofthetransducer ,ensuringalloftheexternallyexposedtransducersurfacesare
coatedandthepaintoverlapsontothehull.
39.Checkforleaksaroundthetransducerimmediatelyuponputtingthevesselbackinthewater.
Important:
DoNO Tleaveyourvesselinthewateruncheckedafterinstallingyourtransducer.Verysmall
leaksmaynotbeimmediatelyobvious,andconsiderablebilgewatercouldaccumulateoverthe
courseofaday,orovernight.
40 .Checkforleaksatregularintervalsafterinstallationuntilyouaresatisfiedthattherearenoleaks.
41.Ensurecheckingforleaksaroundthetransducerisaddedtoyourroutinevesselmaintenance
schedule.
Installation35
 Loading...