
E
Erik JohnsonAug 5, 2025
Why does my Reboot Welding System have excessive spatter?
- KKristen BakerAug 5, 2025
Excessive spatter in your Reboot Welding System can be caused by a long arc or high current.
Why does my Reboot Welding System have excessive spatter?
Excessive spatter in your Reboot Welding System can be caused by a long arc or high current.
Why is my Reboot Welding System weld cracking?
Cracks in your Reboot Welding System weld can occur due to current being too high, dirty materials, or hydrogen present in the weld from the electrode coating.
What causes porosity in Reboot Welding System welds?
Porosity in Reboot Welding System welds can be caused by humidity in the electrode or a long arc.
Why does my Reboot ARC145 have insufficient penetration?
Insufficient penetration with your Reboot Welding System can result from a high progression speed, welding current that is too low, or narrow chamfering.
What causes inclusions in Reboot Welding System welds?
Inclusions in Reboot Welding System welds can be attributed to poor cleanliness or distribution of the welding passes, or improper movement of the electrode.
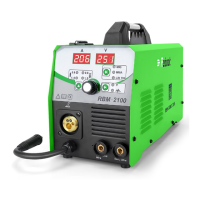
Indicates when the power is turned on. Essential for confirming machine status.
Shows the preset welding current, allowing for accurate adjustments.
Signals overload or internal machine damage, indicating potential maintenance needs.
Used to adjust the welding current for different applications.
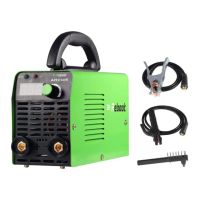
Terminal for installing the welding holder and grounding clamp.
Terminal for installing the welding holder and grounding clamp.
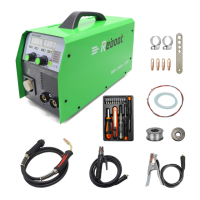
Details the components included with the welding machine, such as welding holder and ground clamp.
Ensures correct voltage, circuit breaker, plug, and extension cord selection for safe operation.
Step-by-step instructions for connecting the welding holder and ground clamp.
Guidance on how to adjust the current using the designated knob.
Instructions for connecting the ground clamp to a clean metal surface for conductivity.
Recommendations for ideal welding rod to workpiece distance and handling adhesion.
Lists suitable and unsuitable welding rod types for optimal performance.
Explains the role of the EMC board in isolating internal and external circuits.
Details the all-copper transformer and high-power capacitors for stability.
Highlights the thicker radiator for enhanced heat dissipation.
Describes the imported IGBTs and rectifier tubes for stable current output.
Identifies common issues like excessive spatter, craters, inclusions, and their causes.
Addresses power-related issues such as machine not turning on or thermal overload.
Provides recommended settings for welding thickness, electrode diameter, and current.
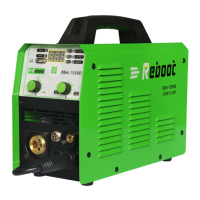
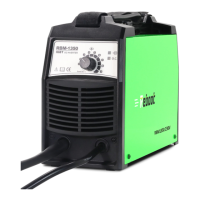
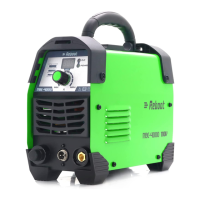
The Reboot ARC145 is an intelligent and user-friendly welding machine designed for manual welding, offering excellent welding performance, versatility across various scenarios, and superior welding results. It's highly regarded by welding enthusiasts and is also suitable for beginners due to its ease of use and quick learning curve.
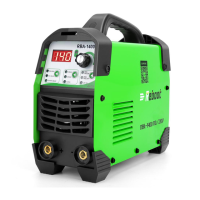
The ARC145 is a stick welding machine that supports both AC 110V and AC 220V voltage input, making it adaptable to different power supplies. It features a clear digital display for preset current and indicators for power and fault conditions. The machine is equipped with a current adjustment knob for precise control over the welding process.
The ARC145 is designed for ease of use, even for beginners. It supports welding rods below 4.0mm (5/32in), with common sizes being 2.5mm (3/32in) and 3.2mm (1/8in). It's compatible with various electrode types:
The machine can weld carbon steel with thicknesses ranging from 1-8mm (1/64-5/64in) and stainless steel from 1-5mm (1/64-7/32in). It is important to note that this machine cannot weld aluminum. For carbon steel, carbon steel electrodes should be used, and for stainless steel, stainless steel electrodes are required.
Upon powering on, the fan at the back of the machine should rotate, and the digital display on the panel should indicate normal operation. The fan may continue to rotate for a few seconds after power-off to reduce the machine's working temperature, which is normal.
The ARC145 is designed with internal protection mechanisms. During high-strength continuous welding, the machine may enter protection mode, indicated by the "OC" light on the panel. After a period of heat dissipation, the machine will automatically return to normal operation.
For any problems that cannot be solved, or if you are interested in translating the manual into other languages, contact service@mirthtek.com.
| Brand | Reboot |
|---|---|
| Model | ARC145 |
| Category | Welding System |
| Language | English |