18
Fig. 6.1A
A B
73
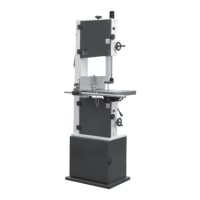
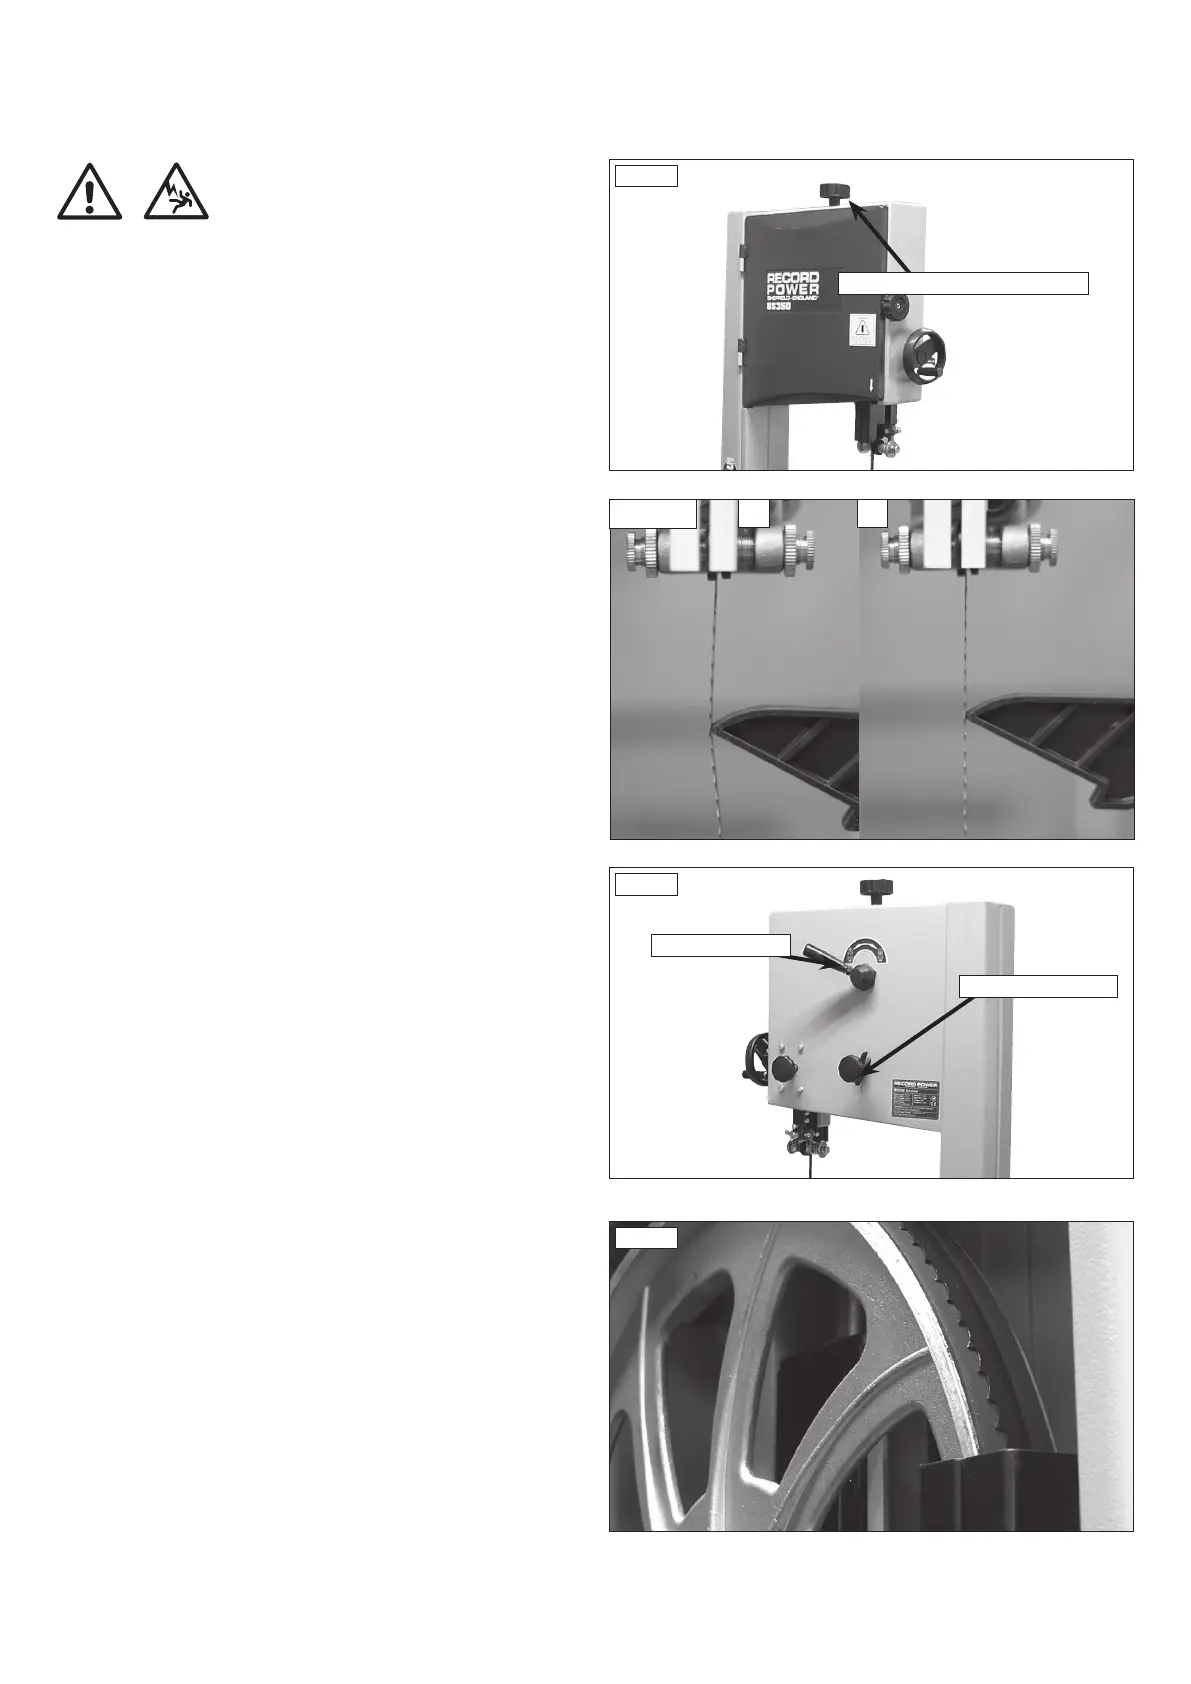
6.1 Tensioning the blade
The blade tensioning knob should be used to increase or decrease tension
(See Fig. 6.1). The only truly accurate way to check a blade is with a
tension meter. These are very expensive so most users may need another
method. The blade tension indicator which is located inside the main top
housing of the bandsaw, should be used first, as a guide to the correct
tension. We then suggest testing the tension by the amount the blade will
deflect sideways. First set the guides to 150 mm above the table, making
sure the saw is turned off. Push the blade sideways with a reasonable
amount of pressure using the push stick. A correctly tensioned blade should
not move more than 4 mm sideways, Fig. 6.1 A. If the blade is over-
tightened, as in Fig 6.1 B, the blade could be damaged.
However perhaps the most tried and tested way of blade tensioning is
simply: If the bandsaw is cutting accurately then the blade is tensioned
correctly, if the blade tends to wander and an accurate cut cannot be
achieved then the blade tension needs adjusting.
If the machine is to stand idle for a period it is good practice to slacken
tension and re-tension when next using. On the BS350 the simplest way to
release and re-tension the blade is to use the blade tension release cam
handle located on the back on the machine.
6.2 Tracking the Bandsaw blade
Isolate the machine from the supply by unplugging the mains plug. Set
the tracking of the blade before setting the blade guides. Once the blade
is tensioned, track the blade by turning the upper bandwheel by hand and
adjusting the tracking knob (See Fig.6.2). When viewed from the back
of the machine turning the tracking knob clockwise the blade will move
towards the back of the bandwheel, by turning the tracking knob anti-
clockwise the blade will move to the front of the bandwheel. The blade
should run as close to the centre of the bandwheel as possible, as shown
(See Fig.6.3). On narrow blades (eg. 1/4" and 3/8") it may be necessary
to run the blade to rear of the bandwheel. After the blade is tracked in
the desired position on the bandwheel, rotate the band wheel several
more times by hand without any further adjustment ensuring that the
blade remains in the same position. Once this has been achieved lock the
tracking knob with the winged nut (See Fig.6.2).
It takes a few revolutions of the bandwheel for the effect of adjustment
on the tracking knob to become apparent. To avoid over-adjusting, make
small gradual adjustments on the tracking knob and revolve the bandwheel
on a few times to check the effect before making further adjustments. The
machine should then be run for a few seconds before any adjustment of
guides is carried out.
Fig.6.2
Fig.6.3
CAM HANDLE
TRACKING KNOB
6. Bandsaw Blade Set Up
Fig.6.1
BLADE TENSIONING KNOB
CAUTION!
Before carrying out any adjustments or maintenance ensure
that the machine is isolated and disconnected from the
electricity supply.