Do you have a question about the ReDeTec ProtoCycler and is the answer not in the manual?
General safety guidelines for operating ProtoCycler.
Specific safety precautions for the extrusion process.
Overview of the ProtoCycler's physical components and terminology.
Detailed steps and considerations for operating the grinding unit.
Crucial safety warnings and precautions for grinder use.
Instructions for the initial assembly and setup of the grinder.
Step-by-step guide on how to operate the grinder.
Method for sorting ground plastic particles by size for extrusion.
Guidelines on regrind particle size and mixing with virgin plastic.
Proper storage of the puller wheel to prevent flat spots.
Importance of keeping the ProtoCycler clean for optimal performance.
Procedures for drying and storing plastic before extrusion.
Limitations regarding transparent plastics and colorant use.
Instructions for assembling the filament spooler.
Detailed steps for assembling the ProtoCycler spooler unit.
Tools and software required for light guide alignment.
Understanding the purpose and process of light guide alignment.
First step in alignment: adjusting sensor height with thumbscrews.
Aligning LEDs to ensure even light distribution across the sensor.
Final calibration step using dowels to ensure accurate diameter readings.
Introduction to extrusion modes and preparation steps.
Preliminary steps before starting any extrusion process.
Guide to operating the ProtoCycler in automatic extrusion mode.
Detailed sequence of operations for automatic extrusion.
Instructions for manual extrusion control.
Step-by-step instructions for manual extrusion control.
General introduction to purging the ProtoCycler system.
Procedure for a short purge, e.g., color changes.
Procedure for disco purging for material transitions.
Best practices and advice for effective purging.
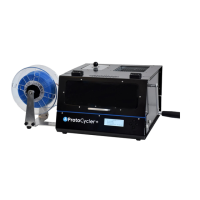
The ProtoCycler is an advanced extrusion system designed to provide an easy-to-use experience for recycling and filament creation. It features an automated control system to monitor and manage the extrusion process, making it suitable for both novice and experienced users. The device allows users to experiment with new materials and colors through its software, offering flexibility in filament production.
The ProtoCycler primarily functions as a plastic recycling system that grinds plastic waste and extrudes it into filament for 3D printing. The process involves several key stages: grinding, sorting, drying, and extrusion. The device is equipped with a grinder for breaking down plastic parts, a sorting mechanism to ensure appropriate particle size for extrusion, and an extruder that melts and forms the plastic into filament. A spooler system then winds the extruded filament onto spools.
The ProtoCycler's grinder is powered on at all times during operation and relies on an electromagnet interlock for safety. This interlock engages the grinder drive train only when power is supplied and disengages at a set torque limit to prevent damage. The grinder operates only when both the grinder lid and drawer are correctly engaged. Users can place plastic parts into the grinder hopper, secure the lid, and then operate the grinder handle. If the load exceeds the maximum, the interlock disengages, requiring the user to reverse the grinder and reduce the load.
After grinding, the material needs to be sorted to ensure optimal particle size for extrusion. The grinder drawer contains a sorting mechanism with two levels of offset holes that sift ground material. Users lift the sorting mechanism, shake it to allow smaller particles to fall through, and then re-grind any oversized bits. Proper cleaning of the catch container for sorted material is crucial to avoid contamination.
The size of regrind particles is critical for preventing jams. The ProtoCycler's extruder accepts pellets between 0.125" and 0.2" in diameter, with an Extruder Hopper Filter providing a final safeguard against oversized particles. It is recommended to mix regrind with virgin pellets, with a 50% recycled plastic ratio being ideal, though up to 70% can be successful with well-ground material. Extruding 100% regrind is not recommended due to the risk of jamming.
Plastic must be dry and clean before extrusion, as moisture can cause bubbles and affect filament quality. The ProtoCycler supports PLA and ABS, with specific drying temperatures and times provided (e.g., 80°C for PLA and 80-90°C for ABS, both for 4 hours). Dried plastic should be stored in airtight containers with desiccants to prevent reabsorption of moisture. The extruder hopper should also be inspected for dust and contaminants before use.
The diameter sensors used for control require opaque filaments. For naturally transparent plastics like PLA, colorants must be added to make the filament opaque for proper sensor readings.
The spooler system needs to be assembled and configured before extrusion. This involves sliding the spooler shaft, spacer, and spool hubs into position, securing them, and then inserting the assembly into the ProtoCycler's base. The spooler motor is then plugged in, and spool geometry settings (width and diameter) are configured via the ProtoCycler's User Interface.
Accurate light guide alignment is essential for the ProtoCycler's vision system to verify and maintain filament diameter. This involves adjusting the sensor height using thumbscrews and ensuring the LED light evenly illuminates the sensor. The process includes aiming the LED up or down by loosening and tightening screws or adjusting a shaft knob, depending on the light guide version. Calibration is performed using dowels of known diameters (e.g., 1.83mm for the puller sensor and 2.56mm for the nozzle sensor) to ensure accurate readings. The graphical user interface (GUI) helps monitor raw data to confirm proper alignment, showing a "U-shaped" trough when a dowel is in place.
Before starting extrusion, the spooler must be correctly set up. The ProtoCycler should be operated in a clean, dry environment at ambient air temperature (~23°C). The unit is primed with plastic and calibrated before shipping, but purging may be required to flush out old plastic if it has absorbed moisture.
Regular cleaning of the ProtoCycler is important to prevent defects in output filament. The extruder hopper should be inspected for dust and contaminants. Compressed air ("computer duster") is recommended to clear dust from the light sensors. A soft material, like a skinny piece of PLA filament, can be used to clean the photoresistor slot. Metal or sharp objects should never be used to clean the diameter sensors to avoid permanent damage.
If un-meltable or dissimilar materials enter the system, the nozzle may become clogged. The Nozzle Cap contains a breaker plate and screen to build stable pressure and act as a defense against contaminants. If the screen becomes clogged, users should contact ReDeTec support for assistance, as this process requires special care and safety.
The puller wheels have soft silicone tires that can develop flats if left stationary under pressure for extended periods. To prevent this, it is important to disengage the spring and rotate the puller idler wheel out of position when the device is not in use.
Purging is necessary for transitioning between different plastics or colors.
| Filament Diameter | 1.75mm |
|---|---|
| Output Material | 3D printer filament |
| Supported Materials | ABS, PLA, PETG |
| Connectivity | USB |
| Nozzle Diameter | 0.4mm |
| Input Material | Plastic |
| Power Requirements | 110-240V, 50/60Hz |