Page 19 of 28
Automatic extrusion does not require a computer connection, but it is useful for experimentation
and/or troubleshooting with new materials or different ambient conditions. To connect to a computer,
follow the procedure in the ProtoCycler Command Center guide. Note that for manual extrusion, you
must be connected to ProtoCycler Command Center.
3. Navigate to the “Extrude” screen using the d-pad on the ProtoCycler. Press the right button to select
Extrude and then either “Automatic” or “Manual. Finally, select “Begin Extrusion” – and proceed to the
corresponding section below.
4.3 Automatic Extrusion
ProtoCycler comes with two preloaded extrusion profiles - PLA and ABS. It is important that you have the most recent
firmware and EEPROM loaded onto your ProtoCycler for these profiles to work optimally. Automatic mode also
allows you to upload and run your own custom profiles via the PCC. Please refer to the ProtoCycler Command Center
Overview manual for guidance on what all the different variables are. Custom profiles must be created and uploaded
via the PCC. We suggest creating, testing, and uploading in manual mode extrusion before proceeding with custom
automatic profile extrusion.
4.3.1 Automatic Extrusion Steps
1. After completing steps 1-3 in “Initial Steps for Extrusion”, above, your ProtoCyler will begin preheating to
thermalization temperature. Once up to temperature, the extruder will hold here for 100 seconds to
thermalize the melt section. This allows the hot (melt) section of your device to reach a uniform
temperature throughout before initiating the rest of the extrusion start-up sequence. This may take a few
minutes depending on ambient conditions and the type of plastic you are using.
2. Following thermalization, the extruder will preheat to the extrusion temperature of your selected plastic.
By default this will be either PLA or ABS processing temperatures.
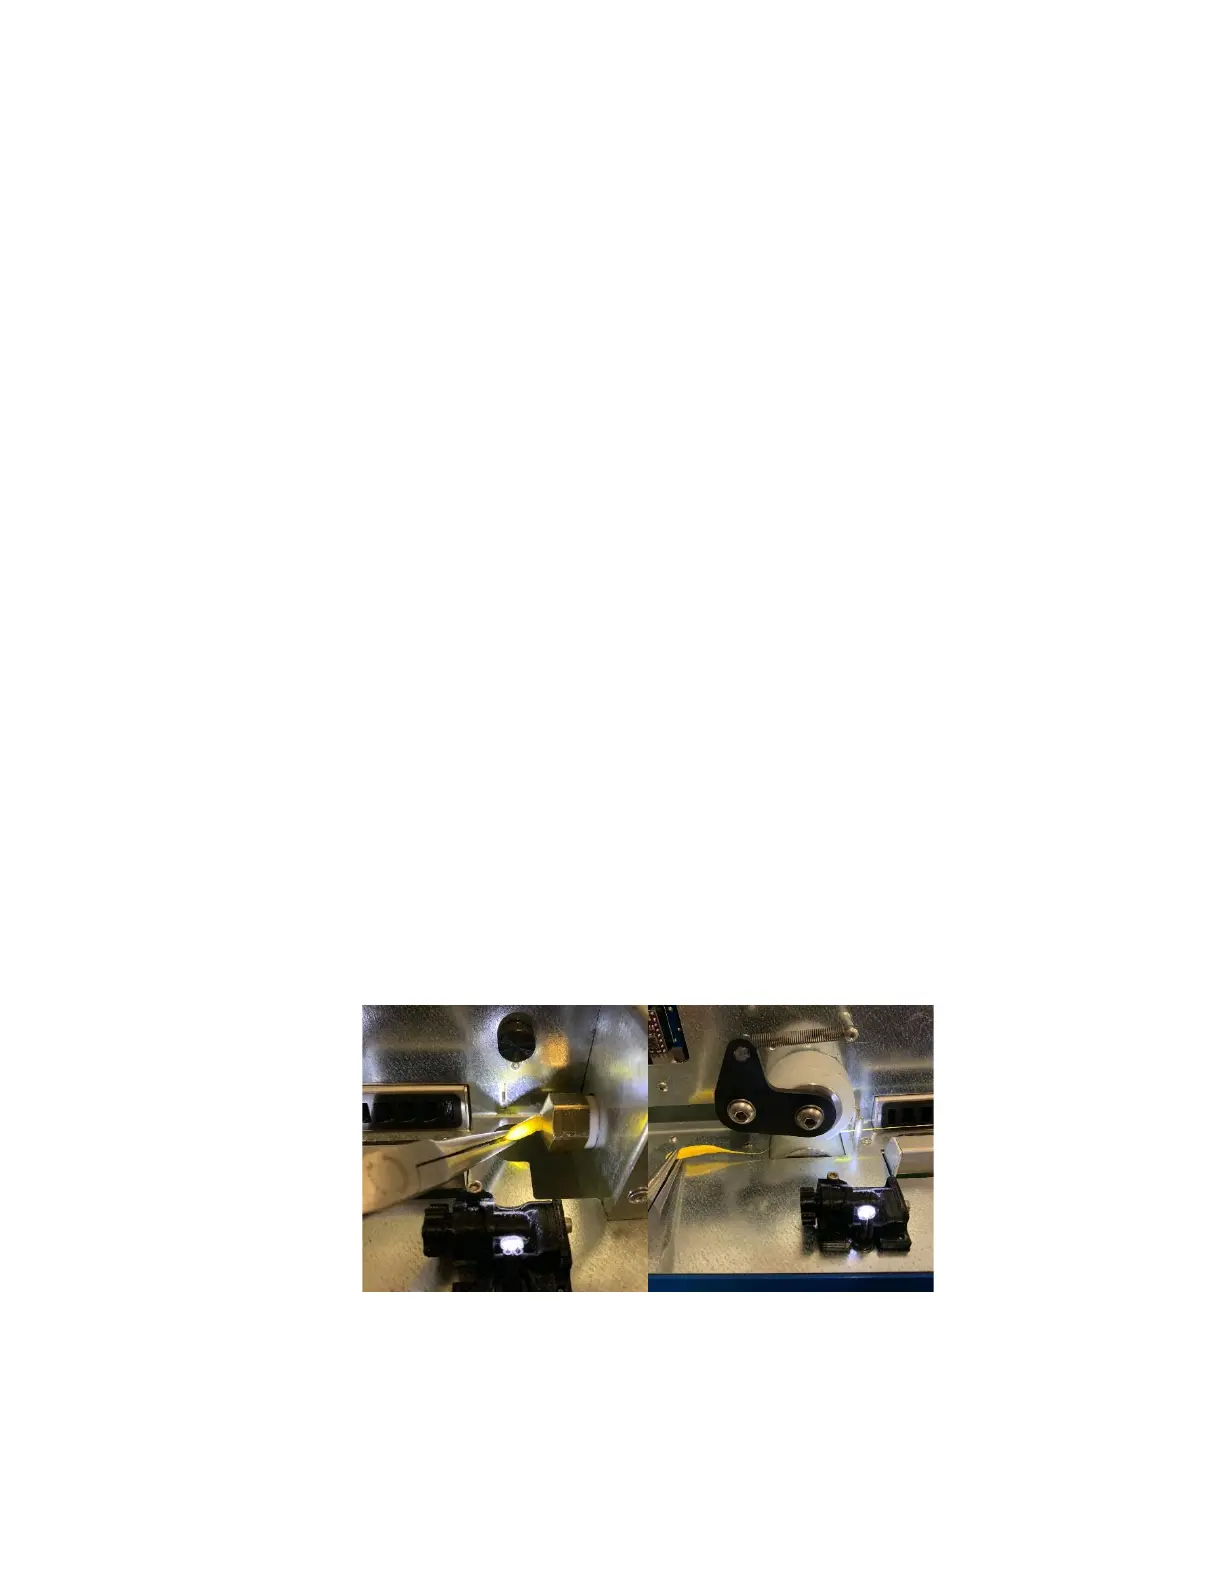
3. Once up to extrusion temperature, you will hear a chime and a prompt on your ProtoCycler’s UI screen
saying “Filament Ready”. At this time, you can now use tweezers or needle nose pliers to feed the plastic
from the nozzle in between and through the puller wheels. Be careful! - The nozzle is extremely hot at this
point in the startup sequence; follow safety guidelines to avoid personal injury or harm. Make sure you
have engaged the puller wheel idler spring! See Figure 15 for reference. Once the filament is being
correctly pulled through the puller wheels, select “Filament Ready” on the D-pad to confirm to ProtoCycler
that it may begin stabilization. Note that for safety concerns, there is a 2 minute timeout feature, and if you
fail to select “Filament Ready” within this time, ProtoCycler will automatically begin cooldown.
Figure 15: Using tweezers or pliers to feed the filament from the nozzle to the puller wheels.
4. ProtoCycler will now enter the “Stabilization” phase. No action is required here. Your ProtoCycler control
system will wait for the filament diameter to become consistent enough to proceed to the spooling phase.
In the meantime, just let the filament “dump” off the front-side of the UI. Stabilization may take a few