Page 13 of 28
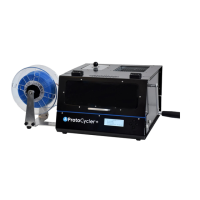
3.5.1 Spooler Assembly Instructions:
Warning: The ProtoCycler must be powered-off when installing and plugging in the spooler. Unplugging or
plugging in the spooler while ProtoCycler is powered can permanently damage the main circuit board!
1. Slide the Spooler Shaft through the bearing in the motor mount bracket in the direction shown.
2. Slide the Spacer onto the shaft so it rests against the bearing and is clear of the pin hole in the shaft.
3. Slide the Pin into the hole in the shaft and hold it there.
4. Slide Spool Hub 1 onto the shaft as shown, ensure the pin seats properly into its groove. NOTE: Spool Hub
1 does NOT have a nut in it!
5. Place a spool over the shaft so it rests against the tapered face of Hub 1.
6. Thread Hub 2 onto the shaft and spin until it is contacting the spool. Now tighten until the hubs are tightly
holding the spool, while ensuring that the spool is being held straight.
7. Slide the shaft into the bushing in the Support Bracket.
8. Ensure the thumb screws in the Spooler Base are as loose as possible, then place the assembly into the base
as shown. Tighten the screws so they are nice and snug.
9. Insert the Spooler Base back into the side of the ProtoCycler and plug the stepper motor into its receptacle,
also located on the left side of the unit.
10. Now it is time to turn on your ProtoCycler and set the spool geometry settings in ProtoCycler's User
Interface.
Failure to correctly set spool geometry may result in improper spreading of filament onto the spool.
i) Plug ProtoCycler's power cord into a grounded outlet and turn on the main power switch.
ii) From the UI Home, select "Settings" and then "Spool size".
iii) In the SPOOL SIZE window, you may now set the width and diameter of the spool. The width figure is
the width contained inside the spool (ie the width filament will be spread over) and the diameter is the
inner diameter that filament will be spooled on. Change these values by using the left and right
buttons.
iv) Return to the top and push the right button to save the spool geometry settings.
The spooler is now set up and ready for extrusion!
3.6 Light Guide Alignment
Light guide alignment is key to your ProtoCycler’s vision system to verify and maintain filament diameter! Every
ProtoCycler is aligned and tested for performance before shipping, but sometimes things are bumped and moved
between when the ProtoCycler ships to the next time it is turned on again by you, the owner. Taking care and
patience to assure your light guides are properly aligned will pay off in the long run.
Depending on when your ProtoCycler was built you may have one of two 3D printed variants! Neither is better in
terms of function. They both work to align the LED beam of light, but an iteration was made to improve fabrication
and assembly time internally. The following image details the two types of Light guides.