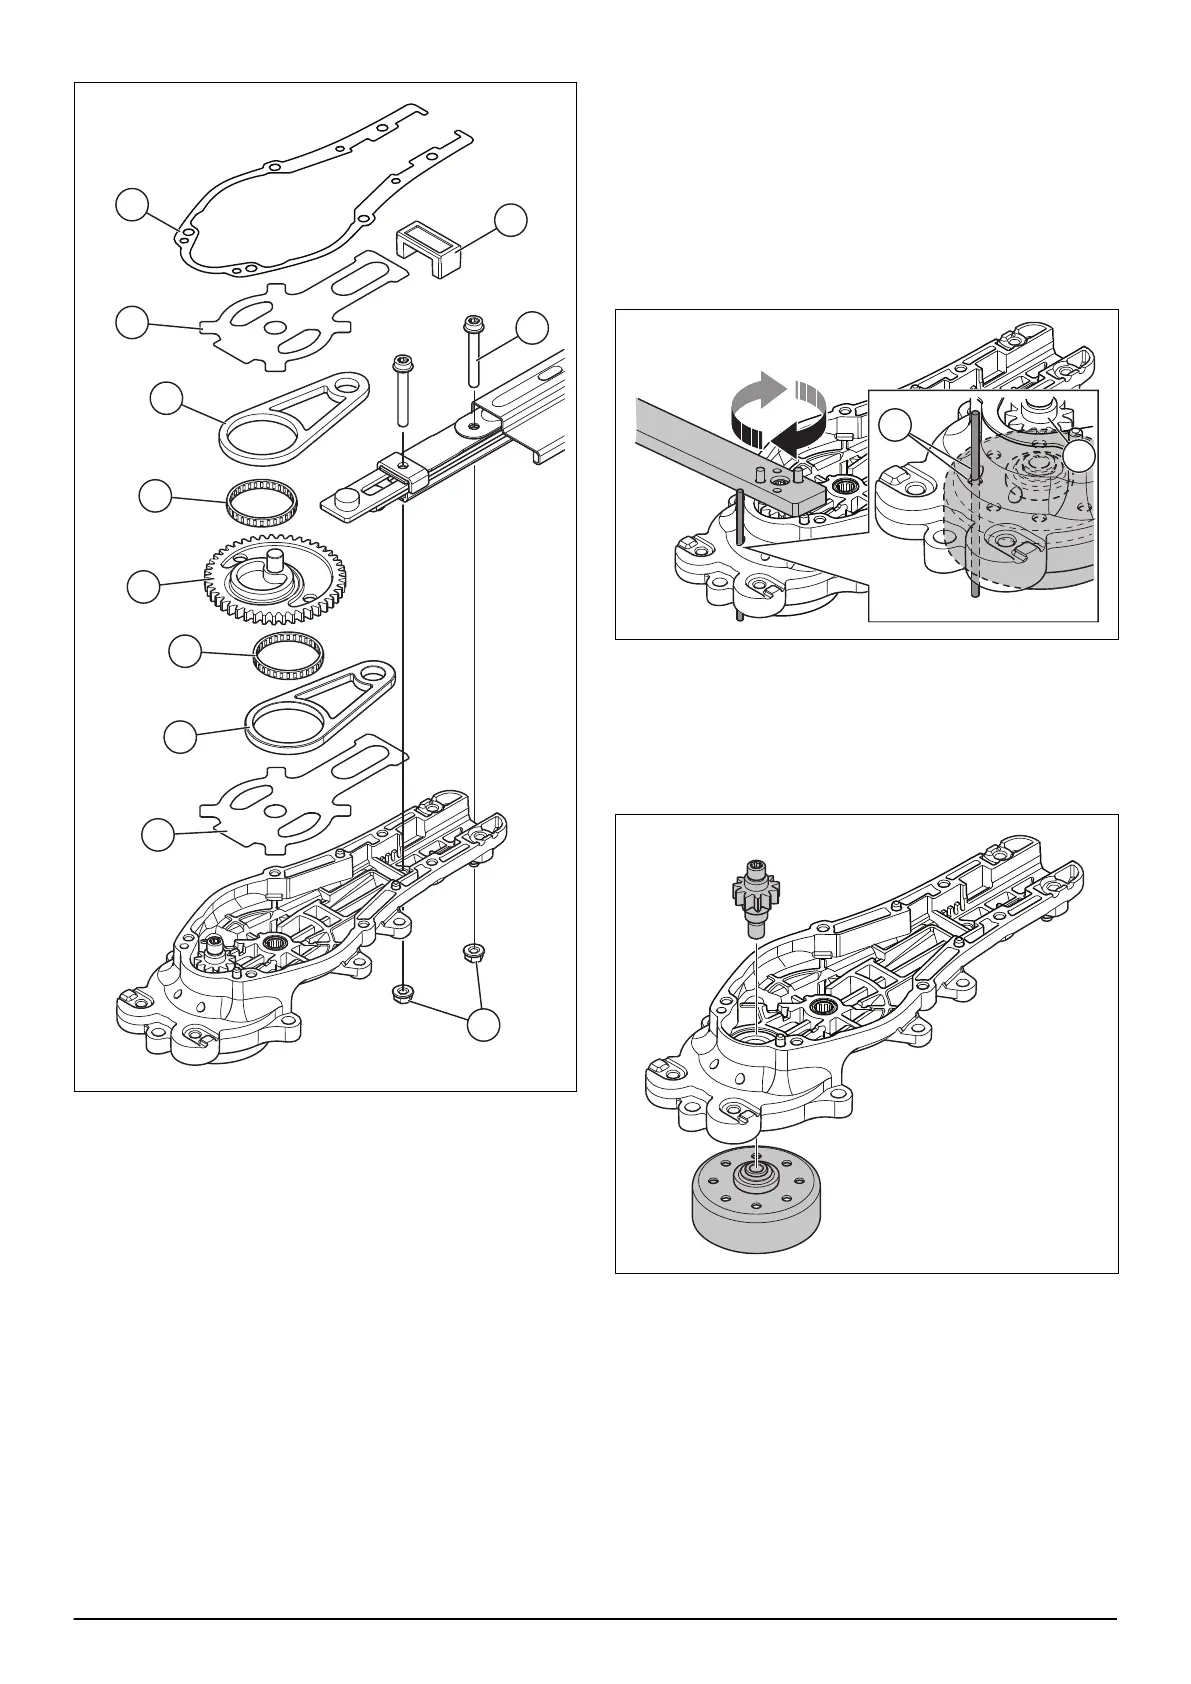
4. Remove the gasket (A).
5. Remove the wear plate (B).
6. Remove the seal (C).
7. Remove the connecting rod (D).
8. Remove the 2 screws (E) and the 2 nuts (F).
9. Remove the cutting equipment.
10. Remove the bearing (G).
11. Remove the gear wheel (H).
12. Remove the bearing (I).
13. Remove the connecting rod (J).
14. Remove the wear plate (K).
15. Use approximately 20 g of grease to lubricate all
parts. Refer to
Servicing data on page 6
.
16. Assemble in the opposite sequence.
17. Add approximately 10 g of grease to the gearbox.
7.12.3 To remove and install the clutch drum
1. Disassemble the gearbox. Refer to
To disassemble
and assemble the gearbox on page 31
.
2. Put a pin through the holes (A) in the gearbox
housing and the clutch drum to prevent revolution of
the clutch drum.
3. Use the removal tool for the gear drive to remove
the small gear drive (B). Refer to
Servicing tools on
page 10
.
4. Push out the small gear drive from the ball bearing
and remove the clutch drum from the gearbox
housing.
5. Remove the ball bearing from the gearbox housing.
6. Install in the opposite sequence.
7.12.4 To clean and examine the clutch, clutch
drum and gearbox
• Examine the clutch drum for wear.
• Examine all the parts. Replace parts, if it is
necessary.
32 - Repair instructions 1351 - 002 - 25.11.2020