OPERATIIMG
INSTRUCTIONS
S2 LABEL SEWERS - MODEL S2-SRLS RANGE
1/4"
-
1-1/2"
STARTING
THREAD
^
CLAMP
FEET^
SIGHTING
HOLES
LABEL
POSITION
^
HOLD
DOWN
MEMBER
m
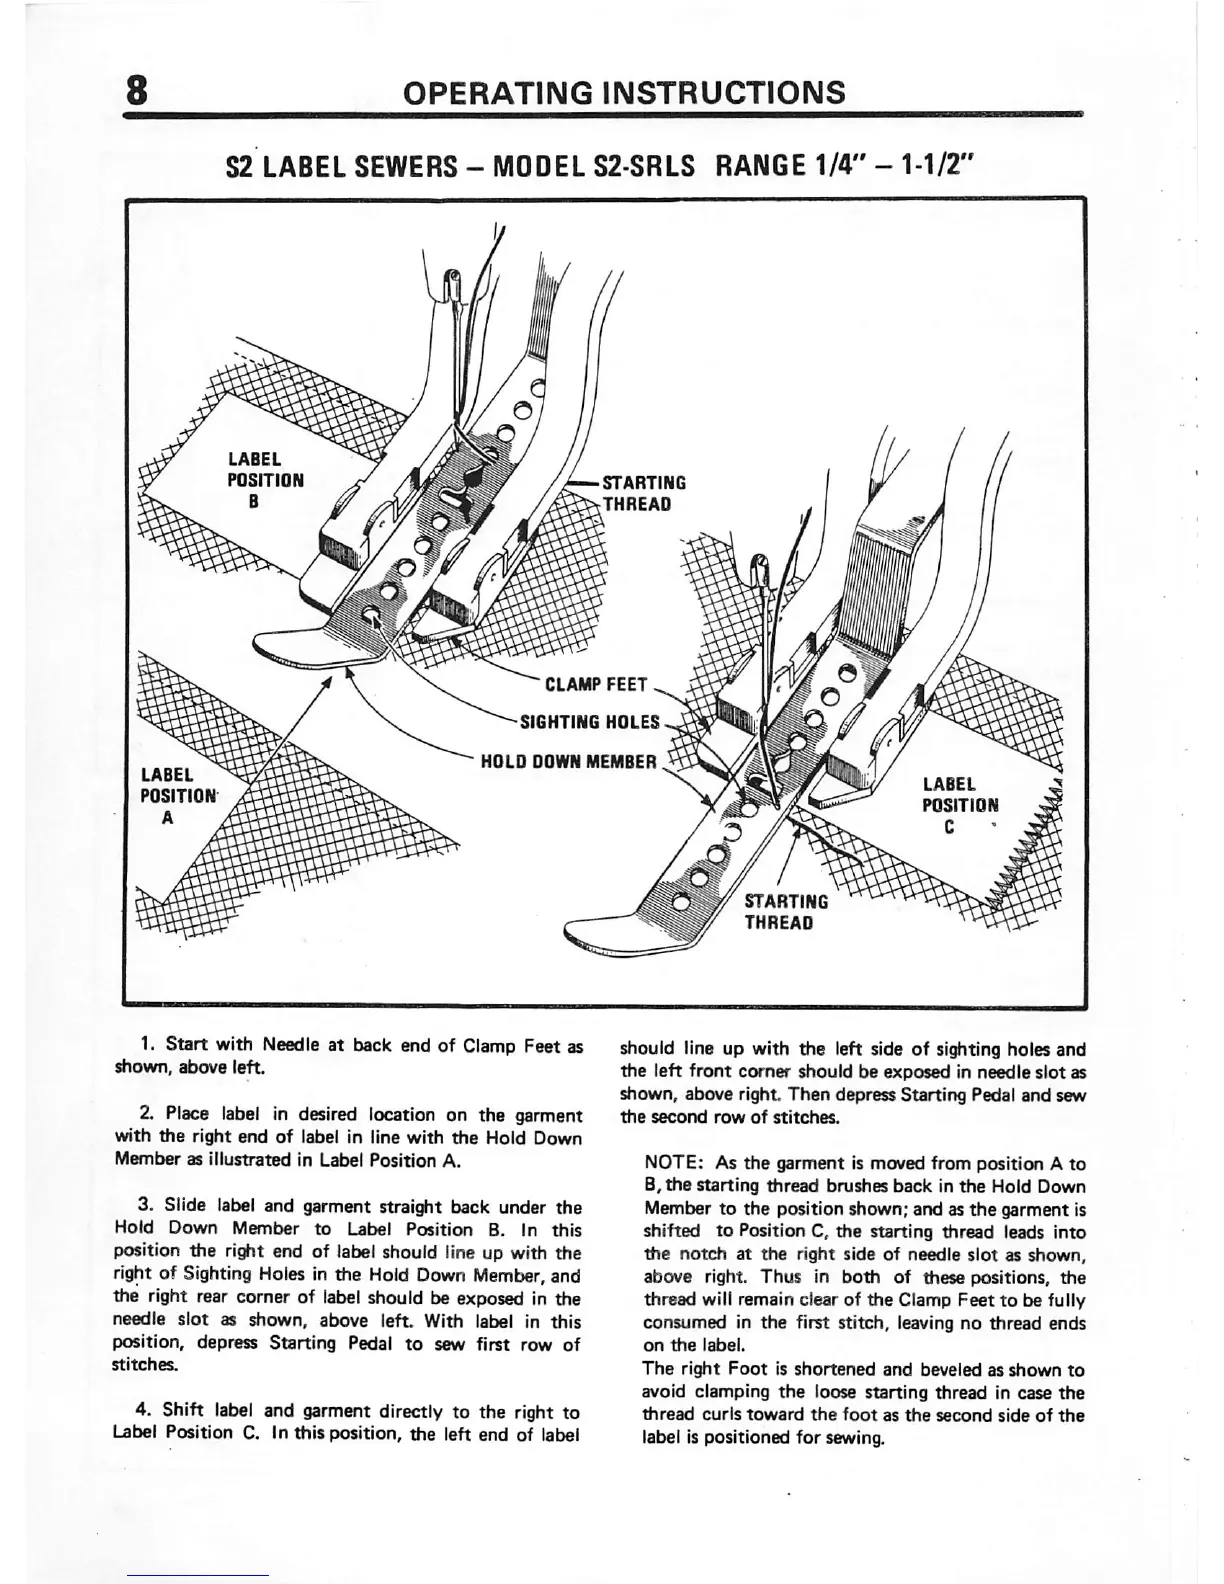
1. Start with Needle at back end of Clamp Feet as
shown,
above
left
2. Place
label
In desired location on the garment
with
the
right
end
of
label in line
with
the
Hold
Down
Member
as
Illustrated
in
Label
Position
A.
3. Slide label and garment straight back under
the
Hold
Down
Member
to Label
Position
B. In
this
position the right end of label should line up with the
right of Sighting Holes in the Hold Down
Member,
and
the right rear corner of label should be exposed in the
needle
slot
as
shown,
above
left. With label in
this
position, depress
Starting
Pedal
to
sew first row
of
stitches.
4. Shift label and garment directly to the right to
Label Position C. In
this
position,
the
left end of label
STARTIN
THREAD
should line up with
the
left side of sighting holes and
the
left
front
corner
should
be
exposed
in
needle
slot
as
shown, above
right
Then
depress Starting Pedal
and
sew
the
second
row
of
stitches.
NOTE: As
the
garment
Is moved from position A
to
8,
the
starting thread brushes
back
in
the
Hold Down
Member
to
the
position
shown;
arxJ as
the
garment
is
shifted
to
Position C,
the
starting thread leads
into
the
notch
at
the
right side of
needle
slot
as
shown,
above
right.
Thus
in
both
of
these
positions,
the
thread will remain clear of
the
Clamp
Feet
to
be fully
consumed
in
the
first stitch, leaving no
thread
ends
on
the
label.
The
right
Foot
is
shortened
and
beveled as
shown
to
avoid clamping
the
loose starting thread in case
the
thread
curls
toward
the
foot
as
the
second
side
of
the
label is positioned
for
sewing.