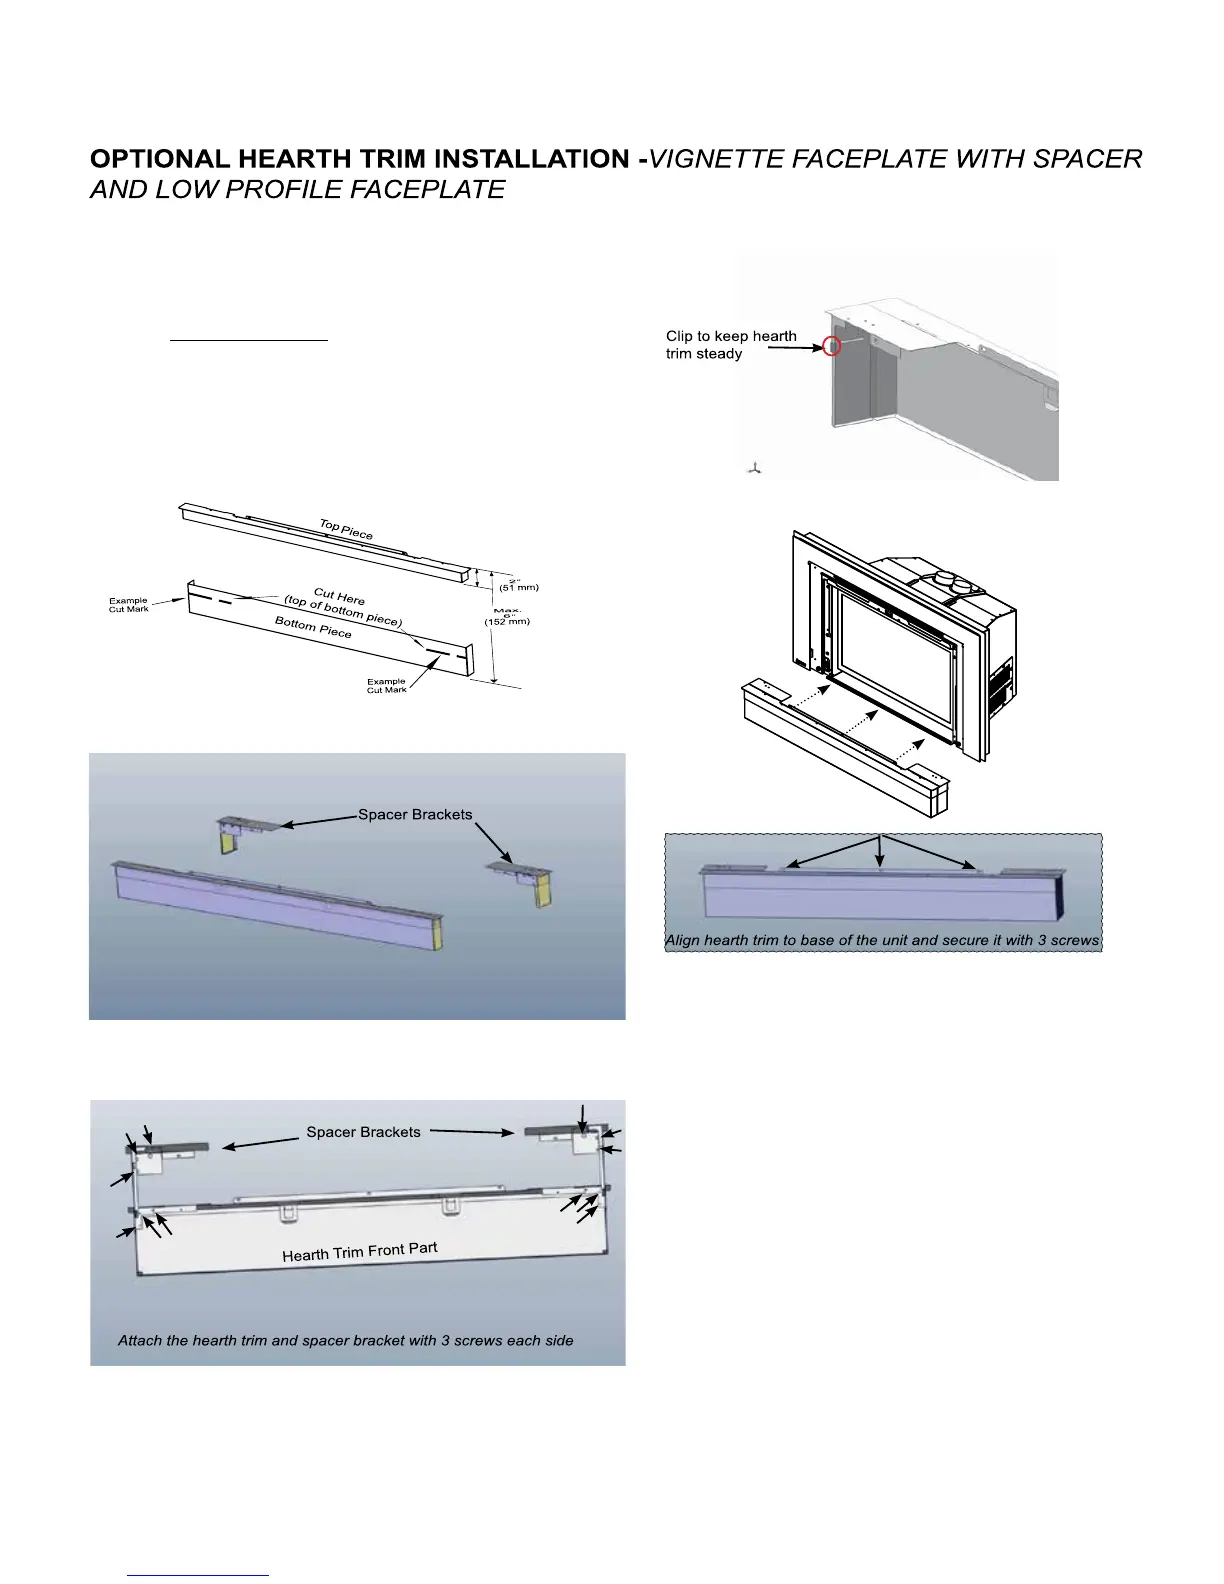
Customizing the Hearth Trim:
The Hearth Trim can be adjusted to custom t an installation by pulling
apart the top piece from the bottom piece. Minimum height of the hearth
trim is 2” and can be adjusted upto maximum 6”.
1) Cut the top of the bottom piece of the hearth trim to the appropriate
height using a metal cutting blade.
NOTE: The tab bends at the back of the top piece of the hearth trim
should be used as the measuring point to the hearth to measure the
height required.
2) Reattach the top piece of the hearth trim to the cut bottom piece by
tting in place.
6) Line up the hearth trim with base of the unit and secure it with 3 screws
as shown below.
4) Attach the top and bottom part of the spacer brackets and then attach these
spacer brackets to the assembled hearth trim with 3 screws.
5) Secure the hearth trim with a clip on its side to keep it steady as shown in
the picture below .
3) Similar to the front hearth trim, cut the top of the bottom piece of the spacer
brackets to the appropriate height.