- 18 -
6. Cleaning / Maintenance
Inside the extractor there are small parts which require maintenance.
Opening the device, other than for the processes described below, is not permissible!
6.1 Emptying the Dust Drawer
After 95 % of the set time (see section 5.6.3) has elapsed, the unit will demand the dust drawer to be
FOHDQHG
Ƈ The dust drawer symbol blinks (33, Fig. 2).
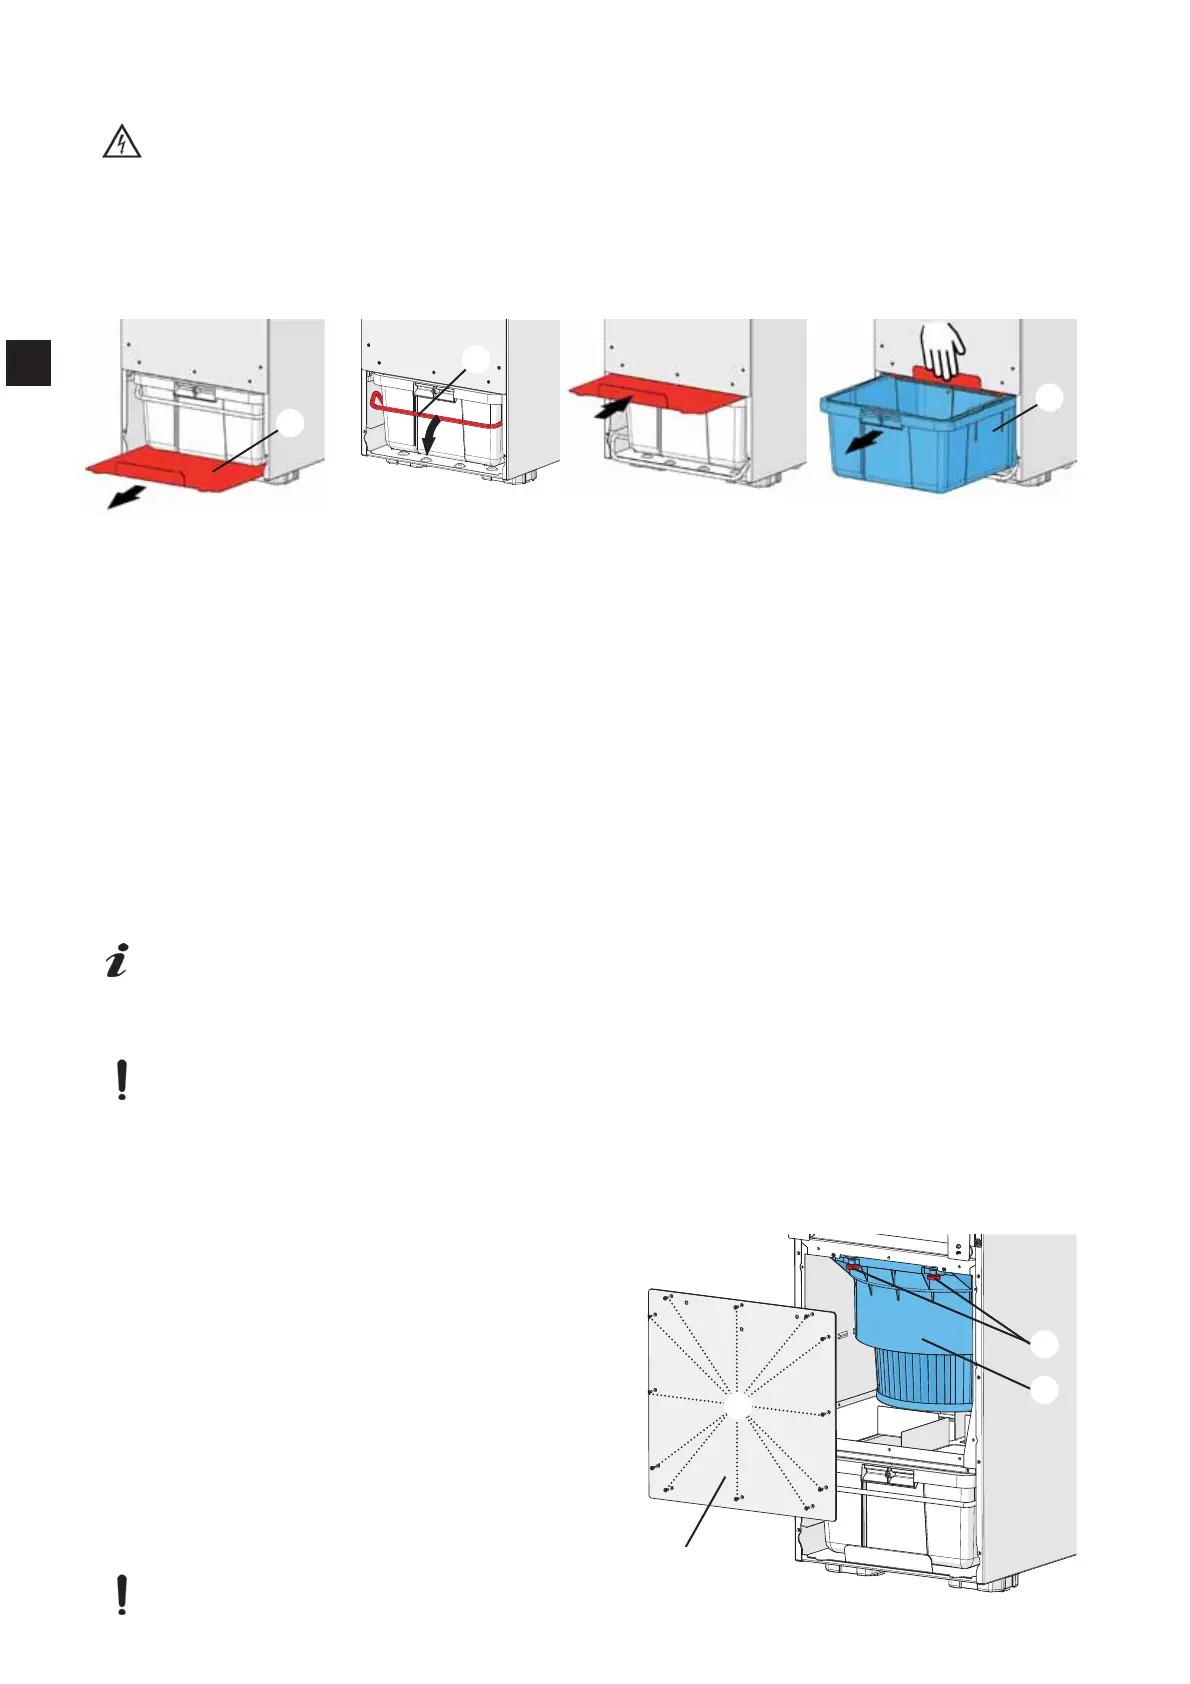
Remove dust drawer:
Pull the front panel off towards the front (4, Fig. 1).
Remove the locking plate entirely (23).
2SHQWKH¿[WXUHEUDFNHW
Push the locking plate in completely above the dust drawer and hold it tight when pulling out the dust
drawer.
Pull out the dust drawer (5) and empty.
&KHFNWKHSUR¿OHVHDORQWKHGXVWGUDZHUFKDQJHLWLILWLVGDPDJHG
Replace the dust drawer:
Push the entire dust drawer into the extraction unit.
Pull out the locking plate.
&ORVHWKH¿[WXUHEUDFNHW
Clean the locking plate.
Push the locking back underneath the dust drawer.
First place the base of the front panel onto the unit, then push the upper part of the panel against the
snap fasteners to close.
For the dust drawer to be correctly registered the suction must be switched on and the dust
drawer must have been removed for at least 15 seconds.
6.2 Changing the Fine Filter
'RQRWZDVKWKH¿QH¿OWHURUWU\WRFOHDQLWLQDQ\RWKHUZD\
,IWKH¿OWHULVGDPDJHGWKHUHLVDULVNWKDWWKHGHYLFHZLOOEHFRPHGDPDJHG
,IWKH¿OWHULVGDPDJHGSOHDVHFKDQJHLPPHGLDWHO\
7KH¿OWHULVFOHDQHGDXWRPDWLFDOO\RQDUHJXODUEDVLVVHHVHFWLRQ
If the cleaning process starts to occur in increasingly short intervals, or if the suction performance is
LQDGHTXDWHHYHQDIWHUFOHDQLQJWKHQWKH¿QH¿OWHUPXVWEHFKDQJHG
5HQIHUWUHFRPPHQGVFKDQJLQJWKH¿QH¿OWHUHYHU\WR\HDUV
7RFKDQJHWKH¿QH¿OWHU
'LVPDQWOHWKH¿QH¿OWHU
8QSDFNWKHQHZ¿QH¿OWHUDQGXVHWKHSDFNDJLQJ
DVDZDVWHEDJWRGLVSRVHRIWKHROG¿QH¿OWHU
Switch the extraction unit on.
Pull the front panel off (4, Fig. 1) towards the front.
Remove the 12 screws (26) from the cover plate
(24) and remove this.
8QVFUHZWKH¿[LQJVFUHZVIURPWKH¿QH¿OWHU
7LOWWKH¿QH¿OWHUJHQWO\GRZQZDUGVDQGSXOORXW
forwards.
3DFNWKH¿QH¿OWHULQWRWKHZDVWHEDJDQGGLVSRVH
of properly.
Before installing, vacuum the inside space of the
extraction unit and clean the sealing surface!
Fig. 24
23
24
5
Fig. 2
6
26
24
25
EN