- 2 -
7. Specifications
7.1 Wireless Specifications
Line of sight wireless transmission (in open air): 100meter
Update Rate: Outdoor Sensor: 16 seconds, Indoor Sensor: 64 seconds
Frequency: 433/868/915 MHz
7.2 Measurement Specifications
The following table provides the specifications for the measured parameters.
Measurement Range Accuracy Resolution
Indoor Temperature 0 to 60 °C ± 1 °C 0.1 °C
Outdoor Temperature -40 to 65 °C sensor
-5 to 60 °C
battery range (alkaline)
± 1 °C 0.1 °C
Indoor Humidity 1 to 99% ± 5% 1 %
Outdoor Humidity 1 to 99% ± 5% 1 %
Barometric Pressure 300-1100hPa
(8.85 to 32.50 inHg)
+/-3hpa under 700-1100hPa 0.1hPa
Light 0 to 400,000 Lux ± 20% 1 Lux
Rain 0 – 9999mm ± 10% 0.03mm
Wind Direction 0 - 360 º 10º 1º
Wind Speed 0-50m/s
± 1m/s or 10% (whichever is
greater)
0.1 m/s
7.3 Power Consumption
ObserverIp Receiver : 5V DC Adaptor (included)
Indoor Thermo-hygrometer-barometer sensor : 2xAAA batteries (not included)
Outdoor sensor array: 3xAA alkaline batteries (not included)
8. Maintenance
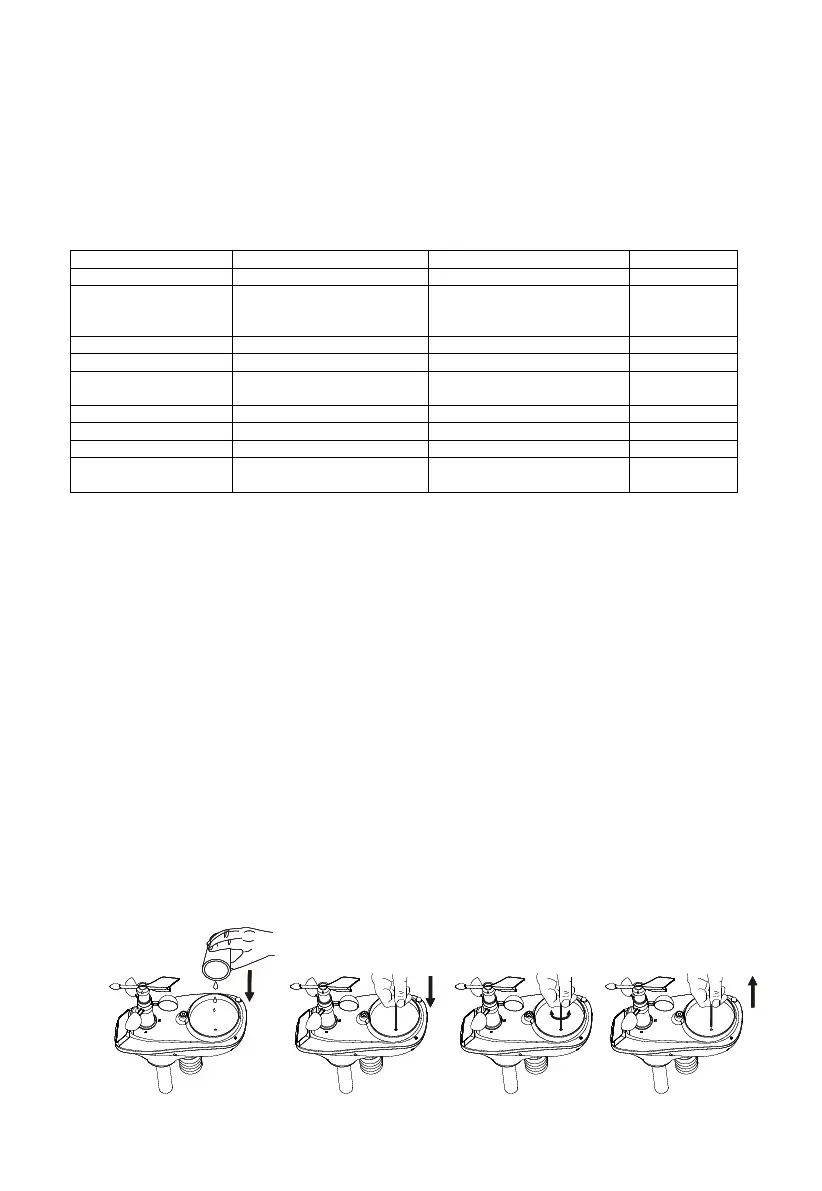
1. Clean the rain gauge once every 3 months as follows. Reference Figure 40.
Step 1: Make a note of the current rain totals by referencing the calibration panel (reference
Section 0). You will need to re-enter these values after the calibration procedure it complete.
Step 2: Pour water into the rain collector to moisturize the dirt inside rain bucket.
Step 3: Use an approximately 3 inch (80 mm) long cotton swab, and push the cotton tip through
the rain collector hole until is reaches the self emptying mechanism, and press until the
mechanism no longer rotates.
Step 4: Rotate the cotton swab back and forth, removing dirt from the tipping mechanism and
rain collector hole.
Step 5: Remove the cotton swab and flush with water to remove any remaining dirt.
Step 6: Re-enter the rain totals recorded in Step 1.
Figure
8
40