- 15 -
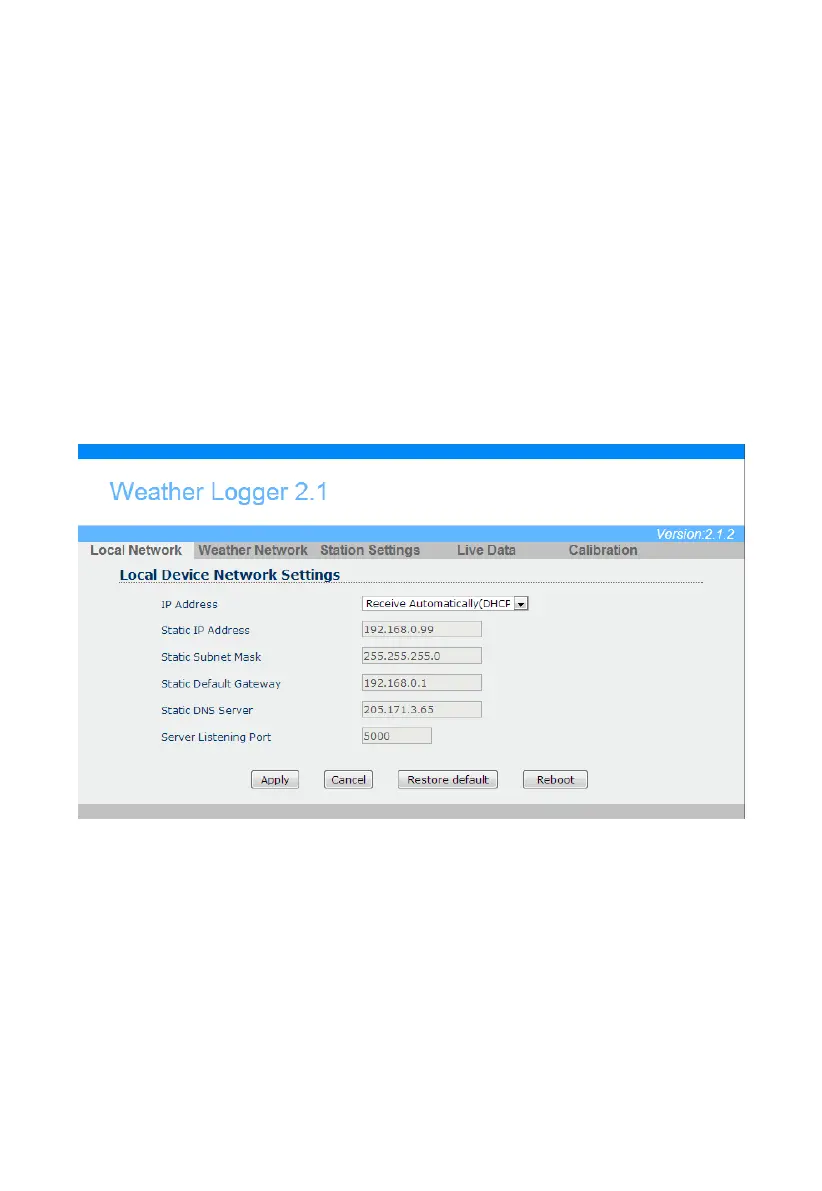
4.6.5 Local Device Network Settings
From your web browser, access the device from the IP address obtained in the previous section.
Select the Local Network tab to program the local network settings. Reference Figure
1. IP Address. The default setting is receive automatically (DCHP), which is recommended.
The network will assign an IP address. To statically assign an IP address, select Static from
the pull down menu. This will prevent the IP address from changing each time you power up
the receiver.
2. Static IP Address. If Static is selected as the IP address, enter the IP address you wish to
access the device.
3. Static Subnet Mask. Default is 255.255.255.0. This should not be changed unless you are
familiar with networking and subnet masking.
4. Static Default Gateway. This is typically the IP address of your router.
5. Static DNS Server. This is your DNS Server setting based on your router connection.
6. Server Listening Port. Default is 5000. Enter an integer between 1024 – 65535.
To confirm the changes, select Apply and Reboot.
Note: If you incorrectly set the static IP settings and can no longer access the device, press the
reset button on the back of the receiver.
Figure
4.6.6 Weather Network Settings
Select the Weather Network tab to program the Weather Network settings. Reference Figure 27:
1. Remote Server. The default setting is rtupdate.wunderground.com, which is recommended. If
you want to upload the weather data to your own website, select Customized from the pull
down menu
2. Server IP/Hostname. If Customized is selected as remote server, enter the host name or IP
address.
3. Server Port. Default is 80.
Enter an integer between
1024~65535
4.
Server type. Default is PSP. (JSP, PHP, ASP)
5.
Station ID.
6. Password.
To confirm the changes, select Apply.
26:
26
 Loading...