25
(Model: RBT50LFP48S)
Smart 48V LFP Battery
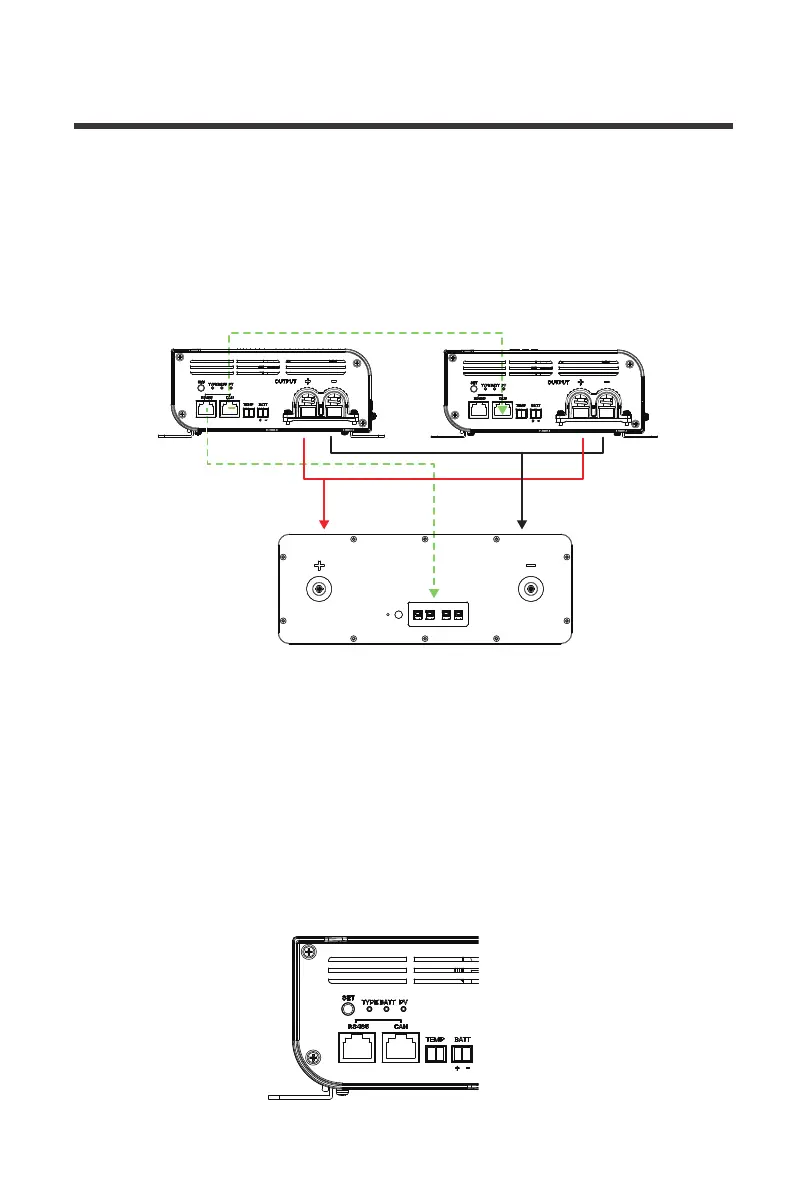
Rover Boost 1 Rover Boost 2
Ethernet(Cat5 and above)RS485 to CAN
4.Press and hold the SET button for 20 seconds on Rover Boost 1. This will activate the CAN
host function and the battery type light will flash once every 5 seconds. Only one Rover Boost
at a time can be set as the host in a single system and during this time the controllers are
communicating and synchronizing the battery recognition information.
5.Both Rover Boost controllers should have the same TYPE LED. The synchronization is
complete and both controllers are now synced to the 48V Smart LFP Battery
2.Set the battery type on the host controller, Rover Boost 1. In this case we will select 48V LFP,
or purple.
3.Next, run an ethernet cable between the Host controller’s (Rover Boost 1) RS485
communication port to the CAN communication port on the 48V Smart LFP Battery.
RS485 RS485 CAN CAN