Caution: 2 MAN LIFT IS RECCOMENDED TO PREVENT INJURY.
6) Elevate the antenna using a 9 Volt DC battery or a power source to make the system
maneuverable for installation and so that you can have access to the drill holes on the feet.
a. Touch the RED and ORANGE wires to the Plus and Minus poles on your 9 Volt
battery or Power source.
b. Upon touching the DC power source, if the mount arms do not move upward,
then reverse the wires on the contacts of the DC voltage source.
7) Trace the holes where you will insert the screws on the roof to help as a guide.
Caution: As a bare minimum you must put a screw in all pre-drilled holes on the
mount feet. In the event the pre-drilled holes do not align with your support
structure, it is highly recommended that you drill extra holes as needed prior to
using Dicor sealer.
8) Put Dicor sealer over the locations of the predrilled holes and on the mounting feet.
9) Lift the antenna over the location where the antenna screws will penetrate the mounting surface
(including any extra drilled screw locations) and lower the antenna mount feet onto the mounting
surface. (Rotate feet as necessary from shipped position) and secure the mount feet to the roof
using the mounting screws you selected.
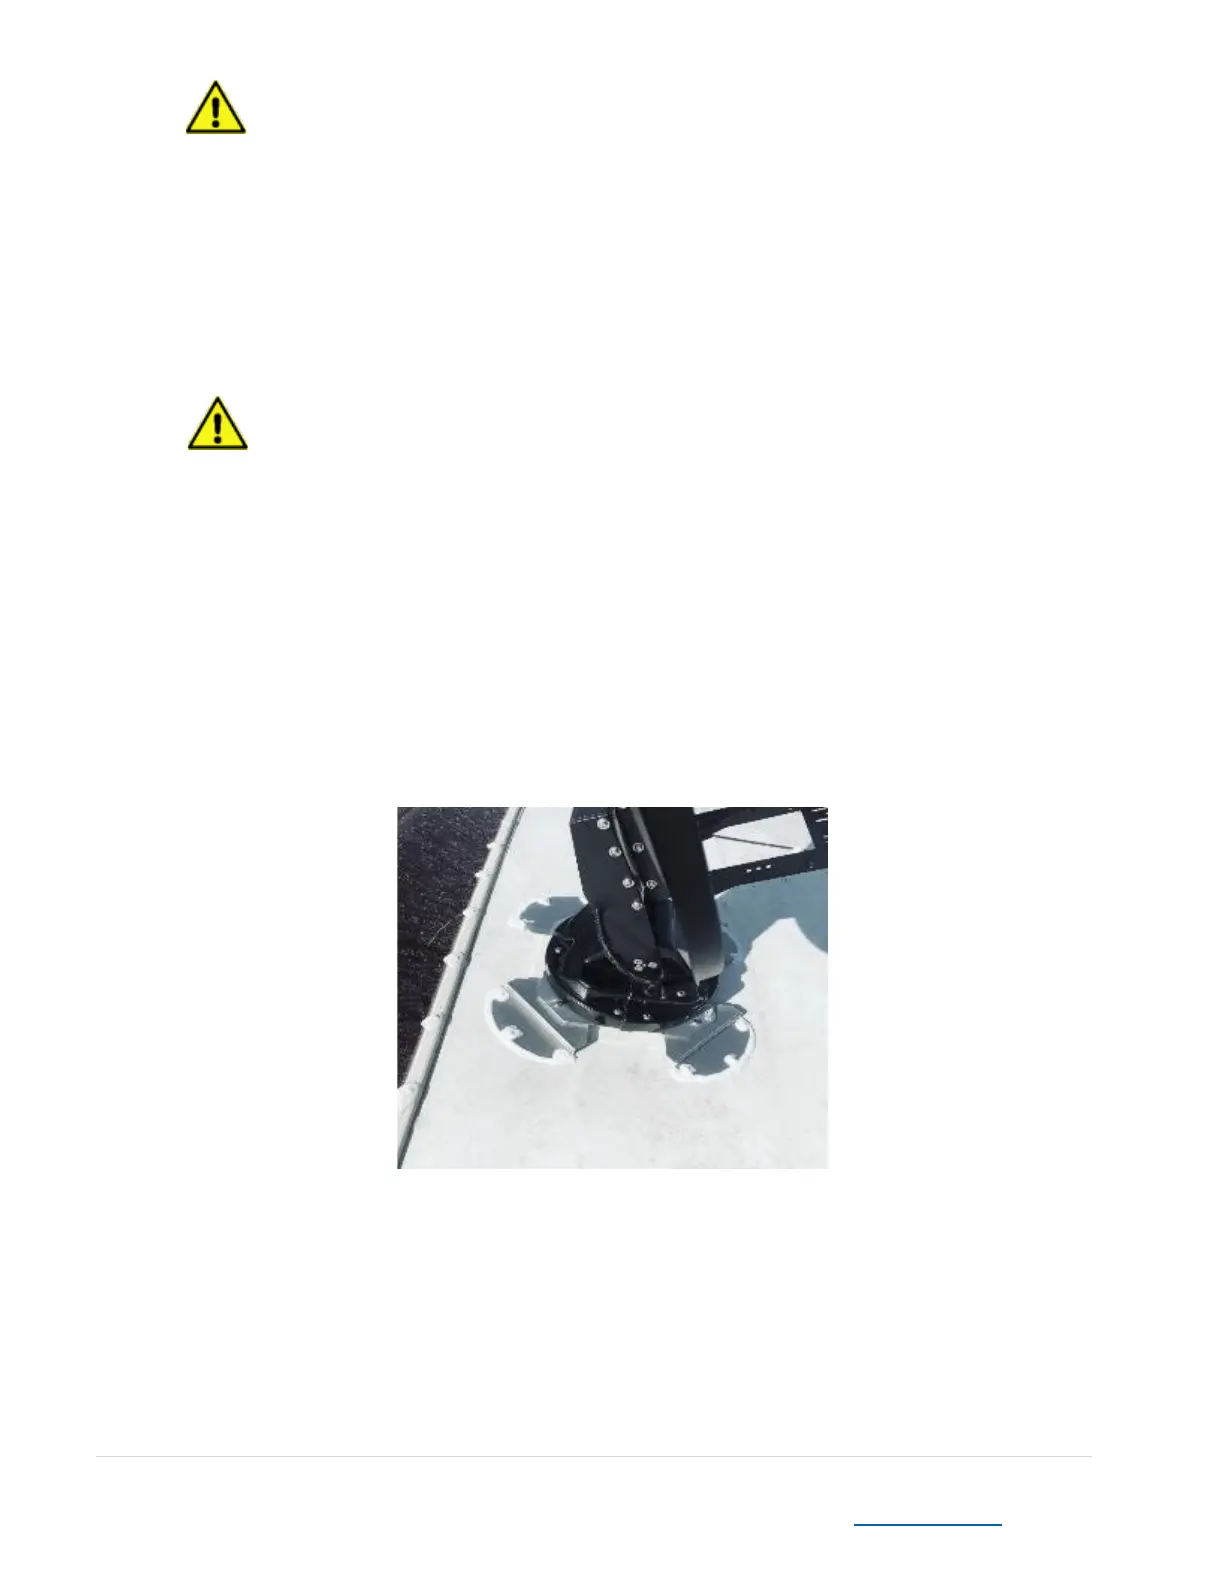
10) Liberally coat the screw heads and around the mount feet with Dicor to prevent water
penetration. As shown below.
11) Install the LNB Landing plate where the LNB Arms and LNB will stow on the roof (Approximately
10-12 inches in front of the antenna base) with screws. (See photo after step 12 as a reference)
Dicor around the plate and on the screw heads.
12) Using a small diameter drill bit make a small pilot hole in the roof where the cabling will pass
through into the control cabinet in the vehicle.