

G
Gerald YoungSep 8, 2025
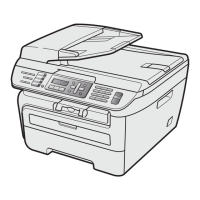
Why is photocopied paper blank on Ricoh Aficio SP 204SN?
- MMeagan WilliamsSep 8, 2025
If the photocopied paper is blank when using your Ricoh All in One Printer, ensure that the original was placed correctly, with the front facing down.