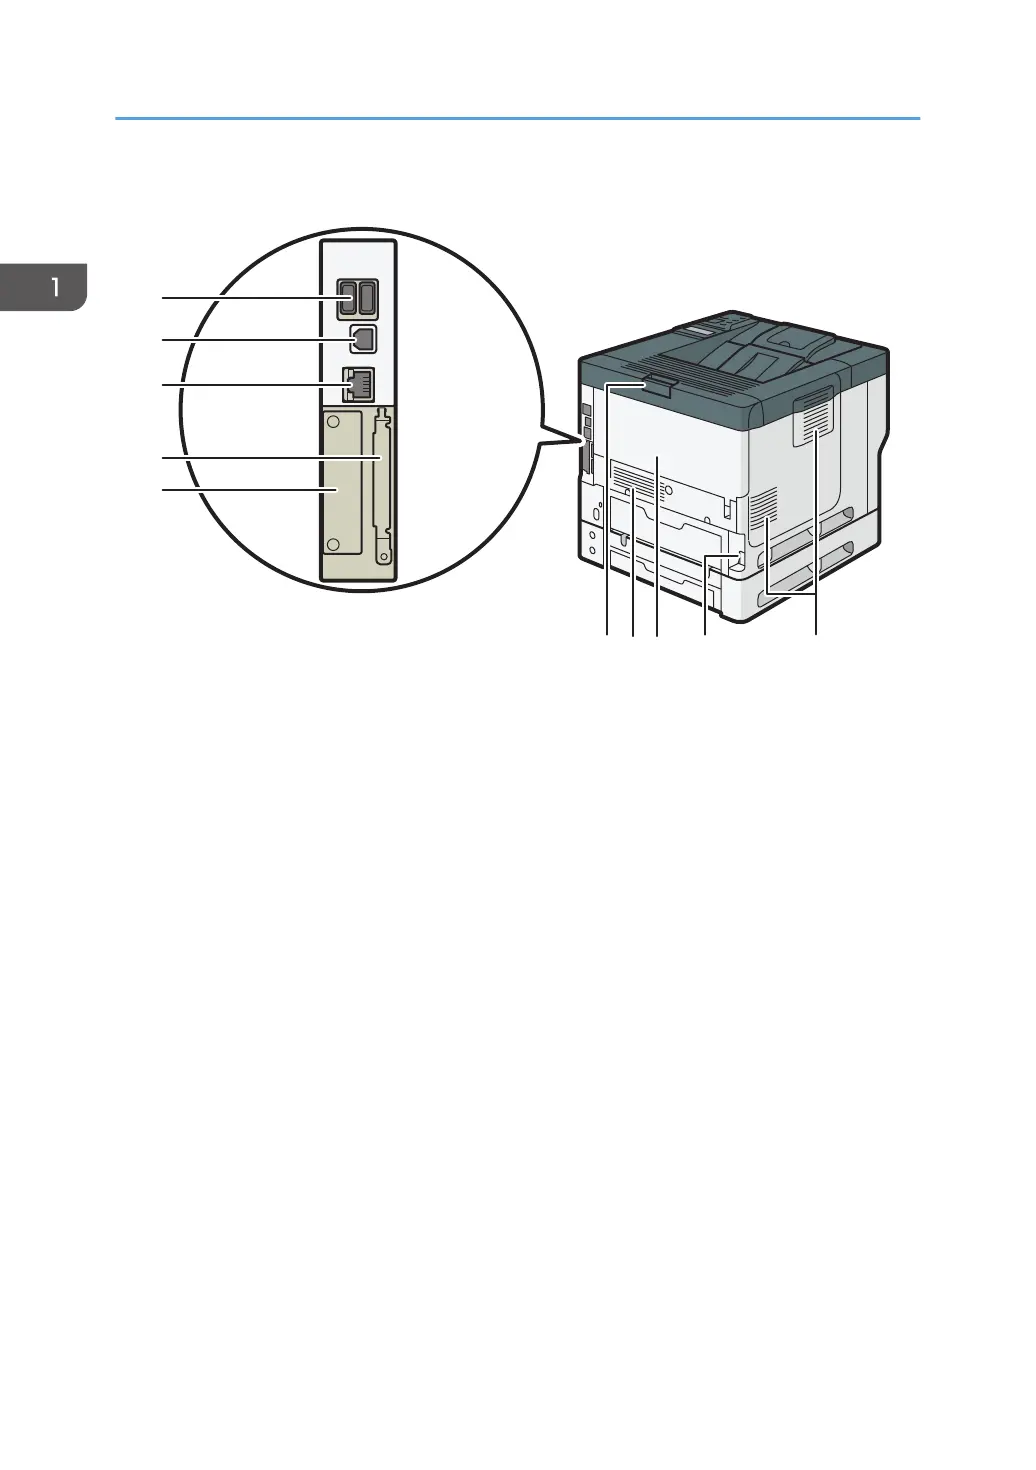
Rear and left view
1. Vents
Prevent overheating.
2. Power connector
Connect the power cord to the machine. Insert the other end into an electrical outlet.
3. Rear cover
Open to access the inside of the machine and remove jammed paper.
Open here to replace the fusing unit.
4. Rear cover open lever
Pull this lever to open the rear cover.
5. Slot
Optional interface boards can be inserted.
6. Expansion card slots
Remove the cover to install SD cards.
7. Ethernet port
Use a network interface cable to connect the machine to a network.
8. USB 2.0 [Type B] port
Use a USB cable to connect the machine to a computer.
9. USB Host Interface
Connect external devices such as a card authentication device.
1. Getting Started
8
 Loading...