3
Shooting
70
3 Press G.
The fine-tuning screen appears.
Available operations
4 Press E.
The screen of Step 2 reappears.
5 Press E.
The camera returns to standby mode.
u Caution
•In R mode, the white balance is fixed to [Auto White
Balance].
• The Digital Preview operation in Step 1 is disabled when the
drive mode is set to [Mirror Lock-up Shooting], [Multi-
exposure], or [Interval Shooting].
t Memo
• When [Multi Auto White Balance] is set, even if various light
sources are present at the shooting location, the camera
automatically adjusts the white balance according to the light
source of each area. (u is not available in C mode.)
• The following settings for the white balance can be set in the
E3 menu.
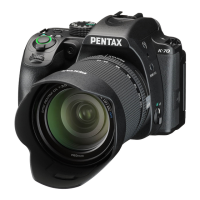
You can measure the white balance at a selected location.
1 Select o in Step 2 of “Setting the White
Balance” (p.69).
2 Use R to select 1 to 3.
1 to 3 are the locations where you
can store three different manual
white balance settings.
3 Under the light you wish to measure the white
balance of, select a white area as the subject,
and press 0 fully.
The captured image is displayed.
4 Use ABCD to specify
the measuring area.
Press M to return the measuring
area to the center.
5 Press E.
The White Balance setting screen reappears.
[The operation could not be completed correctly] appears
when measuring is unsuccessful. Press E to remeasure
the white balance.
t Memo
• You can copy the white balance settings of a captured image
and save them as o1 to o3 in [Save as Manual WB] of the
playback mode palette. (p.83)
AB
Adjust: Green-Magenta
CD
Adjust: Blue-Amber
M
Resets the adjustment value to the default
setting.
15 WB Adjustable Range
Fixed, Auto Adjustment
16 AWB in Tungsten Light
Strong Correction, Subtle
Correction
17 WB When Using Flash
Auto White Balance, Multi
Auto White Balance,
Unchanged
18 Color Temperature Steps Kelvin, Mired
G3
A2
±0
Cancel
OK
Auto White Balance
Adjusting the White Balance Manually
WB
±
Manual White Balance
Cancel
Check
Adjust
OK
Cancel
OK
 Loading...