If you are using the camera for the first time, read this section.
31
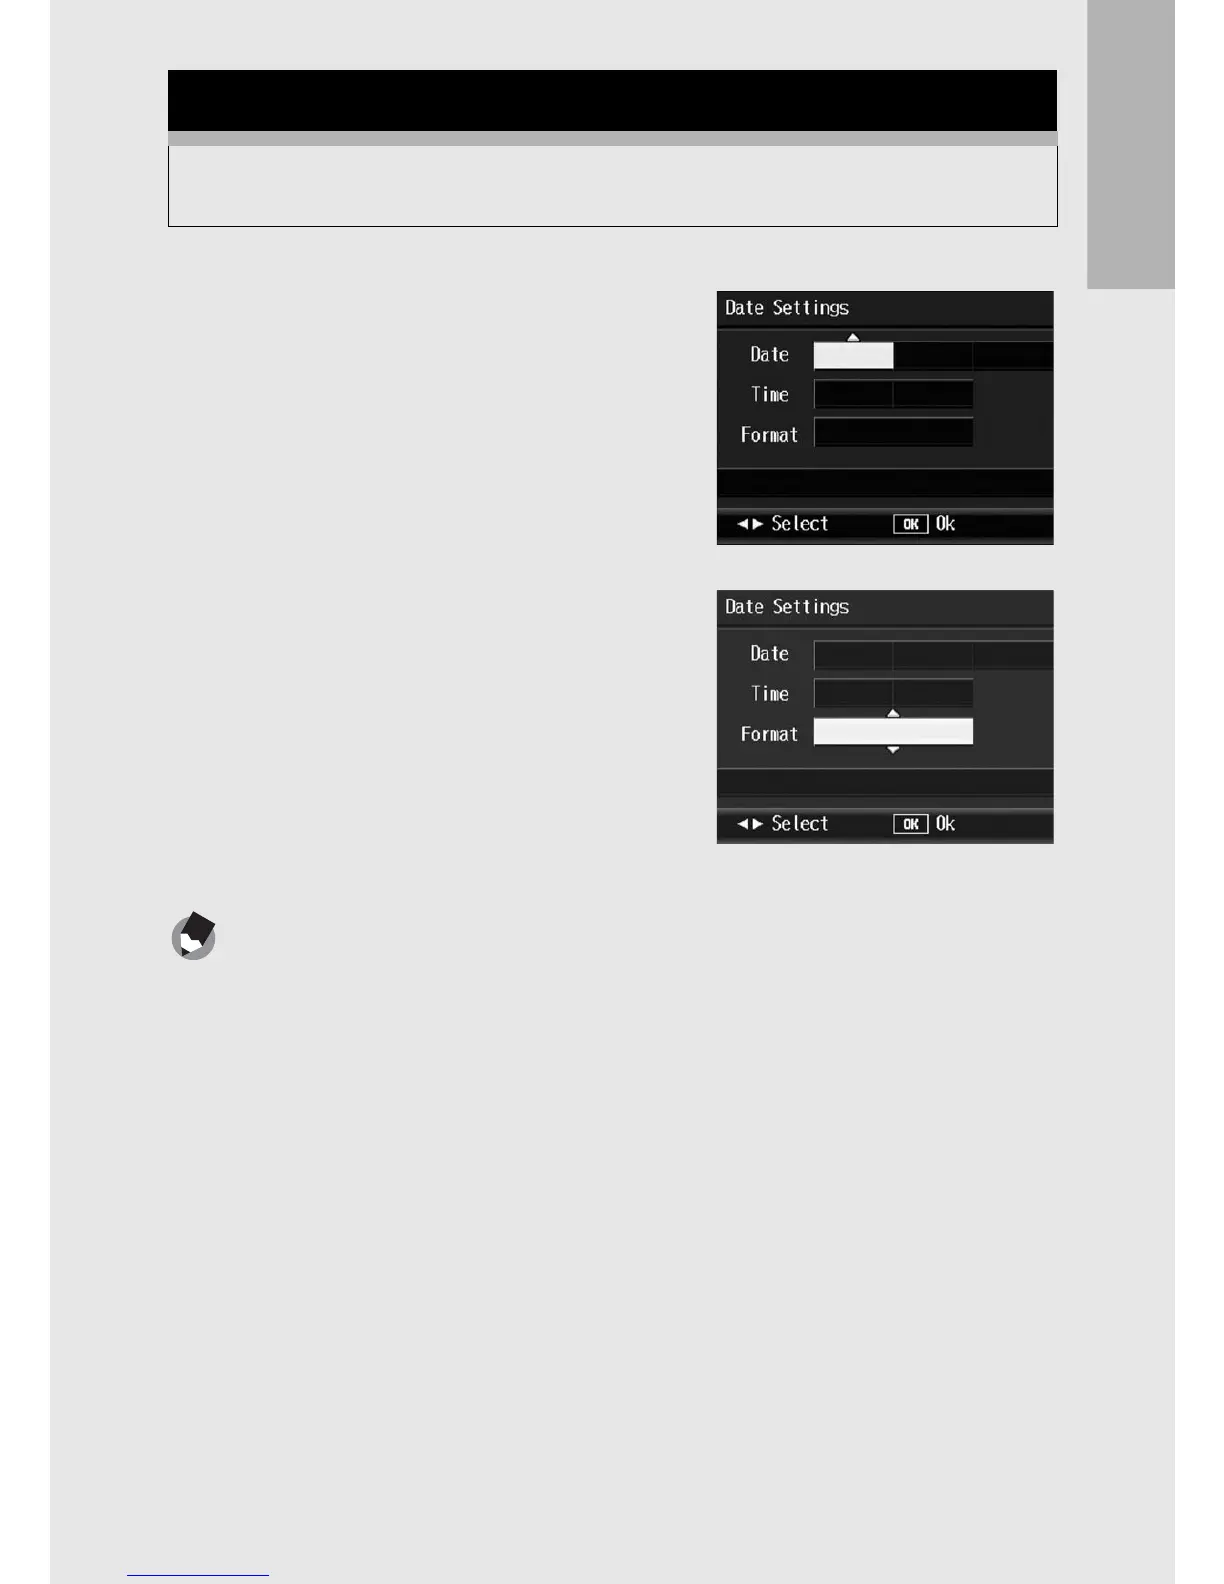
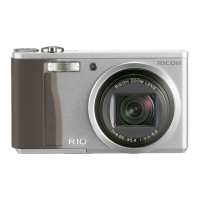
1
Press the ADJ./OK button
!"#$ to set the year,
month, date and time.
• Change the value with !" and
move the frame with #$.
2
In [Format], choose the date
and time format.
• Select the date and time format
with !".
3
Check the display and then
press the ADJ./OK button.
• The date is set.
Note ---------------------------------------------------------------------------------------------------
• If the battery is removed for more than one week, the date and time settings will be
lost. These settings must be made again.
• To retain the date and time settings, load a battery with adequate remaining power
for more than two hours.
• The set date and time can be changed later. (GP.162)
• The date and time can be inserted into images. (GP.91)
Setting the Date and Time
When the power is turned on for the first time, the date/time
setting screen appears.
2008 01
00
Y
/
M
/
D
2008
/
01
/
01 00:00
hh:mm
00
01
Setting at shipping
2008 03
00
Y
/
M
/
D
2008
/
03
/
01 00:12
hh:mm
12
01