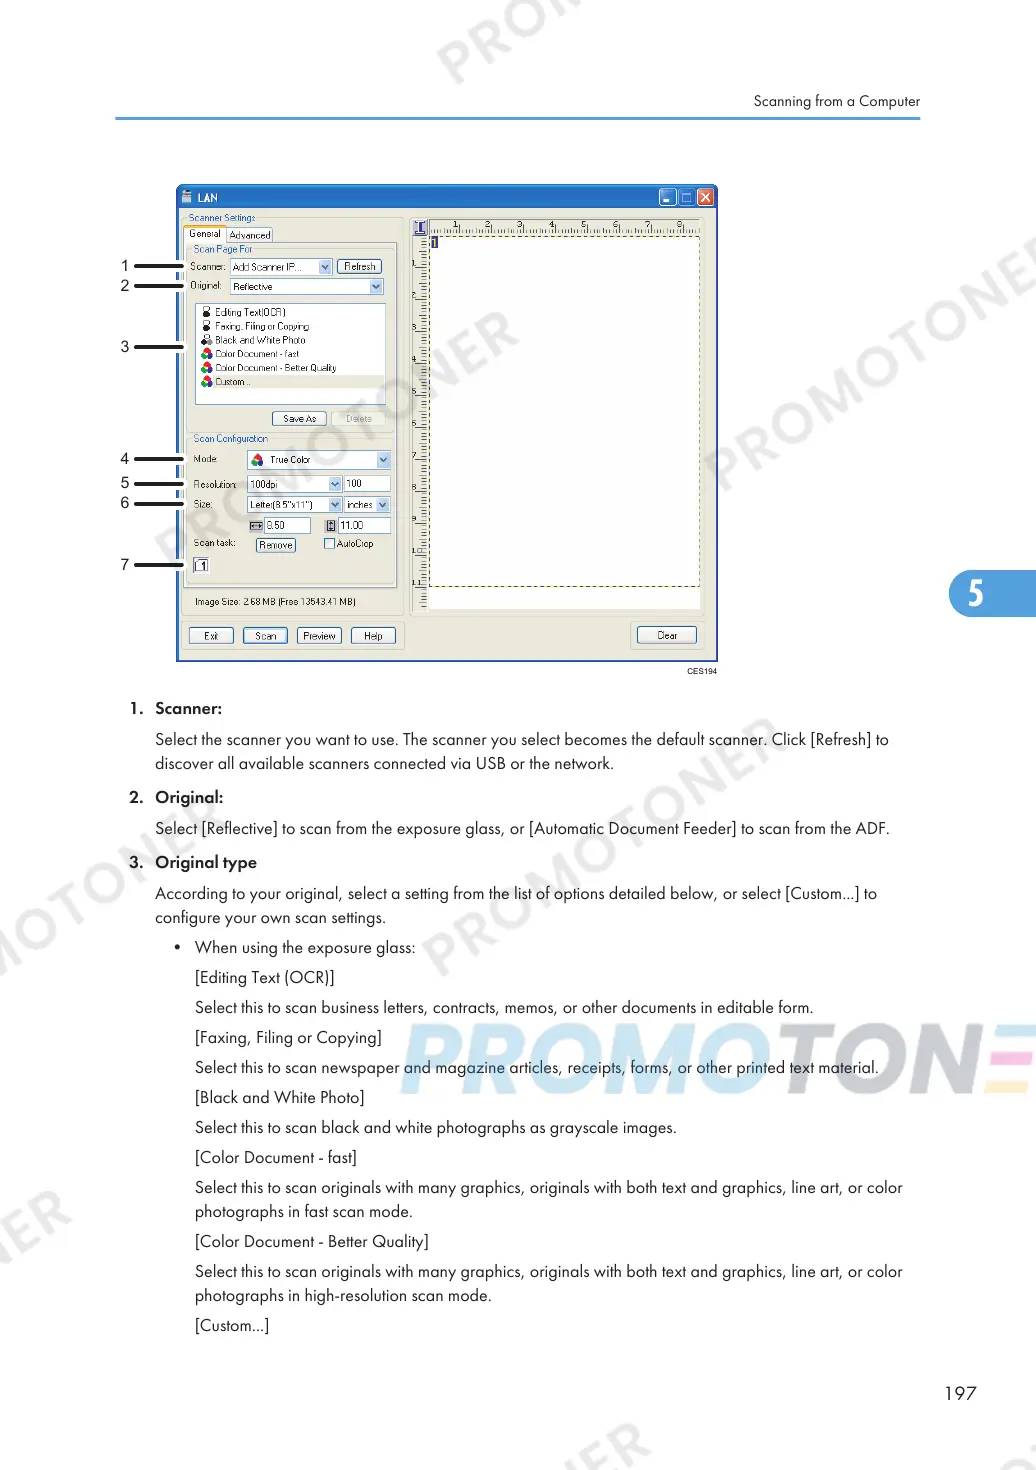
1. Scanner:
Select the scanner you want to use. The scanner you select becomes the default scanner. Click [Refresh] to
discover all available scanners connected via USB or the network.
2. Original:
Select [Reflective] to scan from the exposure glass, or [Automatic Document Feeder] to scan from the ADF.
3. Original type
According to your original, select a setting from the list of options detailed below, or select [Custom...] to
configure your own scan settings.
• When using the exposure glass:
[Editing Text (OCR)]
Select this to scan business letters, contracts, memos, or other documents in editable form.
[Faxing, Filing or Copying]
Select this to scan newspaper and magazine articles, receipts, forms, or other printed text material.
[Black and White Photo]
Select this to scan black and white photographs as grayscale images.
[Color Document - fast]
Select this to scan originals with many graphics, originals with both text and graphics, line art, or color
photographs in fast scan mode.
[Color Document - Better Quality]
Select this to scan originals with many graphics, originals with both text and graphics, line art, or color
photographs in high-resolution scan mode.
[Custom...]
Scanning from a Computer
197

 Loading...