Do you have a question about the RIDGID 300 Compact and is the answer not in the manual?
Guidelines for a safe work environment and proper electrical usage to prevent accidents and shocks.
Recommendations for operator alertness, proper attire, and avoiding accidental starts for injury prevention.
Instructions for proper operation, maintenance, and safe handling of the threading machine and accessories.
Critical safety measures for foot switch operation and general machine safety during use.
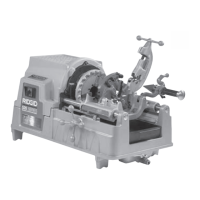
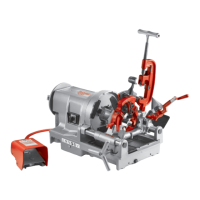
Overview of the RIDGID Model 300 Compact Threading Machine's function and features.
Detailed technical specifications including threading capacity, chuck type, motor, and electrical requirements.
Lists the standard accessories and components included with the Model 300 Compact Threading Machine.
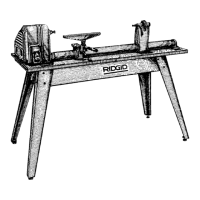
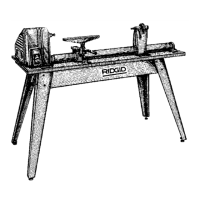
Procedures for securely mounting the threading machine onto various RIDGID stands or workbenches.
Essential daily checks for machine condition, safety features, and readiness for operation.
Steps for preparing the work area, ensuring adequate lighting, clear paths, and proper grounding.
Procedure for correctly inserting and securing pipe or rod into the threading machine chuck.
Detailed steps for using the No. 360 cutter to cut pipe accurately.
Instructions for using the No. 344 reamer to prepare pipe ends after cutting.
Guide for threading pipe or rod using different types of die heads for precise thread cutting.
Steps for safely releasing and removing the workpiece from the machine chuck.
Procedure for installing dies into various die heads (Quick-Opening, Self-Opening, Semi-Automatic).
Methods for verifying the accuracy and quality of cut threads using visual checks or gauges.
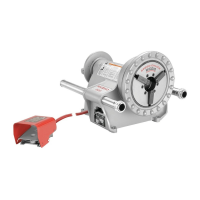
Guide for using the No. 819 Nipple Chuck for threading short nipples and close nipples.
Instructions for mounting the 916 Groover Adapter Bracket to the 300 Compact machine.
Guidance on lubricating bearings with grease fittings for optimal machine performance and longevity.
Procedures for maintaining the oil system, including oil replacement and filter cleaning.
Steps for replacing worn jaw inserts to ensure proper workpiece holding during operation.
Instructions for checking and replacing worn motor brushes to maintain motor function.
Recommendations for storing the threading machine safely, especially regarding weather and unauthorized access.
Information on obtaining professional service and repair, emphasizing qualified personnel and genuine parts.
Schematics illustrating the electrical connections for different voltage configurations of the machine.