37
OPERATION
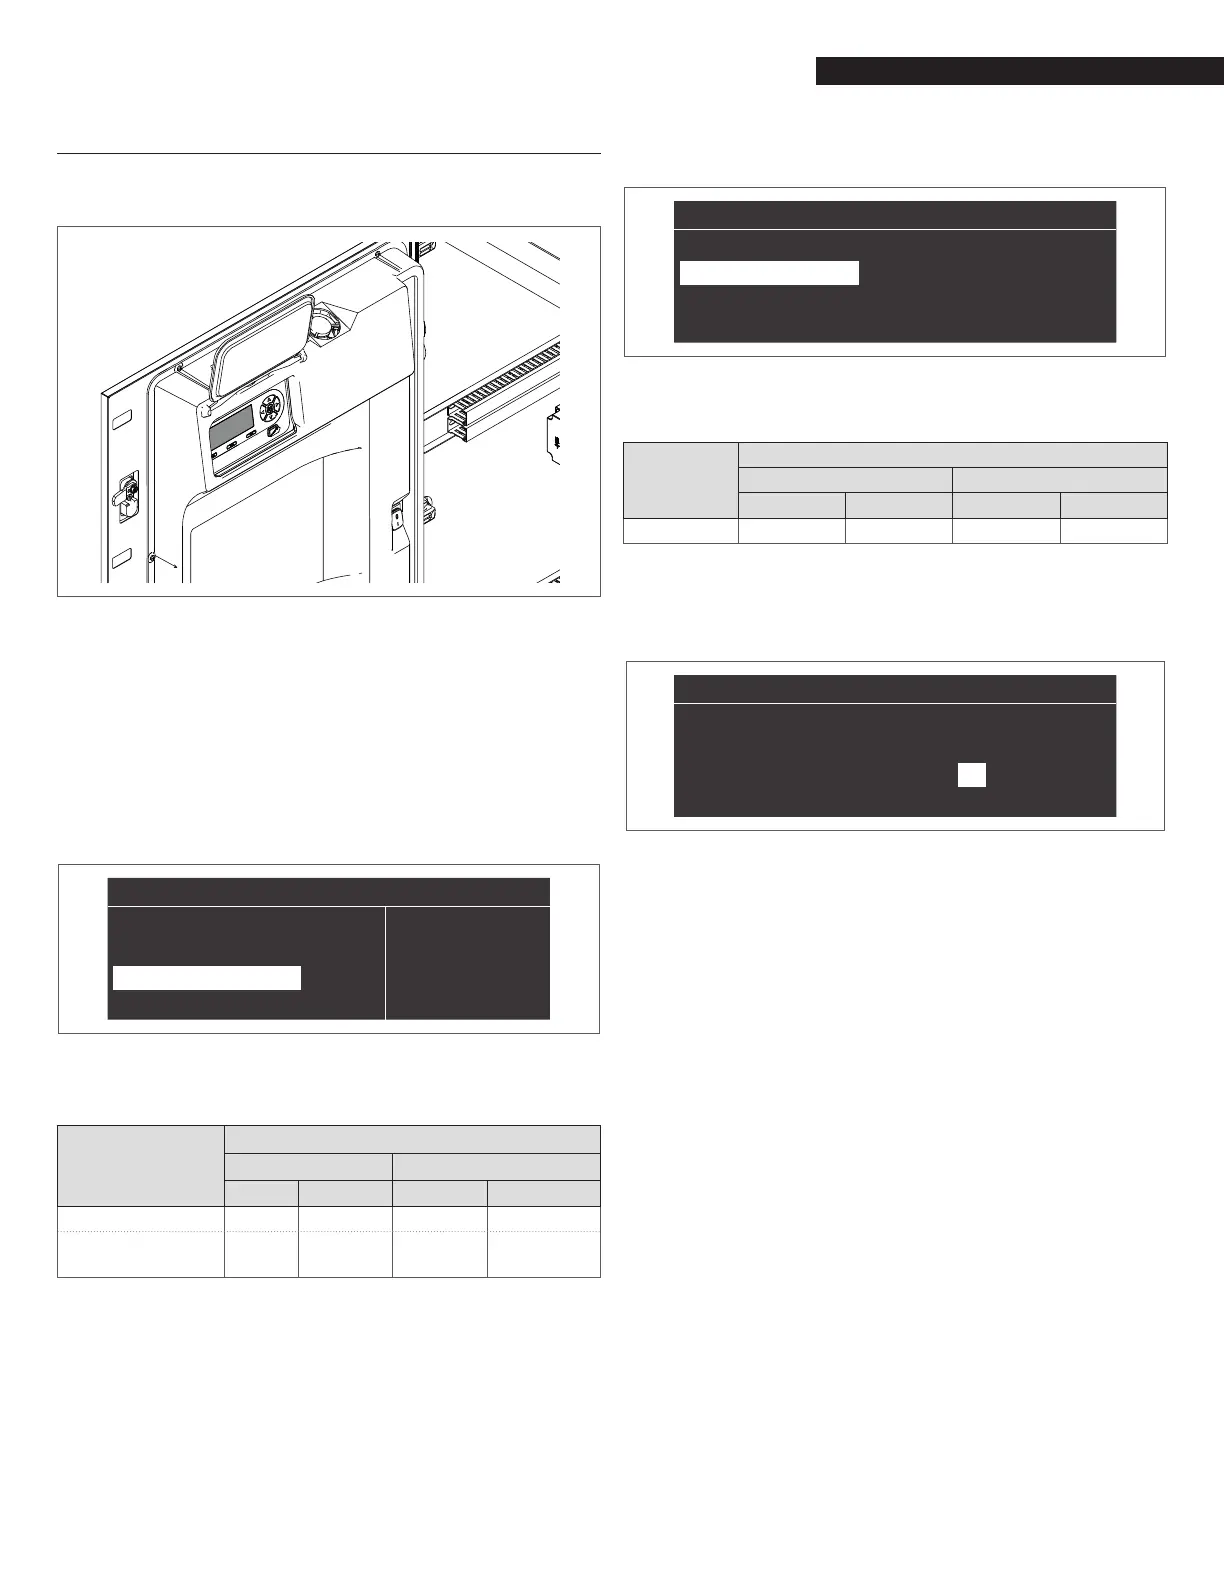
6.4 Display board replacement
9
System congurations must be performed only by the Technical
Assistance Service or by personnel authorized by
R.
When replacing the front control panel, an initial screen with the
logo is displayed on the next reboot
R.
The system performs a consistency check between the
conguration data saved on the motherboard and those saved in
the user interface; therefore, when replacing the control interface,
the system can detect an inconsistency between the saved data.
Set the Par. 97 and the Par. 98.
Proceed as follows:
− On the home screen of the control panel, press the ● key
− Select "Settings" with the ▲ / ▼ keys and press the ● key
− Select "Appliance conguration" with the ▲ / ▼ keys and
press the ● key
“Settings”
“
General Settings”
“Boiler Settings”
“Appliance Configuration”
− Enter the password
− Select "(97) IO Conguration" and press the ● button
− With the ▲ / ▼ keys change the value following what is in
the following table and press the ● key:
Model
Par. 97
Managing Dependent
NG LPG NG LPG
AR 800 22 22 21 21
AR 800
WITH AIR DAMPER
22 (*) 22 (*)
Not
Applicable
Not
Applicable
9
(*) Par. 126 = 10 (DEFAULT 6)
− With the ▲ / ▼ keys change the value following what is in
the following table and press the ● key:
Model
Par. 98
Managing Dependent
NG LPG NG LPG
AR 800 80 81 80 81
− Press the ▼ key, select "Cong. Conrmed" and press the
● key
− With the ▲ / ▼ keys change the value to "Yes" and press
the ● key
“
”
“
(97) IO Configuration
”
22
“
(98) Appliance Settings
”
80
“
Configuration Confirmed
” “
Yes
”
At this point the systems starts an application update process.
Once this is nished, the menu "Settings" appears on the menu.
− Press ◄ until you return to the home screen
An error message is displayed for a few seconds and then the
display returns to its normal state.
− Press the ▼ key, select "(98) Appliance Settings" and press
the ● key
“
”
“
(97) IO Configuration
”
22
“
(98) Appliance Settings
”
80
“
Configuration Confirmed
” “
No
”