RIGOL Chapter 1 Disassembly and Assembly
DG1000 Service Guide
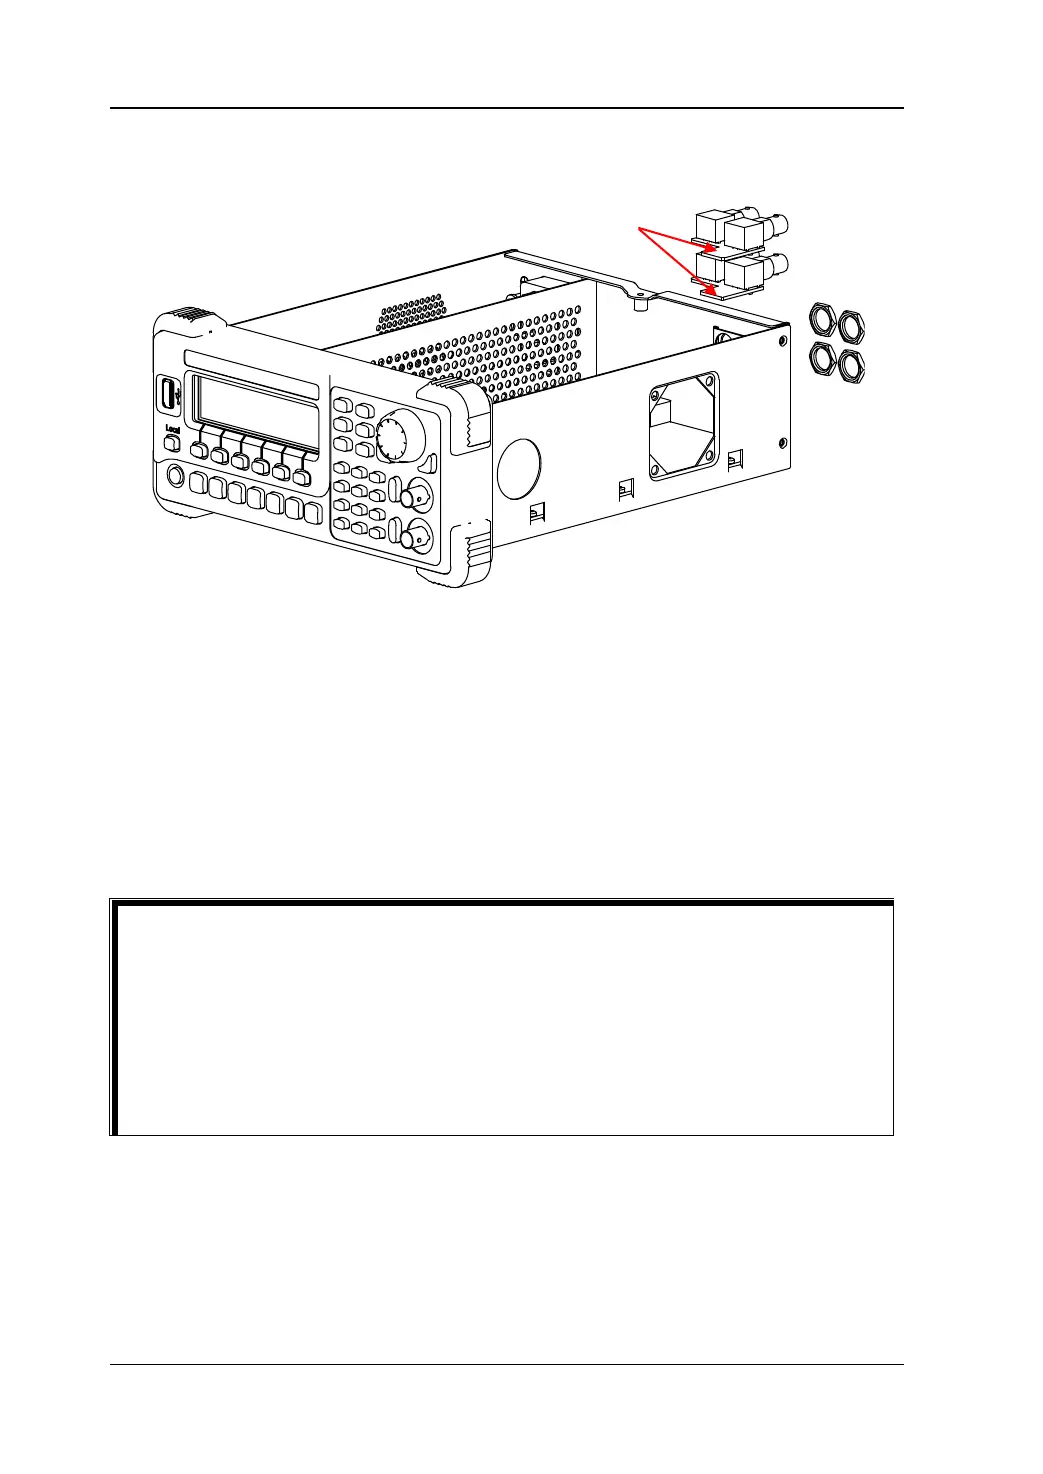
Disassemble Rear BNC Boards
Figure 1-5 Disassemble Rear BNC Boards
Part Description:
① 4 BNC nuts.
Disassembly Steps:
1. Remove 4 BNC nuts (①) using the BNC socket wrench.
2. Take out two rear BNC boards from the metal chassis and remove two 10-pin
cables that connect the main board.
There are two sets of rear BNC boards and each board has two BNC connectors on
it. When assembling, follow the bottom-up assembly procedure. First, insert the
10-pin cable of the rear BNC board into the slot of the main board; then from inside
the metal chassis, get two BNC connectors on the rear BNC board through two
holes located at the lower position of the rear BNC fixture, then fasten them to the
fixture using two BNC nuts. Perform the same assembly procedure for another set
①
 Loading...