Do you have a question about the ring Stick Up Cam Battery and is the answer not in the manual?
Download and install the Ring app from the App Store or Google Play.
Fully charge the battery using the provided orange cable and a USB power source.
Have your Wi-Fi password ready for the setup process.
Twist the battery cover counterclockwise to remove it from the Stick Up Cam.
Insert the charged battery into the bottom of the Stick Up Cam until it clicks.
Follow in-app instructions to set up your Stick Up Cam, selecting Security Cams.
Tap the Live View button in the Ring app to check the camera feed after setup.
A flashing blue light indicates software updating; do not remove the battery.
Select a suitable indoor or outdoor location for your Stick Up Cam.
Place the Stick Up Cam on a flat surface after inserting the battery.
Swivel and tilt the base to adjust the camera's downward viewing angle.
Steps for mounting the Stick Up Cam to a wall.
Unscrew the base from the Stick Up Cam using a Phillips-head screwdriver.
Screw the base back onto the Stick Up Cam with the 'UP' arrow aligned.
Slide the mounting bracket down to detach it from the base.
Mount the bracket to the wall with screws, ensuring the 'UP' arrow points upward.
Guide the base grooves onto the bracket hooks and slide the Stick Up Cam down.
| Type | IP security camera |
|---|---|
| Remote viewing | Yes |
| Placement supported | Indoor & outdoor |
| Connectivity technology | Wireless |
| Ethernet LAN | - |
| Wi-Fi standards | 802.11b, 802.11g, Wi-Fi 4 (802.11n) |
| Built-in HDD | No |
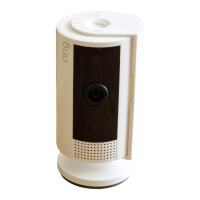
| Form factor | Box |
| Mounting type | Ceiling/Wall/Desk |
| Product color | White |
| Minimum illumination | - lx |
| Power source type | Battery |
| Operating temperature (T-T) | -20.5 - 48.5 °C |
| Total megapixels | - MP |
| Maximum resolution | - pixels |
| Supported video modes | 1080p |
| Cables included | Micro-USB |
| Number of cameras | 1 |
| Audio system | 2-way |
| Mobile operating systems supported | Android, iOS |
| Width | 60 mm |
|---|---|
| Height | 97 mm |